

Gunforce II (Arcade) Tips
Gunforce II really clicked with me, so I decided to write a brief guide for it. I’m not sure if this guide will be useful, since players can make infinite attempts and do not lose progress if they die. On the other hand, some of the things I learned could be useful for anyone trying to 1CC Gunforce II or for those who want the game to be a bit easier. Either way, the following tips should help with general gameplay as well as the bosses. As always, thanks for using this guide and let me know if there’s anything that needs to be fixed or improved.
~by tankMage (September 2026)
Contents
Here are a few tricks I’ve learned over successive play throughs. Gunforce II is a fairly chaotic game game and I had difficulty parsing what all of the items do, so some of my observations may be a bit inaccurate.
a. Jump and Shoot
Staying mobile is a good way to survive. Jumping makes you a more difficult target to hit, plus it’s a lot easier to jump over enemy bullets than it is to duck them. This does not work in every stage, particularly in places where you are getting attacked from all sides, so use your discretion when choosing tactics.
b. Conserve Ammo
Max and Lei (the Player 1 and 2 heroes respectively) start with two basic assault rifles with unlimited ammo. Power ups can often be found in destroyable objects like crates and barrels. These include special weapons that deal extra damage. Do not shoot recklessly if you grab an extra weapon because they have a limited number of shots.
Your hero will drop his or her special weapon upon death and it is possible to pick it up again. Grabbing a dropped weapon power up after respawning will refill your ammo. It is possible to die “strategically” in order to collect more ammo for your weapon. This technique can be particularly useful when fighting a boss.
c. Most Large Projectiles can be Shot Down
Some foes launch missiles or drop bombs which can be destroyed by shooting them. Intercepting these large projectiles is often a good way to stay alive. However, many of the enemy’s weapons cannot be destroyed. These include small bullets and all types of lasers.
d. Use Terrain to Your Advantage
Positioning is very important. Many enemies have blind spots that you can take advantage of and you can often climb up to higher platforms by jumping while holding up. Your character can even climb ropes and ladders as well as hang from horizontal ropes. Changing elevation is often a good way to get out of dangerous situations.
e. Ride Vehicles
Gunforce II features a surprising number of vehicles players can pilot. Vehicles include anything from a gondola with a turret mounted on it to tanks. Most vehicles will absorb damage for the player until they are destroyed, however some offer zero protection and you will lose a life if you get hit while mounted on them.
A vehicle that can be piloted by the player has a black or white flag on it in most cases. Black flagged vehicles are enemy controlled, so the player must defeat the pilot before attempting to control the vehicle. Shoot directly at the rider to obtain the vehicle quickly without damaging it much.*
*I’m not sure if shooting at the pilot always works.
f. Rescue the Girls and Collect Medals
Gunforce II awards players with an extra life every 100,000 points. Look out for items that increase your score. The most notable of these are Medals dropped by bad guys and female hostages scattered around stages.
Collecting these items is a good way to earn lives if you are trying to complete the game on a single credit. However, Hostages and Medals are frequently placed in dangerous locations, so take care when going after them.
Note: I could be wrong about getting a life every 100,000 points. I’ll try to test the game more to verify my theory, but let me know if I missed something or if I merely imagined getting an extra life!
g. You May Want to Avoid the Boost SP Item
There is an item called Boost SP that occasionally appears in some stages. Getting it will drastically increase the power of your current weapon, but it comes at a price: Your ammo will rapidly diminish over time even if you do not fire your weapon. With this in mind, it’s often better to simply rely on your weapon in its normal state. The only times when it’s really beneficial to get the Boost SP are when you only have the default rifles, when you find it in an area where you have a lot of trouble surviving, and just before fighting a boss.
h. Know Your Weapons
Earlier, I talked about conserving ammo for the special weapons without really describing them. Generally, any special weapon is better than the regular guns thanks to the huge amounts of damage they inflict. That said, you may occasionally have the opportunity to choose from multiple weapons. It’s beneficial to know what weapon is best in the few cases where you have a choice. You will also find Power Ups that increase the range and damage of your current weapon as well as Bullets that give you extra ammo.
Rifles – You start with a pair of semi-automatic rifles that fire weak shots. They have infinite ammo, though I think collecting Power Up icons increases their damage while giving them limited ammo. Even though they are weak, the rifles have long range and the player will always default to them when they run out of special ammo, so it’s wise to learn how to use them well.
Flame – Grabbing a Flame icon grants the player a flamethrower. Like all special weapons, the flamer does a ton of damage. Unfortunately, its reach is really low until you find a Power Up or two.
Laser – The Laser is fairly powerful and has slightly better range than the flamethrower. At higher power levels it becomes a very deadly weapon.
Spread – This rocket flies a short distance before exploding in a devastating burst. As the strongest weapon, Spread is highly effective even at its lowest power level. At high power it can destroy bosses in seconds. Sadly, it’s also the least common of the special weapons.
Here’s some info on all of the bosses. None of them have official names, so I simply refer to them as “Target 1, 2, 3, etc.” because that’s what the game calls them.
a. Target 1
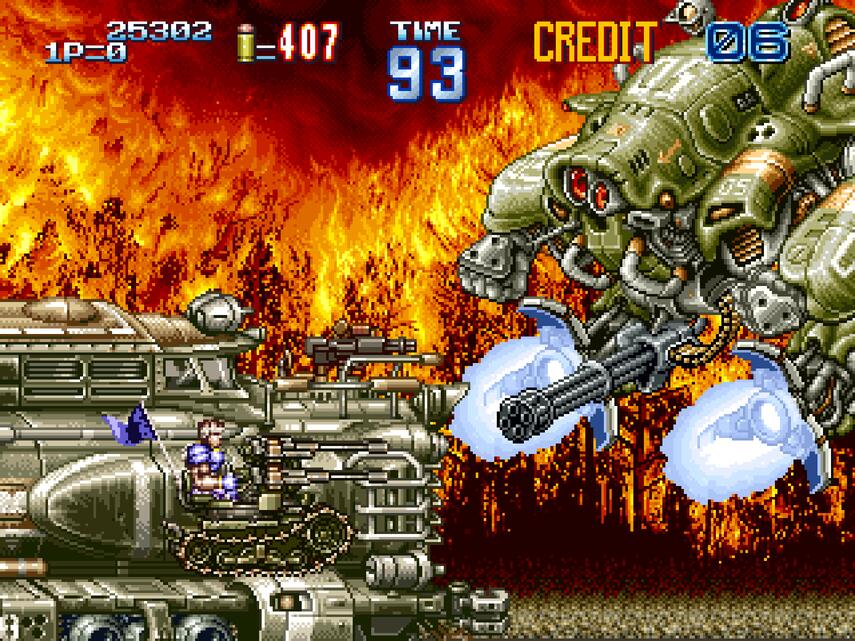
The first boss stays on the right side of the screen and launches its attacks from afar, which gives you plenty of time to react if you keep your distance. You should start the battle in a small anti-aircraft vehicle found near the back of the train engine. Stay as far to the left as possible and fire at the boss as much as possible. The boss has a large vulcan cannon that it fires downward at a forty-five degree angle. The vulcan should miss you if you stay far back enough.
At some point, the mech boss will release a cluster of bouncing bombs that will probably destroy your vehicle. Shooting the bombs will destroy them, unfortunately there are so many that enough of them will hit your vehicle to blow it up. Jump to the top of the engine and fire away at the upper half of the mech. Watch out if it extends its right arm, because it will emit long range flames that can hit you. If this happens, jump down to the lower part of the engine, then hop back up when it retracts its arm. Its left arm fires semi-guided missiles that can be shot down or hopped over. The center portion of the mech opens up to release more barrel bombs. Jump over these as they bounce towards you or shoot them.
Damage the mech enough and its armor will blow away, revealing its pilot, who will promptly throw a missile at you. Jump over the missile, which should be easy to avoid if you are standing in the upper left corner, though you may have to duck if the missile comes in high. The pilot will alternate between throwing missiles and firing the vulcan, which will eat away at the train engine. Focus your fire on him to finish the fight quickly.
This battle can go very fast if you have the Flame weapon. You will have to get pretty close to the mech to damage it with the flamer, unless it’s been upgraded, so time your attacks for when you have an opening. If you manage to keep the flamethrower until the mech’s cockpit is exposed, you can end the fight in a few seconds of concentrated fire.
b. Target 2
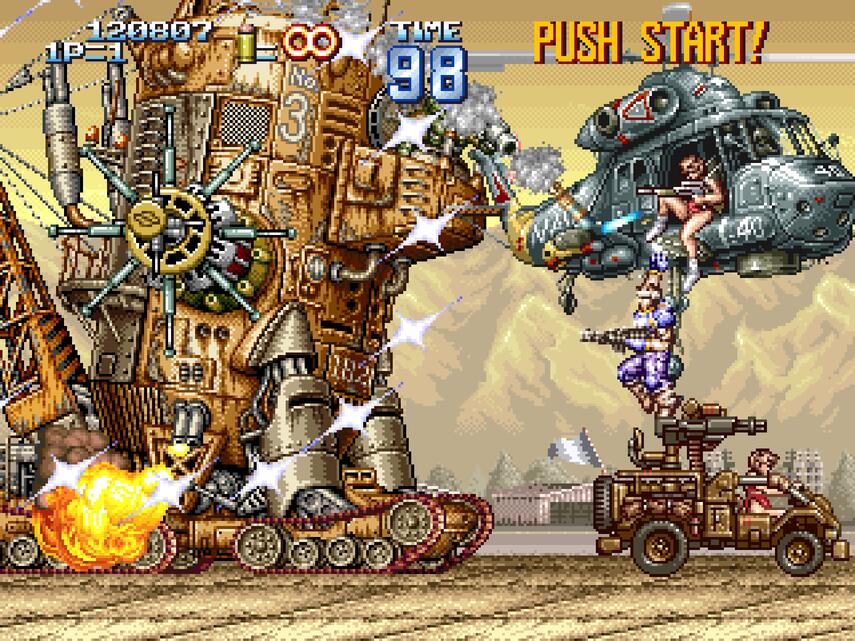
This tank can be really difficult if you do not know how to handle it. You will be prompted to ride one of two vehicles at the start of the fight. The trick is to basically ignore the jeep and helicopter and stay on ground instead. Walk under the boss when it rolls in from the left and shoot upward to damage it. Adjust your position a bit to compensate for the scrolling screen. If you get pushed too far left, you will probably get killed by the small flame thrower attached to the center of the tank. Watch out for homing missiles fired by a guy near the top of the tank. A few shots can destroy a missile or you can just stay to the left to get out of its way.
Every so often, the tank will fire a huge ring laser from an apparatus near its middle. The laser starts out as a small circle of stars that expand outwards into a blue ring while rotating. You will need to walk or jump through the gap in the ring. Generally, it’s best to move to the right when the stars appear and hop through the gap in the ring when it gets low to the ground. However, the timing of the ring’s motion can vary, so you may need to use the hook on the helicopter for a boost. Walk left after going through the gap and hop through it again to get back to the tank. Duck briefly to avoid getting nailed by the laser.
Once clear of the ring, go back under the tank and shoot it. Most of the boss’s weapons will miss you and you’ll destroy it fairly quickly since it was designed to be fought in a vehicle where the player can only fire one gun at a time.
c. Target 3
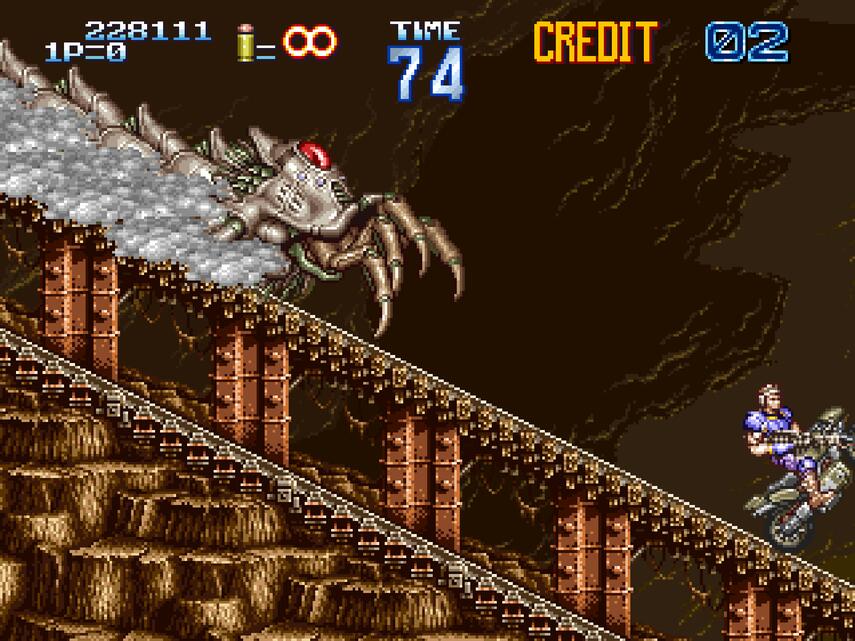
This giant mechanical worm is not very hard. Try to stay on the lower right side of the screen so it can’t smash or grab you. It will release smaller robots that emit vertical beams every few seconds. Remain in the lower right and shoot the bot in that section to keep it from shooting its beam.
The only tricky part of this encounter is aiming, since you need to keep away from the worm while controlling the motorcycle. Adjusting your aim while jumping is probably the best way to deal with this issue. Keep blasting away at the worm and you’ll make short work of it.
d. Target 4
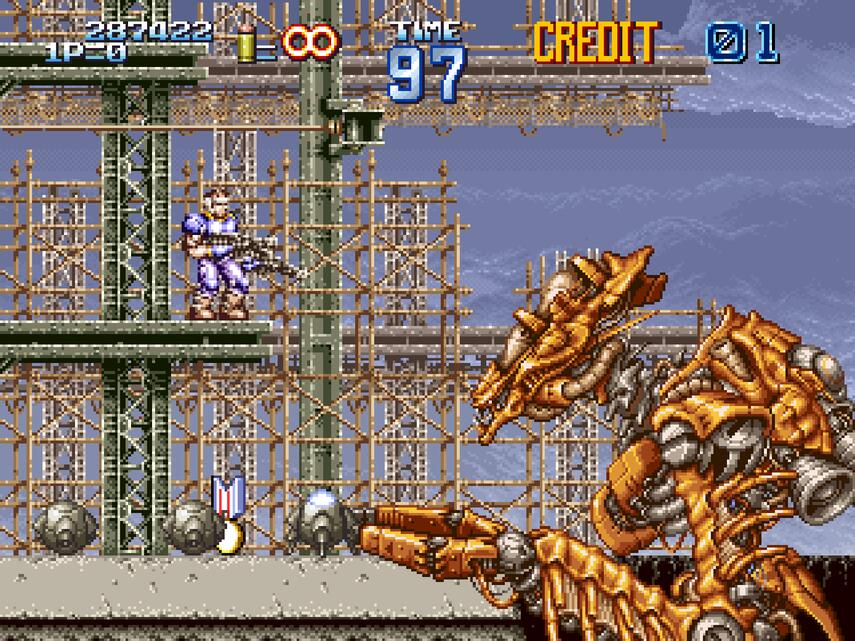
Get ready for what is possibly the toughest boss in Gunforce II. Your opponent is a giant robot that spits balls that roll a bit before firing blue lasers upwards. It will also make a screeching sound, then attempt to grab your character with its arm.
I find it best to stand on the middle platform and shoot at the boss. Walk a little left or right when the balls stop rolling to avoid their lasers. Simply jump to dodge its claw grab. Remember to listen for the screech, which serves as a warning that the mech will try to grab you.
Damage the mech enough and it will turn red, then move closer to the player. The robot will begin to use its claw more frequently as well as open its mouth to shoot lightning. The lightning has a long tell and is easy to dodge by dropping to the lowest platform. You can then grab onto the middle and highest platform to avoid the inevitable claw attack follow up.
This fight can go pretty quickly if you managed to get the flamethrower (or any weapon) that drops from the crates during the elevator ride up to the boss fight. Of course, you’ll have to get close to use the flamer or laser, but the danger is well worth the massive damage these weapons put out.
f. Target 5
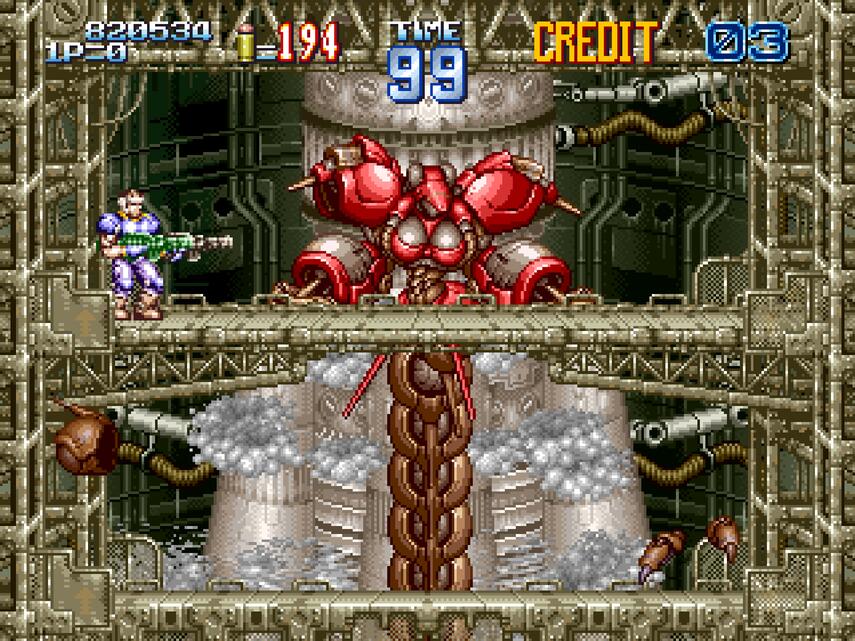
Target 5 is the final boss. It really helps to have the Spread weapon when you get to this fight, because it can obliterate the last boss in a few seconds. Luckily, several Spread power ups drop in the hallway before the boss, so it’s likely you will have it as long as you are careful with your ammo.
This snake-like machine releases small aliens that climb up the left and right walls. Ignore the small creatures because they serve as a distraction. The real threat is the boss’s slam and flame attacks. You will know a slam is coming when the boss raises its arms. It will try to crash into where your hero is standing, so move out of the way. Do not stand on the far left or right side of the room or you will get hit by the flames that spout out of the floor on the far sides of the chamber.
It is much harder to get out of the way of the flame attack. The boss will go to the center of the room and raise its visor, revealing a skull. You’ll have about a second before fire starts spewing from its mouth. The fire sweeps the room in a circular pattern and is the most difficult thing to dodge in the game. To escape, stay on the lower platform and watch what direction the fire is going. You will have to quickly climb up the platforms on the right or left, then jump over the boss to avoid the fire.
Finally, the boss will sometimes climb up the missile in the background, leave the screen, then slam into the ground where you are standing. Moving out of the way by walking is the best way to deal with this move, so watch the top of the screen carefully when she crawls up the missile.
Remain on the lowest level of the boss room, it has the most space to maneuver in. Try to hammer the boss with Spread as fast as possible and it should become incapacitated after about twenty seconds or so. If you’re fast and lucky, you may be able to defeat it before it can do its fire attack. This fight takes much longer if you’re using the plain rifles.
Once damaged enough, the boss will lose its tail and cling to the side of the room. Keep blasting it until it moves to the middle of the room. At this point it’s pretty harmless, so just fire away and you’ll finish the first loop!
Here’s the only written guide I was able to find for Gunforce II.
https://gamefaqs.gamespot.com/arcade/567727-gun-force-ii/faqs/18884
Thanks for using this tips guide for Gunforce II!
RetroMaggedon.com ©2026