

Diablo (PC, PS1) Guide
~by tankMage (August 2023)
About this Guide
I’ve played both the PS1 and PC versions of Diablo extensively since it came out in the late 90s, so this guide is the product of nearly 25 years of experience. Be forewarned I am very opinionated and strongly disagree with some of the advice given in other guides as well as forums, particularity when it comes to equipment. I also focus heavily on tactics and gloss over some of the more basic aspects of the game like repairing equipment and using scrolls.
Finally, I do not go into detail about quests and have left most Hellfire content out of this guide. I am not very knowledgeable when it comes to Hellfire, but I’ll create a separate guide for it in the near future…hopefully. As far as quests go, details for them are readily available on other sites and I am willing to add a quest section if there is demand for one. Thank you for using this guide!
Contents
a. Exploration and Character Management Tips
6. Noteworthy Unique Enemies (The Butcher, King Leoric, Diablo Etc.)
7. What to Expect from Normal, Nightmare, and Hell Difficulties
1. General Tips
Good habits are the key to survival in Diablo. There’s a lot to learn and the game will start punishing you early on if you make poor decisions. The lengthy section below covers most, but not all, of the things players should do if they want to succeed.
a. Exploration and Character Management Tips
Save Frequently
Diablo’s dungeons are procedurally generated, so there’s no way of knowing what kind of situations you will run into. There’s nothing worse than losing progress, because you opened a door or stepped into a passage and two bosses popped out then killed you. Take a moment to save whenever you go down a level, find good items, or defeat a powerful foe.
Restart the Game if the going gets too Tough
It can be very difficult to get all of the things you need to survive due to the random nature of Diablo. Warriors need good weapons/armor, Rogue’s need powerful bows, and Sorcerers need spell books. A lot of Gold and some luck are often required to find the stuff you need. The difficulty of the game usually spikes around Floors 5, 9, and 12, so make sure you’re ready for stronger monsters when going down a floor.
Do not be ashamed to restart the dungeon from the beginning if you find yourself struggling. A good ring, weapon, or even an extra experience level can make a huge difference. If you’re new to the game, replaying earlier floors is also a good way to learn the ropes.
Shrines: The Good, The Bad, and the Ugly
Shrines can be interacted with to invoke various effects. Some of them are good and may fill your inventory with gold or give you free potions, while others are more of a trade off. In the Labyrinth and Catacombs, most shrines are named, allowing the player to figure out what they do. Goat Shrines and Cauldrons found later on are random.
For the most part it is best to skip shrines if you do not know what they do, especially the random Cauldrons and Goat Shrines. A shrine effect can really mess up your character by lowering spell levels or max Mana. That said, basic shrines that are clearly labeled are safe to use. I will not list all of the shrine effects for the sake of brevity, but here are the ones I think are worth activating:
| Shrine Name | Message | Effect |
| Abandoned Shrine | “The hands of men may be guided by fate.” | +2 Dexterity |
| Creepy Shrine | “Strength is bolstered by heavenly faith.” | +2 Strength |
| Divine Shrine | “Drink and be refreshed.” | Fully Restores HP and MP. Drops potions. |
| Eldritch Shrine | “Crimson and azure become as the sun.” | Turns all Mana/Healing Potions into Rejuvenation or Full Rejuvenation Potions. |
| Eerie Shrine | “Knowledge and wisdom at the cost of self.” | +2 Magic |
| Glimmering Shrine | “Mysteries are revealed in the light of reason.” | Identifies all unidentified items in the player’s inventory. |
| Mendicant’s Shrine (Hellfire) | “Give and you shall receive.” | Exchanges 50% of the gold in the player’s inventory for exp. |
| Quiet Shrine | “The essence of life flows from within.” | +2 Vitality |
| Religious Shrine | “Time cannot diminish the power of steel.” | Repairs all items in the player’s inventory. |
| Shimmering Shrine (Hellfire) | “Spiritual energy is restored.” | Replenishes Mana. |
| Sparkling Shrine (Hellfire) | “Some experience is gained by touch.” | Damages player with Flash, but gives 1000xDLVL Exp. |
| Stone Shrine | “The power of mana refocused renews.” | Recharges staves. |
| Thaumaturgic Shrine | “What was once open now is closed.” | Closes and restocks all chest on that floor. |
| Town Shrine (Hellfire) | “There’s no place like home.” | Casts Town Portal. |
As I said before these are the shrines I feel are best to use. The Mysterious Shrine, which basically allows you to reallocate some sat points is fine to use despite the fact that I left it out. It is unwise to activate Sacred, Ornate, and Fascinating Shrines as they reduce max MP by 10%, which will basically permanently ruin a character. This is also why Goat Shrines and Cauldrons should be avoided unless you are willing to save before hand and reload. Finally, I recommend avoiding the Enchanted Shrine, because it weakens one spell by a level and raises the rest by a level. While this seems very helpful, it is believed Mana Shield is bugged and becomes weaker as the player levels up, so getting Mana Shield past level 1 is generally a bad thing.
Always Carry Healing/Mana Potions and a Few Town Portal Scrolls
Going into the dungeon empty handed is inadvisable unless you are tying to complete an Iron Man style challenge. Warriors should carry Healing Potions and anyone that uses Mana Shield should have Mana Potions as well as a few emergency Healing Potions. Town Portal is a really useful escape item. It’s also good for saving time since climbing back up to town takes a while depending on how close you are to an exit.
Look for Rings/Amulets with All Stats Up and Spell Resistance Enchantments
Every character benefits from the All Stats Up Enchantment (IE “of the Sky” “of the Moon” “of the Zodiac” etc.) and should make sure all three Ring/Amulet spaces are occupied by an item with one of these enchantments. It is also wise to look for Magic/Fire/Lighting Resistance on Rings/Amulets, because AC and Damage increasing enchantments are better to have on Weapons and Armor.
Save and Reload to Restock the Shops (PS1 Only)
It is not at all likely that you will get everything you need from monster drops, so you’ll have to shop..a lot. Griswold and Wirt stock random items that are spawned every time the player loads the game. Saving, then reloading is a good way to find items you need.
Don’t Use Elixirs Until You are a High Level
Elixirs (which boost certain stats permanently) can be really useful and I recommend using the Spectral Elixir from the mushroom quest in Floor 9 of the Caves as well as those dropped by monsters. They also spawn in Pepin and Adria’s Shops once you reach about level 30, but I advise players against buying them until you’re level 40 or so, because they cost 5000 Gold a pop. Save your money for gear. The most you will get out of sucking down Elixirs at low levels is some extra HP/MP, because damage is dependent on the player’s level as well as Str or Dex.
Do Not Rely on Unique Items (PS1 Version Only)
Unique weapons, rings, and armor offer a variety of special properties which can make players quite powerful. While these items remain in your inventory when starting a new game on the PC version of Diablo, they do not carry over to new games on the PlayStation release. Consequently, starting a new game with a character that had several unique items equipped will leave the player in a situation where he or she has to find suitable replacements for their lost gear. Fortunately, most unique items are out gunned by high level magic items aside from a few exceptions, so PS1 players can get by without ever using a unique. That said, Unique equipment is worth wearing on a temporary basis in the PS1 release, just don’t sell your old stuff.
Clear Every Floor
Try to fully explore every level of the dungeon to get as much exp and money as possible. It also helps to do quests, especially on Normal difficulty. Many of the plain weapons and armors dropped in the dungeon can sell for a decent amount of money, so do not be shy about selling them along with magical gear. Every little bit helps.
DO NOT USE WEAPONS WITH SPELL RESISTANCE AND OTHER NON-OFFENSIVE STATS!!
Ok, I know it’s obnoxious to write in all caps, but it drives me crazy to read about or see people using weapons with Magic Resistance, Vitality, and other enchantments that do not add to damage. The only time you should use a weapon that does not have damage, speed, or relevant stat enchantments is if you have nothing better. A Warrior’s Great Axe is always better than a Great Axe of Vim even if you need HP, because the idea is to kill monsters before they can really hurt you. I’m also not a fan of taking Spell Resistance on armor and Fast Hit Recovery armor, because high AC is almost always better.
Fight Strategically
While I go into detail about combat for each class in Sections 2, 3, and 4, it’s worth mentioning that every class benefits from a few basic tactics. Here are few few helpful rules of thumb:
-It’s always smart to move forward cautiously and fall back when you see enemies to keep yourself from being swarmed.
-Spells like Telekinesis, Phasing, Teleport, and Fire Wall have all sorts of tactical uses.
-Players in Co-op mode should work together when battling monsters and avoid friendly fire.
-Doors are great defensive barriers as they can be used as choke points and some monsters cannot open them. Just keep in mind corpses will block doors, making it impossible to close them.
-Projectiles can pass through bars found in the Labyrinth and wood barriers in the Caves.
-Try to avoid enemy attacks when possible.
Watch Out for Unique Monsters and their Minions
One of the biggest threats in this game are unique monsters, which are kind of like bosses. Uniques are stronger than their regular variants and are often accompanied by a pack of creatures. They are almost always based on standard enemies, but their behavior and Resistances can vary. For example, Acid Beast type uniques will not close with the player to engage them in melee, instead they hang back and constantly spit acid.
Try to spot uniques from afar and find a safe place to fight them. It is also a good idea to set up a town portal nearby so you can escape if necessary. Despite being hard to kill, uniques are worth the effort as they always drop magic items.
Be Careful at Floor Entrances
The entrance to a dungeon floor is almost always the most dangerous place on that floor, because there is no safe zone to which the player can retreat without going back up a floor. Entrances become particularly dangerous in Hell and the Caves where unique monster squads can spawn near the steps. Consider casting Town Portal so you have a means of escape upon entering a floor. It is also smart to save. Though rare, scrolls of Infravision can reveal hidden threats behind walls.
Black Death HP Bug (PC Only)
The infamous Black Death bug refers to a type of Zombie that appears in the later levels of the Labyrinth and sometimes the Catacombs. Getting hit by these Zombies will reduce your max HP by 1 point for every blow they land. Use magic or bows on these creatures. Fortunately Black Deaths are slow and easy to spot.
It is also worth noting that this bug does not exist on the PlayStation version of the game. It may also have been fixed in the GOG Release and I remember reading that it was patched out in Hellfire, but I may be wrong. Regardless, it’s a good idea to save and check your HP before fighting a Black Death, then reload if the bug affects your character.
Use Mana Shield
While almost pointless for the Warrior, Mana Shield is amazing for the Sorcerer and Rogue. I cuts damage by 33% and transfers it to MP. This essentially doubles the Rogue’s life pool and allows the Sorcerer to rely on his naturally high MP to stay alive. It also makes it harder for monsters to stun the player since it cuts damage by a third. As an added bonus, it blunts the damage of enemy spells as well.
2. Warrior Tips
The Warrior is a master of close quarters combat and is well suited to his job. While he is bad at casting spells, his ability to deal damage in melee combat is unparalleled thanks to a hidden critical hit bonus, which gives him a chance to inflict double damage based on his level. This bonus is equal to a 1% chance per level, so a level 25 Warrior has a 1 in 4 chance of hitting an enemy for 200% damage.
Warriors are also strong enough to equip heavy weapons and armor without having to rely on magical bonuses as long as the player invests in the Strength stat. A large HP pool will keep this class on its feet in situations that would crush a Rogue or Sorcerer. All this comes at a cost and the Warrior is very bad at magic. Luckily, he is decent with a bow and can use one in situations that require ranged attacks.
The Warrior starts with the Repair Skill, which is easily the worst specialty of the three classes. The Repair Skill allows the Warrior to fix his weapon and armor, but reduces the maximum durability of the item it was used to repair. Several uses of the Repair Skill can reduce the max durability of sword from 45 to 5, so be careful when using it. Despite its disadvantage, using the Warrior’s Repair Skill at low levels to fix up equipment that you won’t wear for long is a good way to save money.
Warriors are best suited to melee weapons and should be given gear that helps them survive in close quarters. Both one handed and two handed weapons are deadly in the hands of this class, but these choices have an impact on how well it performs in certain situations. Here are the most important stats for a Warrior and why they matter:
Armor Class (AC) – Those playing a Warrior will want powerful armor that boosts AC as much as possible, because this class will have to get in close to slay monsters. Wearing a helmet, body armor, and shield (if using a one handed weapon) with a bonus to Armor Class (IE Awesome Platemail, Glorious Leather Armor) is the main way a Warrior can defend himself from melee attacks as well as arrows. Warriors that use a shield will have an easy time maintaining a high AC score, but it is also necessary, since they will get locked into blocking and will have difficulty attacking if their AC is too low. About 225 to 250 AC is sufficient for Hell difficulty. On Normal 90-100 AC is decent and 160-190 is fairly good for Nightmare. Players using axes or twohanded swords can get away with less AC as long as they can kill melee enemies quickly and avoided being surrounded.
To Hit% – Warriors have the lowest Dexterity cap out of all the classes. This makes hitting monsters difficult, which is a real problem when you rely on a melee weapon to win battles. Look for weapons with combined Damage/To Hit % bonuses like “Soldier’s, Fine, and King’s”. Amulets and Rings with prefix bonuses like Silver and Meteoric are also helpful. A To Hit% rate of 90% is decent for Normal Difficulty. 120% to hit is good for Nightmare and 150% will be enough to hit things reliably in Hell difficulty. (Note: Add about 30 points to the suggested To Hit% if playing on PC)
HP (Hit Points) – With a nice +2 bonus to HP for every level and point put into Vitality, Warriors have a lot of health. A player using this class can never have too much HP and armors that have HP bonus suffixes like “of the Wolf” or “of the Whale” are vital. Players should try to have at least 200 HP by the end of Normal, 300 HP near the end of Nightmare, and 400 HP at the end of Hell.
Fire/Lightning/Magic Resistance – Warriors have to wade into battle, often while being hit from a distance with spells, so it is important to have decent Spell Resistances. About 40%-60% resistance to all three magic types is enough to survive very comfortably if your HP is high (400+ in Hell), but Max (75%) is best. Try to get rings and amulets with the Resist All bonus effect (IE Jade Ring, Obsidian Amulet) since it is important to maintain high AC from your body armor, shield, and helmet. If you are forced to choose a resistance type due to equipment limitations, be sure to wear Lightning Res in the Caves and Fire/Magic Res in Hell.
Damage – Oddly, it is not important to have super high damage as a Warrior, though it does help. This is mostly due to the fact that the class has a critical hit bonus that becomes noticeable at around level 10.
Magic/Mana – Magic and Mana are not very important to the Warrior. No matter what the player does, a Warrior will always have low Mana compared to the Rogue let alone the Sorcerer. A set of Rings/Amulet with the All Stats Up bonus is enough to ensure that a Warrior can cast a few basic utility spells like Town Portal, Telekinesis, and Stone Curse. Players worried about the Warrior’s Mana pool can always look for rings with a Mana bonus like “Serpent’s Amulet” given they have their Resistances covered.
Example Warrior Equipment Setup
Here’s an idea of what a Warrior’s endgame equipment would look like. Keep in mind not all of the best weapons and armors are actually available in vanilla Diablo, so do not expect to get a Godly Full Platemail of the Whale without hacking the game. Secondly, lower level players should strive to get equipment similar to that listed below, but it will obviously be weaker enchantments and base items like Warrior’s Falchion of Speed or Glorious Hard Chainmail of the Eagle.
| Slot | Example Item | Bonuses |
| Weapon* | King’s Bastard Sword of Slaughter or King’s Great Axe of Slaughter | Bonuses: To Hit% up, Damage% up, Flat Damage Bonus |
| Helmet | Godly Great Helm of the Whale | AC% up, HP Up |
| Body Armor | Awesome Field Plate of the Lion | AC% up, HP Up |
| Shield (optional) | Awesome Tower Shield of the Lion | AC% up, HP Up |
| Rings** | Obsidian Ring of the Zodiac | %Resist All, All Stats Up |
| Amulet** | Gold Amulet of the Zodiac | To Hit% Up, All Stats Up |
*Players have some leeway here, bonuses to flat damage like Gore and Slaughter are good. All stat bonuses like “of the Heavens” are also nice. Warriors can benefit from + Strength bonuses like “of Giants” as well. Attack Speed Up is also nice as is “of Blood” which converts damage to life.
**Rings and Amulets are mostly interchangeable, just be sure to have a combination that has two items with the Resist All effect and one with To Hit% Up.
Two Handed Weapons vs. One handed Weapons
Warriors are competent with swords, blunt weapons, and axes. Many of these weapons have both one and two handed variants. Players trade off between offense and defense based on what type of weapon they use. For example, an ax can inflict massive damage, but it prevents the player from using a shield. On the other hand, a one handed sword or mace does a lot less damage than an ax, but the player will also get a hefty defense bonus from a shield.
For the most part, a one handed weapon accompanied by a shield is the safe bet since it provides player with an extra layer of defense in the form of blocking. That said, axes make great side arms and can destroy monsters in a few hits once the player is a high enough level to really leverage the Warrior’s critical hit bonus. With this in mind, it can be wise to switch to an ax at around level 25 if you manage to find an ax that does enough damage to one hit KO most bad guys.
The Bow Warrior
Years ago I equipped a Warrior with a bow and played through the game with him. From what I can tell, the Warrior’s critical hit ability also applies to bows, so he can do some incredible damage from afar. Unfortunately, he is not as fast as the Rogue. He needs something like a “King’s Long Battle Bow of Haste” (if such a weapon even spawns normally) to make up for his sluggish attack and poor To Hit%. Eaglehorn, Windforce, or even The Needler may also be suitable for PC players, but you will need a Ring or Amulet with + To Hit% to make up for their lack of accuracy.
Warriors will want to focus on Strength and Dexterity early on. Magic and even Vitality can be ignored until later, especially if you can find decent rings. High Strength allows the Warrior to equip heavy weapons and armor, which is essential when moving onto the Catacombs for the first time. High Dex will help the Warrior land hits with his ax, mace, or sword and improve his damage as a result. Players can spread their stat points out more once they hit about 50 Dex and 80 Str.
Use Terrain to Your Advantage!
A well prepared Warrior is nearly unbeatable in one on one combat. Use choke points like doors, narrow paths, and spaces between obstacles to break groups of enemies up in order to force them to fight you one on one. Doors are especially useful for luring archers and other ranged enemies into tight quarters where you can corner them. Take a moment to scope out the layout of every new area and make a plan of action.
When in Doubt, Fall Back.
This goes hand in hand with the terrain tip. It is generally best to run from large groups of enemies that threaten to surround your Warrior, even if you are confident you can beat them. Fighting while surrounded will almost always result in you taking unnecessary damage, so find more defensible positions to fight from when facing large groups.
Keep Your Weapons and Armor Up to Date.
Equipment is really important to Warriors. A good blade or ax that can kill monsters in one or two hits makes all the difference. At the same time, a few points of AC or HP can make it easier to survive. Visit Griswold regularly and save your money for good gear. Don’t forget that you can force Griswold to restock his inventory by saving, then reloading the game.
Stock Up on Healing Potions!
Potions of Healing are uniquely important to Warriors. In fact, a Warrior can often stock his inventory full of Healing Potions and simply brute force his way through tough situations.
Keep Your AC High if You Use a Shield.
Shields are great for blocking both ranged and melee attacks. They also give your character an extra stat boost compared to two-handed weapons. However, they can be a detriment if your AC is low. Enemies that attack rapidly (like Storm Riders and The Butcher) can force a Warrior with a shield to block constantly if his AC is too low, because the game check AC before shield block. This can make it nearly impossible to fight back.
Try getting armor with good AC bonuses if you notice your Warrior blocking too much. Shield users will also block most spells, if they do not have any Spell Resistance. This can be good or bad depending on the situation, but it’s generally better to have at least 20% in all Resistances to prevent your Warrior from getting locked in place by barrages of Fireballs or Blood Stars.
Use the Right Weapon for the Job!
Some enemies are Resistant to certain weapon types. For example, Undead take less damage from swords, but take more damage from blunt weapons like Maces and Spiked Clubs. The reverse is true for Animal type monsters like Scavengers and Acid Beasts, which take less damage from blunt weapons, while sustaining more damage from swords. Smart Warriors always have an extra weapon on hand to use against monsters that resist their main weapon.
Useful Spells
While it may seem counterintuitive, Warriors can put a few of the spells in Diablo to good use. That said, magic is mostly a utility for this class and players should not worry about it too much.
Stone Curse – This is one of the few essential spells for the Warrior. The ability to freeze pesky archers and mages that like to flee tilts the scales in the Warrior’s favor in a big way. Stone Curse requires high magic to learn and lots of mana to cast, but a few Rings of the Zodiac make it a lot more accessible.
Telekinesis – It is easy to overlook this spell, but the ability to open doors and manipulate levers from a distance can be a life saver. For example, let’s say you are fairly certain a room is filled with enemies, you can stay back and cast Telekinesis from a distance to draw a few of the monsters out to thin out their ranks.
Firewall – Casting Fire Wall in front of your Warrior while fighting can be a really effective means of boosting damage. It’s also good to use against acid spitter bosses and archers that keep their distance.
Healing – Warriors do not have the Mana to constantly heal themselves, but this spell can be helpful if you have a few extra Mana Potions in the dungeon and want to save your Healing Potions.
Phasing/Teleport – In theory, Phasing should be a godsend as it allows players to warp out of danger, but it’s unpredictable. However, Phasing is still worth learning since it can get you out of trouble with some luck. Really high level Warriors can even put Teleport to use.
3. Rogue Tips
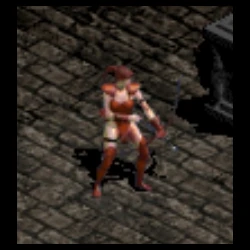
Rogues are masters of the bow who can rapidly fire arrows into groups of enemies. They have generally well rounded Stats despite being geared towards Dexterity and present something of a balance between the Warrior and Sorcerer. Do not make the mistake of assuming Rogues are jacks-of-all-trades, because they are most effective with a bow in hand. Things like magic and melee combat are secondary skills for the Rogue just as archery is a backup for the Warrior.
Good Rogues focus on damage first, since shooting enemies dead before they can bring their attacks to bear is the best survival strategy for this class. Mana Shield is a game changer for the Rogue. With Mana Shield active, the Rogue’s potential life pool is nearly doubled and incoming damage is reduced by 33%. This allows Rogue players to equip gear that raises all Stats or Dexterity for extra damage.
Damage is the name of the game when it comes to gearing a Rogue. A Rogue with a good bow will dominate the game. However, the other Stats are still important and Rogues will have to pay attention to defense to survive situations they cant just shoot their way out of.
Damage – Bows suffer from low base damage. It is especially important to pay attention to the Rogue’s lower end damage, since most bows have a minimum damage of 1. Magical bonuses that add flat damage like “Quality, Gore, and Slaughter” are really good for bows since a Long War Bow that does 1-14 damage can do 11-24 damage with a mediocre Gore bonus (+10 to Damage). Prefixes like Merciless and Massive, which add a high percentage to damage are also desirable. Really high level Rogues (level 45 and above) may find high Dexterity bonuses preferable to flat damage.
Armor Class (AC) – Rogues can generally run away from or dodge melee attacks, but are ironically vulnerable to arrows. This is due to the fact that they do not have shields and their need to stand still to shoot at enemies. Consequently, it helps to have high AC for fire fights with other archers, especially in tight spaces. It’s also helpful for the odd situation where monsters manage to corner the player. Look for Helmets and Body Armor with high AC bonuses.
Fire/Lightning/Magic Resistance – Spell Resistance is desirable, but not vital. The 33% damage reduction granted by Mana Shield takes the edge off of spells and ranged classes have an easier time avoiding magic, so Rogues can get by without spell mitigation. That said, having high Resistance can be extremely beneficial, since it allows players to basically shrug off all the Fireballs and Bloodstars enemies throw at them in the depths of the dungeon. Rings and/or Amulets that boost Spell Resistance should be a high priority.
To Hit% – Rogues have naturally high accuracy and can usually hit things without issue as long as they invest in Dexterity. However, Rogues may struggle to hit heavily armored foes on Hell difficulty, so it may be necessary to find a Ring/Amulet that increases To Hit% depending on the player’s equipment setup.
Mana/Magic – Rogues should use Mana Shield as a primary layer of defense. Consequently, having some Magic and Mana can be a big help. A Rogue should have enough Magic/Mana to cast and maintain Mana Shield given they are using the recommended All Stats Up Rings/Amulets every class should wear. The odd point into Magic also helps.
HP – Mana Shield is the Rogue’s primary means of defense. Plus, Rogue’s generally attack from a distance, so Hit Points are not super important. For the most part the Rogue’s base HP plus anything granted from All Stats Up Rings (IE Ring of the Sky) should be enough to keep players alive.
Example Equipment Setup
Below is an example of a gear set players should *ahem* aim to have by the later parts of the game on Hell difficulty. Keep in mind these are suggestions and it’s wise to experiment. Secondly, some of these weapon and armors may not even spawn in the game, so be prepared to settle for weaker versions of what is listed below. It is also worth noting that Rogues really benefit from All Stats Up and/or Dex Up gear. Increasing all Stats will give the Rogue a good mix of damage and survivability, while focusing on Dexterity massively improves damage.
| Slot | Example Item | Bonuses |
| Weapon | Merciless Long War Bow of Slaughter or Perfection | Damage% Up, Flat Damage Bonus or Dex Up |
| Helmet* | Godly Great Helm of the Heavens or Perfection | AC% Up, All Stats Up or Dex Up |
| Body Armor | Awesome Field Plate of the Heavens or Perfection | AC% up, All Stats Up or Dex Up |
| Rings** | Obsidian Ring of the Zodiac | %Resist All, All Stats Up |
| Amulet** | Dragon’s Amulet of the Zodiac | To Hit% Up, All Stats Up |
*It may be possible to get a Godly Great Helm of the Zodiac, though I think it’s unlikely.
**Rings and Amulets are basically interchangeable, so it does not matter if the bonuses appear on a ring instead of an amulet or vice versa.
Rogues are very versatile and can focus on magic or melee combat instead of the bow. However, the Rogue is not a master of melee like the Warrior and lacks the shear magical might of the Sorcerer. Consequently, playing as a magic or melee oriented Rogue is more for fun and challenge. This section briefly covers my thoughts on both variants.
Melee Rogue
This variant either uses a sword and shield or a two handed weapon like an ax to fight. Mana Shield can make this setup really tough to kill specifically when paired with a shield. Unfortunately, Rogues cannot attack as quickly with melee weapons or block as quickly with shields like the Warrior, so this build suffers against tough enemies. Melee Rogues really need to keep their AC high and will likely want to focus on gear that boosts all stats to make up for their deficiencies.
Magic Rogue
It takes a lot of Magic Up gear to get a spell casting Rogue off the ground, but they can be very competent with a little effort. Rogues recover from hits faster than the Sorcerer and have higher base HP, so they tend to be durable. They also have naturally high To Hit%, which gives them a slight accuracy advantage. For the most part it is best to go with a sword and shield setup to really boost the Magic stat and give the Rogue some extra AC. That said, a good staff can also come in handy.
Rogues find themselves in a quandary early on, because they need a good spread of stat points to equip bows and use Mana Shield, but it’s nearly impossible to achieve both goals before level 15 or so. Since Rogues are reliant on a “shoot first, ask questions later” strategy, it is best to focus on Strength and Dexterity at first. Putting 2 points into Str, 2 into Dex, and 1 into Magic should ensure that your low level Rogue can use weapons like the Hunter’s Bow ASAP as well as prepare for Mana Shield later on. Finding a decent Ring of the Sky or Moon also helps a lot.
High level Rogues can spread their Stats out a bit, but Dexterity should still be emphasized by upgrading it by 2 to 3 points each level. Vitality can be ignored until Magic and Strength are maxed out, since Mana Shield is more than enough to keep a Rogue on her feet.
Keep Your Distance!
Learning to kite melee enemies is an essential skill. Get used to loosing a few arrows, falling back, then loosing a few more. Metal bars in the Labyrinth and wood fences in the Caves are really helpful for Rogues since they can shoot through them without worrying about melee enemies.
Get a Bow with Good Minimum Damage.
Bows tend to have pretty big damage ranges compared to other weapons. A Merciless long War Bow will have a damage range of 3-42. While the high end damage is nice, it also means a lot of your shots are going to do really low damage unless your Dex/Str are really high. At low levels use bows with relatively high minium damage (IE Hunter’s Bow, Composite Bow, Short Battle Bow, Short War Bow) and be on the look out for flat damage enchantments like Slaying, Gore, and Slaughter since they can really boost minimum damage.
Save Your Money for Good Bows and Rings.
Armor is not terribly important to the Rogue until higher difficulties, because she can fight from a distance and has naturally high AC. It’s more important to have a bow that can kill things quickly and a few Rings to boost your Magic stat for Mana Shield.
Don’t Shoot Your Friends!
Rogues can accidentally shoot their allies in multiplayer, so be careful when helping your Warrior buddy and try to fire at safe angles.
Watch Out for Other Archers!
Enemy archers, especially Fire and Night Clans on Hell difficulty can pose a real threat to a Rogue. Even with Mana Shield up, a big squad of archers can punch through a Rogue’s defenses, stun-lock, then kill her. Start looking for armor with high AC on Nightmare and Hell difficulties to mitigate arrow damage and always be prepared to dodge arrows.
Trap Disarm is Actually Useful.
Most of the class skills are rather dubious in terms of their utility, but the Rogue’s Trap Disarm is really good. Trapped Doors/Boxes are highlighted and the player can use Trap Disarm to render them harmless. While trivial later in the game, traps can be dangerous at low levels, so bear in mind that you have an easy means of avoiding trap damage as a Rogue.
Useful Spells
Rogues have a strange relationship with magic. On one hand, they are competent spell casters. On the other hand, their bow is generally better at killing things than most offensive spells since it costs nothing to fire and its damage is not mitigated by Spell Resistances or Immunities. As a result, magic is more for defense than offense. That said, a well placed Firewall or a few blasts of Chain Lightning can really soften up packs of monsters.
Mana Shield – If there is one spell every Rogue should use, it’s Mana Shield. This spell will give the Rogue an extra layer of defense that basically doubles her health. It also reduces pesky bow and magic damage.
Telekinesis – This allows Rogues to open doors from afar and fire a few arrows into a room to harass the enemy.
Healing – Being able to heal in a pinch is very helpful and this spell is easy to find.
Teleport – Although difficult to learn, Rogues can make great use of Teleport by employing it in hit and run tactics. Teleporting away from enemies or behind walls to mount a new attack can make difficult situations trivial.
Firewall – While helpful for most classes, Fire Wall is great when used by a Rogue against ranged enemies. Monsters will stand in the Fire Wall, while she can focus on dodging or shooting back.
Chain Lightning – This spell is good for hitting packs of monsters or flushing out Hiddens/Illusion Weavers.
Golem – Another difficult to learn spell, the Golem is a great decoy that can keep monsters busy while the Rogue picks away at them.
4. Sorcerer Tips
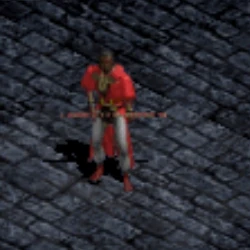
Sorcerers are something of a paradox as they are simultaneously the best and worst class in Diablo. High level Sorcerers with the right gear and spells are tough to kill, but the class really struggles if the player has bad luck finding essential spells early on. Sorcerers are also highly reliant on magic to fight, so much so that most players will have to Stone Curse monsters if they hope to kill them with melee weapons, which is sometimes necessary against unique monsters with high Spell Resistance/Immunity.
Luckily, Sorcerers are almost invincible with Mana Shield and high enough Magic. While most Warriors will top out at about 500-600 HP, a Sorcerer can have upwards of 800 MP with an extra 33% damage reduction! Even when taking into account the fact that the class has terrible Hit Recovery Speed, it’s still difficult for most monsters to cut through the Sorcerer’s Mana fast enough to kill him. That said, poor melee attack and block speed keep the Sorcerer from performing satisfactorily in melee combat and players will need to use magic to do their killing.
The Sorcerer’s Staff Recharge is fairly useful early in the game, especially if the player can find a few throw-away staves that can be used to kill enemies. Recharging a staff with the skill will decreases its max charges and ruin it, so it’s best to have Adria recharge staves you want to keep in town.
Sorcerers start with a Staff of Charged Bolt, but it is best to look for a sword and shield as the game progresses. This is due to the fact that swords have similar damage to staves, but allow the use of a shield, which in turn provides the Sorcerer with better defense as well as some more stat bonuses. Aside from that, Sorcerer’s will really want to pump their Magic stat. Here is an overview of what Sorcerers should concentrate on:
The Magic Stat is really vital to this class and Sorcerers should focus on it despite their innately high score in this stat. All of your armor should have bonuses like Sorcery, or Wizardry to really push the Magic stat to its limit. Aside from that, AC and maybe some Spell Resistance is helpful. Players that really want to go crazy with Mana can eschew some Spell Resistance and double up on +Mana Rings. Finally, I often use swords with a Magic or All Stats Up bonus, but I think the Attack Speed Up bonus may be better for the Sorcerer if you find yourself in melee combat often.
| Slot | Example Item | Bonuses |
| Weapon | King’s Bastard Sword of Haste | To Hit% Up, Damage %Up, Attack Speed Up |
| Shield | Godly Tower Shield of Wizardry | AC% Up, Magic Up |
| Helmet* | Godly Great Helm of Sorcery | AC% Up, Magic Up |
| Body Armor | Awesome Field Plate of Wizardry | AC% Up, Magic Up |
| Rings** | Obsidian Ring of the Zodiac | %Resist All, All Stats Up |
| Amulet** | Dragon’s Amulet of the Zodiac | MP Up, All Stats Up |
*It may be possible to get a Godly Great Helm of Wizardry, though I think it’s unlikely.
**Rings and Amulets are basically interchangeable, so it does not matter if the bonuses appear on a ring instead of an amulet or vice versa.
While I prefer to use a one handed weapon and shield for my Sorcerers, I have experimented with Staves quite a bit. Staves have two things going for them that make them viable. The first is their relatively decent attack speed compared to other weapon, which makes them acceptable melee weapons. The second is their ability to host bonuses like +1 to All Spell Levels and Mana Up. They can also come with spells like Apocalypse, but this spell isn’t really viable unless you have the Hellfire expansion. For the most part, it’s safe to go with a good staff if you do not like sword and shield setups.
You’re likely tired of reading “Magic should be the focus of the Sorcerer for his entire career”, so my apologies for reiterating it here. For the most part I find that putting 3 points into the Magic stat every level up is sufficient. Strength should get a point every level so the player can equip weapons and armor. Dexterity should also get a point to increase his chances of hitting monsters with spells. Vitality can be ignored until everything else is maxed out since it only gives the player a pathetic 1 HP per Vit point.
Watch Out for Traps!
Exploding barrels, trapped chests, and trapped doors can be a death sentence for low level Sorcerers that do not know Mana Shield. Either avoid hitting barrels altogether or make sure your HP is full when striking them. Be ready to move out of the way of a Fire Bolt or arrow when opening boxes/doors. Let one of your friends open chests for you in multiplayer.
Poor Man’s Mana Shield.
Mana Shield is an expensive and sometimes difficult to acquire early on. With his horrendously low HP, the Sorcerer is an extremely soft target without Mana Shield. Enemies like The Butcher can easily stun-lock and kill a low level Sorcerer in a few hits. The good news is Adria sells Mana Shield Scrolls more often than she does the book and they are only a few hundred Gold. Keep a Scroll of Mana Shield on hand for emergencies even if it’s a strain your budget. You can also use a Staff of Mana Shield and recharge it with the Sorcerer’s skill.
Hit and Run.
Sorcerers need to kite enemies by firing off a few spells then backing off before the baddies can get them in single player and even multiplayer. Get used to moving around and try to separate monster packs by luring them out of hiding.
Read, Read, Read.
Spell books are precious to the Sorcerer and you should try to get your favorite spells to high levels. Save most of your money for books early on.
Start a New Game if You get Stuck.
Experienced players should be able to overcome any situation as a Sorcerer, but sometimes the game just doesn’t provide enough books to get this class off the ground. This goes doubly for new players. If you go through the Labyrinth and find only a couple of books or get to a point where enemies are too tough, consider starting a new game. At the very least you’ll earn some extra Gold and it’s likely you will find a few spell books on you second trip.
Learn Monster Resistances and Immunities.
Monsters that resist or are immune to various spell effects are a real pain in the neck for the Sorcerer since he has to rely on magic to win battles. Try to memorize what spells work best on each type of enemy. The game will also display the Resistances and Immunities of common monsters if you kill enough of each type.
Listen for Damage.
Monsters often screech or grunt when damaged and sometimes this is the only indicator that a spell is working, since spells like Lightning almost never stagger enemies. This is especially important for unique monsters who are likely to have immunity to certain types of magic.
When in Doubt, Cast Stone Curse.
Stone Curse is almost as essential as Mana Shield if you want to beat certain enemies. Some rare monsters are immune to all magic damage (Fire, Lightning, and Magic) and have to be killed with physical attacks. In such cases, it’s best to clear out any minions that may accompany the triple immune, then Stone Curse it and start attacking. This is also a good strategy for enemies that have really high resistance and HP.
Take Care when Casting Spells in Multiplayer.
Many spells can hit friendly targets, so try to aim them away from friends. Chain Lightning, Fireball, Charged Bolt, Flash, and Firewall can be a real danger to nearby allies, so be especially cautious with these spells.
Learn Heal Other in Multiplayer
The ability to heal your teammates is really nice to have and Sorcerers have the MP to do the job. Warriors benefit greatly from Heal Other, since they are most likely to rely on their HP pool, but it can also be used to heal Rogues and fellow Sorcerers. It is also smart to carry a Resurrect Scroll or two as a Sorcerer, since you will likely be in the back row away from danger and will be the one who has to bring dead allies back. That said, other players usually carry their own Healing Potions, so consider Heal Other more of an emergency measure.
Don’t Bother with Naj’s Light Plate
I know this is a controversial take, but the unique armor called Naj’s Light Plate (which is popular among Sorcerers) is not worth your time. People like this armor because of its bonus to spell levels, but it’s not enough to make up for the lack of AC. An extra spell level won’t make much of a difference in the grand scheme of things and is actually a detriment if you take the Mana Shield bug into account. That said, Naj’s Light Plate is a great temporary choice for someone playing on Normal or even Nightmare difficulty since it has decent AC and Magic bonuses.
Useful Spells
Sorcerers should probably learn every spell they can get their hands on. But, some spells are more important than others, so here’s a list of those that are worth prioritizing.
Mana Shield – Of all the spells this is the most important to this class. A Sorcerer without Mana Shield is going to have a very short life. With any luck you will find a copy in the Catacombs, but it may be necessary to buy one from Adria in town for about 16k Gold.
Fire Bolt – This basic spell should not be underestimated. It’s cheap and good for clearing away weak monsters even on Nightmare and Hell difficulty. It is also safer to use around allies than Fireball.
Charged Bolt – For the most part this spell is pretty awful unless you can get it to about level 8 or so, then the bolts it creates split more frequently. At high levels Charged Bolt can fill rooms with deadly lightning. That said, Lightning and Chain Lightning make it obsolete.
Holy Bolt – Undead tend to be weak to fire, but a few resist it, so use this spell when fighting Burning Dead. It also seems more effective than Fire Bolt when used on Undead despite having similar damage. As an added bonus, Holy Bolt will harmlessly pass through your friends in multiplayer.
Lightning – One of the best offensive spells in the game, Lightning is viable from the moment you get it to the final floor of Hell even on Hell difficulty. It’s ultimately outclassed by Chain Lightning, but the fact that it’s much cheaper to cast allows it to retain its usefulness.
Fireball – Like Lightning, this spell is good throughout the entire game, but a lot of monsters resist fire, so it is not always an option. It also has to be used cautiously in multiplayer.
Firewall – Always a good choice, Firewall works well as a barrier for retreating Sorcerers. It’s also amazing if you get the opportunity to cast it in rooms packed with enemies.
Chain Lightning – A devastating upgraded form of the Lightning spell, Chain Lightning arcs towards any targets in the area, which makes it a great fire-and-forget spell. It tends to be expensive to use, so level it up as much as possible. Be really careful with this spell when playing co-op.
Flame Wave – A moving Firewall. I’ve had mixed results with this spell. High level monsters seem to shrug its effects off, but it’s good for clearing away weaker enemies.
Golem – A disposable ally that can distract monsters for the Sorcerer. Though weak at first, Golems can become fairly tough as the Sorcerer levels up and gains spell levels.
Teleport – A good utility spell for escaping, luring monsters out of hiding, or charging into battle.
Stone Curse – Sorcerers really struggle against foes with magic immunities. Stone Curse freezes the target, allowing the Sorcerer to finish it off with melee attacks. Works well with Golem. Is also great for helping fellow players out.
5. Dungeon Overview
This section is a brief survey of the dungeon and its various sections, of which there are four. Each section is inhabited by its own creatures (for the most part) and has its own terrain layout that is similar from game to game despite the fact that floors are procedurally generated. Having an idea of what to expect from each zone goes a long way towards survival.
Floors 1-4
The game starts in earnest in the Labyrinth. This area is largely populated by shambling Zombies, Skeletons, and cowardly little demons that flee when one of their allies fall. Players do not have to worry about Spell Resistances in this section, since none of the monsters use spells, though players may encounter Familiars which inflict Lightning damage on occasion.
The layout of this area is very easy to navigate and players will find a lot of defensible positions like doors and bars that can be shot through with spells or bows. Spell book rooms are also really common in this zone and magic users may want to replay the Labyrinth a few times to stock up on spells.
Many of the game’s quests like the Butcher, Poisoned Water Supply, and King Leoric’s Tomb are also located in this section of the dungeon. Beware King Leoric and The Butcher, because they are both tough opponents on Normal difficulty, though they become more trivial on Nightmare and Hell.
Floors 5-8
More powerful monsters appear in the Catacombs and players will likely have a hard time here if they did not find some decent gear. Flesh, Fire, Stone, and Night Clan Archers may appear in the Catacombs. These enemies are difficult to fight as a Warrior, dangerous to Rogues, and potentially deadly to the Sorcerer. A Gloom and a Blink unique spawn in floor 5. These foes hit hard and have decent defense, so make sure you have passable armor and some potions. Mana Shield becomes increasingly important to the Rogue and Sorcerer thanks to the stronger enemies in this area.
Some high quality spell books like Fire Wall, Lightning, and Mana Shield can be found in the Catacombs. Players may also encounter a cross shaped room on floor 5 which is associated with the Arkaine’s Valor quest. Completing this quest will reward the player with a good suit of armor that will carry them deep into the Caves on Normal difficulty.
The terrain of the Catacombs is not as symmetrical as the Labyrinth, but there are still plenty of defensible doors and small rooms that can be used as kill boxes for archers.
Floors 9-11
the Caves are very dangerous for newer characters thanks to Lightning Demons that commonly appear in the area. These monstrosities hurl Lightning and attack with swift claws. Even the tough Warrior will find himself in trouble if surrounded by these creatures. Charging demons like the Horned Demon and Frost Chargers are also common, so players will have to watch out for monsters rushing towards them. High AC and Lightning Resistance can make life n the Caves a lot easier. Fire Resistance also helps since lava rock throwing Lava Demons often appear in the Caves.
Deeper in the Caves, players may encounter Blood Star casting Succubi. Blood Star inflicts Magic based damage, so it can help to have some Magic Resistance around floor 11 if possible.
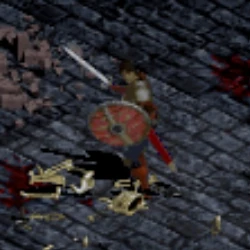
Floor 9 is notable for the Mushroom Quest and the Fallen Hero. You can always find the Fallen Hero in floor 9, though his position is random. Loot the body to get a class specific item. The Warrior will get an enchanted Breast Plate, the Rogue will find an enchanted bow, and the Sorcerer will get a spell book. The properties of these items are random.
The layout of the Caves is fairly unforgiving with many big chambers that invite ambushes from packs of monsters. There are also impassable lava flows and few doors to use a choke points. Luckily, narrow strips of land between lava pools, narrow passages, and the occasional door can be used as defensive positions.
Note: Players using the PC version will also encounter Balrogs that cast the Inferno spell in the Caves.
Floors 12-16
The final portion of the dungeon is the least forgiving. A wide array of monster types can populate Hell, which makes it difficult to know what to expect. Players may encounter fallen knights like Steel Lords and Doom Guards or they may find themselves battling Succubi. Mages that cast spells like Fireball, Charged Bolt, and Fireball are also a possibility as are giant serpents. Players may even encounter acid spiting Lava Maws in Hell. Consequently, it helps to be prepared before exploring this area. All types of Spell Resistance, high AC, and a good weapon all go a long way in the final floors.
Topography is often your biggest foe in Hell. There are no doors or narrow passages hunker down in, so monsters can easily swarm the player. This makes retreating to break up packs an important tactic even for Warriors. Players will also need to learn to take cover by corners and use some of the objects that spawn in this area as terrain. It is best to explore Hell floors methodically so you have a guarantee that there will be at least a small safe area to fall back to in dangerous situations.
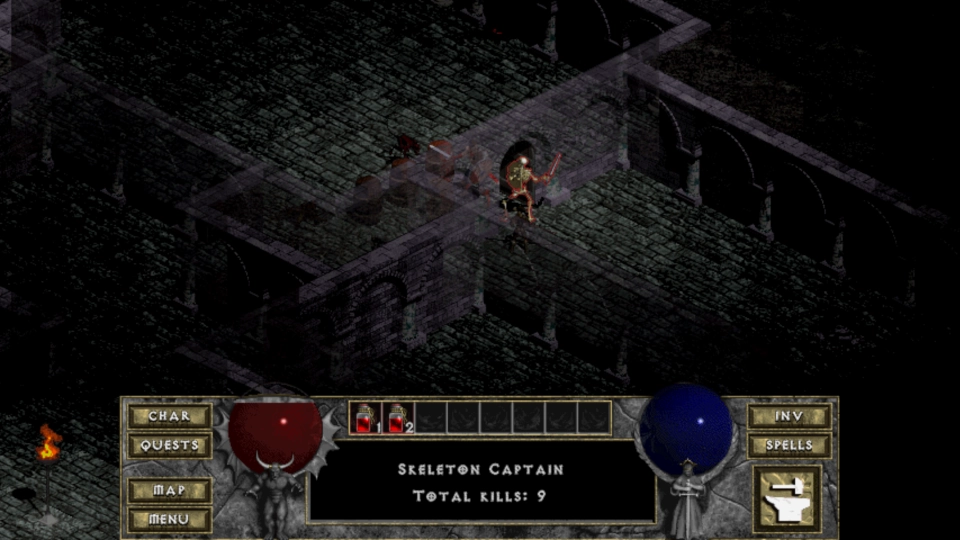
6. Noteworthy Unique Enemies
There are many types of monsters in Diablo and it’s out of the scope of this guide to cover them all, but I will go over some of the major foes players are likely to encounter. This section also provides some advice on how to defeat the more powerful denizens of the dungeon.
The Butcher
Floor 2
Inhabiting a square chamber on Floor 2, The Butcher is likely the first “boss” players will meet in this game. You will know The Butcher has spawned in your game if you meet a Wounded Townsman outside of the entrance to the Labyrinth. The Butcher will not bother you if you do not open his chamber, which is easily identified by the bodies on pikes that fill it and its square shape.
The Butcher rapidly swings a deadly cleaver. He is very accurate and nearly every swing will connect with your character if your AC is 30 or lower on Normal. His damage is high enough to stagger the player and he can kill the Rogue or Sorcerer fairly quickly. I strongly recommend clearing Floor 2 before you even think about fighting this boss. It may be wise to leave him alone until you clear Floors 3 and 4, since coming back to The Butcher at a higher level makes it easy to kill him.
One way to beat this boss easily is to look for bars with a nearby door. Make sure you have a bow or powerful spell like Firewall. Let The Butcher out of his chamber, then retreat to the bars and close the door. Start shooting The Butcher or cast Firewall to kill him. It may take a while, because he has high HP.
The Butcher’s Cleaver is a fairly powerful weapon, especially for ax wielding Warriors, but it’s not worth dying for.
King Leoric
Floor 3
The Skeleton King (King Leoric) is one tough customer. He appears on Floor 3 and Ogden in town will mention him if you talk to him after your reach Floor 2. King Leoric is a random quest, so you may or may not encounter him. In single player games he has his own sub-floor that is called King Leoric’s Tomb. It can be entered from Floor 3. In multiplayer, The Skeleton King merely spawns on the regular floor with a horde of skeletons.
Leoric only takes 50% damage from swords, has high defense, and gains life every time he lands a blow on the player. This alone makes him really difficult to uh…kill. For the most part it’s wise to fight this boss with a good blunt weapon or the Holy Bolt spell. Players are also free to ignore Leoric and return later at a higher level.
When fighting Leoric in a single player game it is possible to go behind the bars in the northeast side of his tomb if you manage to open the secret chamber by destroying the crucified skeletons in the corner, then shoot him through the bars. This works best for the Rogue and Sorcerer, but the Warrior can do it with a ton of potions and Holy Bolt or a bow. Players with Teleport can just warp through the bars at the entrance, draw Leoric to them, then warp behind the bars again, leaving the boss stuck.
Leoric drops a powerful helmet called the Undead Crown, which gives the player the ability to gain HP from attacks.
Foulwing and Wrathraven
Floor 5
These winged demons are uniques that appear quite frequently on Floor 5, the start of the Catacombs. Both of them are competent fighters and are accompanied by a cadre of winged fiends. Despite not having a quest associated with them, Foulwing and Wrathraven are noteworthy due to their tenacity. They can be difficult to kill if you lack sufficient gear or spell levels and tend to blend into the dungeon.
Foulwing is particularly dangerous thanks to his ability to charge the player like a Horned Demon. His minions can also charge, so be very cautious on Floor 5. It’s wise to set up a Town Portal after entering Floor 5 so you can retreat from these bosses if necessary. Both bosses are trivial if you can use terrain to separate them from their allies, but Wrathraven will phase around the player when hit.
Deathspit
Another notorious Catacombs unique, Deathspit is an Acid Beast that uses a different strategy than the rest of his brethren. Instead of occasionally spitting acid at the player, then closing to melee range, Deathspit will continuously puke globs of acid at the player. He will also run away if you get close and he has minions that behave in the same manner.
Needless to say, this unique is really deadly, but there are two good ways to deal with him and his pack. The best way is to back up the moment you see globs of acid flying towards your hero. The acid has limited range and careful players can stand just outside its reach. Rogues and Sorcerers can easily fire spells down range at the beast. Firewall is particularly effective since the dumb monsters will just stand in it while it kills them.
Players that lack ranged attacks can look for a door and shut out the beasts, since they are unable to open doors. After doing so, the player can stand by the door, open it briefly to let a few beasts in, then shut it before the whole gang piles into the room. Then the player can kill the beasts and repeat the process to kill the entire pack without getting shredded by acid.
Lightning Demon Uniques
Floor 9
Players will almost certainly encounter 2-3 Lightning Demon uniques on the first floor of the Caves. Lightning Demons throw Lightning at the player and swipe with deadly claws. Needless to say, a pack of these monsters lead by a unique can be a major threat. Unlucky players may encounter one of these packs near the entrance and I have had experiences where I was attacked by two uniques at once not far from the stairs.
It is essential to keep these monsters from surrounding you, since they can attack rapidly. Always plan an escape route when entering Floor 9 and look for narrow paths through lava or doors that can act as choke points. High AC and Lightning Resistance are great to have when fighting Lightning Demons. Firewall is also highly effective.
Lazarus and His Minions
Floor 15 (Unholy Altar)
Lazarus always spawns in Diablo since he is part of the main quest. Players will find a staff on Floor 15 that will open a portal to the Unholy Altar when given to Deckard Cain in town. The red portal to the altar appears on a giant pentagram in Floor 15.
Players will have to activate a number of books and pentagrams to warp to Lazarus’s hiding place in the Unholy Altar. After a brief speech, Lazarus will attack the player and a wall nearby will open up revealing a gaggle of Succubi accompanied by a few mages.
It is best to flee to one of the doors to the east or west when the wall opens to avoid Lazarus’s minions, because there are two unique Succubi in the mix. The Succubi are easy to defeat if you can separate them from the mages. Once the minions are gone you can fight Lazarus fairly safely. His Fireball spell is powerful, but about 25-50% Fire Res should be enough to blunt its effectiveness.
Lazarus can and will teleport when the player gets close. Cast Stone Curse to stop him or try to force him into a corner. This mage is immune to Magic and resists Fire/Lightning, so it is best to use melee or bows on him.
Diablo
Floor 16
Diablo always spawns in the final floor of the dungeon and is the final boss of the game. He is locked in a chamber that can be opened by activating switches scattered around the area. Always kill all the mages and skeletons on this floor, because you do not want to deal with them while trying to fight Diablo himself.
Once the player opens Diablo’s chamber, the Dark Lord himself will attack the player. He is guarded by more mages, but it is easy to draw him away from his minions. That said, Diablo will attack you with his mighty Apocalypse spell as he chases you. This spell hits everyone and can stagger players.
Bring a ton of Mana or Healing Potions to this fight. Diablo resists spells, but Fireball or Chain Lightning work well enough on him. Warriors can rip though Diablo with their strong melee attacks, but also have to worry about his own close combat attacks. For the most part this boss is not all that hard as long as you have a ton of potions. It also helps to set up a portal before the fight in case you need to escape.
7. What to Expect from Normal, Nightmare, and Hell Difficulties
Diablo offers three dificulty modes: Normal, Nightmare, and Hell. The monsters become stronger as the difficulty rises, but the rewards also become greater. It is also necessary to play on higher difficulties as the player levels up, since the low level monsters on Normal will stop giving the player exp after a while.
Please note that I recommend AC, To Hit%, and MP/HP values for each difficulty. These are mostly based on my personal experience and are not written in stone. The suggested HP/MP values do not really apply to Rogues using Mana Shield, Warriors do not have to worry about MP, and Sorcerers can ignore HP. Also, the recommended values for Normal difficulty are for Floor 12 and lower, not the beginning of the game. Finally the Recommended Lightning/Magic/Fire Resistance is not essential, but it does help against spell casters and players can temporarily equip gear that grants the Resistances needed for the area they are exploring if necessary.
Required Level: None
Recommended AC: 130 (PC) 90 (PS1)
Recommended To Hit%: 110% (PC) 80% (PS1)
Recommended HP/MP: ~200
Recommended Lightning/Magic/Fire Resistance: 0-20%
This is the start point for any character. The monsters on Normal are weak and tend to lack Resistances and immunities. While the enemies are as weak as they will ever be, the player will also be weak, so Normal can be surprisingly challenging. Be sure to equip your character with better gear as you go and try to amass a decent pile of Gold so you can afford gear for the trials to come.
Required Level: 20
Recommended AC: 180 (PC) 150 (PS1)
Recommended To Hit%: 150% (PC) 120% (PS1)
Recommended HP/MP: ~350
Recommended Lightning/Magic/Fire Resistance: 25-40%
Strangely enough, Nightmare is arguably the easiest of the three difficulties. Players will likely start this mode at level 24 or 25 if they cleared Normal fully, so they will have an edge on the monsters. Nightmare can be tough around the Caves, so players should try to hit the AC, To Hit%, and HP/MP values recommended above around Floor 9.
Be sure to power up your gear as much as possible before going into Hell difficulty. In fact, it doesn’t hurt to replay Nightmare after completing it, because the monsters in Hell difficulty are very high level and players will not get experience from many of them once they reach Floor 8 or so.
Required Level: 30
Recommended AC: 240 (PC) 210 (PS1) or Higher
Recommended To Hit%: 180% (PC) 150% (PS1) or Higher
Recommended HP/MP: 450 or Higher
Recommended Lightning/Magic/Fire Resistance: 50% or Higher
As the name suggests, Hell is not at all forgiving. Almost all monsters have some sort of Spell Resistance and they are going to be at their strongest. While the Labyrinth should be safe for most players, things start to get hairy in the Catacombs. Night and Fire Clan Archers can deal a lot of damage, so it really helps to hit the recommended AC values. This trend continues as the player descends, so it is wise to spend a lot of time looking for new items.
As I said in the section about Nightmare difficulty, there is not much point in going very deep into the dungeon on Hell difficulty until you are about level 35 or even higher. This is due to the fact that enemies more than nine levels above or below the player will not yield Exp when slain. Consequently, a level 33 player will only receive Exp from a few of the enemies on Floor 9 and lower. Luckily, this gives you time to find better gear for the more difficult Floors by restarting the game and clearing the first 8 floors a few times.
8. References
Almost all of the info in this guide is based purely off of my experience, but I did refer to a few sites to get details and jog my memory. These are also good resources for players who want a different perspective on the game.
Furious Paul’s Diablo Guide:
https://www.furiouspaul.com/pc/diablo1/
General Information:
https://diablo.fandom.com/wiki/Diablo_Wiki
Jarulf’s Diablo Guide:
http://www.lurkerlounge.com/forums/thread-12141.html
Note: The link to Jarulf’s guide is an old forum post where I found it and may not be the original source.
Thanks for using our Diablo (PC, PS1) Guide!
RetroMaggedon.com ©2023
Ty long live to Diablo