

Tombs and Treasure Walkthrough for the Nintendo Entertainment System
~by tankMage (October 2023)
About this Walkthrough
This guide is a step by step semi-spoiler free walkthrough for the NES adventure game Tombs and Treasure. As with many adventure games, it’s possible (and very easy) to make a poor choice and get softlocked, so please follow the instructions below very carefully. Thanks for choosing my guide and enjoy the game!
Contents
Get Passwords frequently and save them in case you get stuck.
Softlocks are very common in Tombs and Treasures. There are several rooms players can enter and get stuck in and I think it is possible to miss certain important items, which also can result in a softlock. Using the Ixmol Jewel to get passwords often will allow you to backtrack easily if you make a mistake. It is also advisable to stick closely to this guide as well as others.
You can run from most dangerous situations.
It’s easy to accidentally step in a room you should not explore yet and get attacked by an enemy that is too powerful to defeat at your current level. If this happens, you should be able to run away by selecting the Go command and moving backwards. This also works if you simply step into a room or area you shouldn’t be in yet.
Kulkucan’s Clue Room
There’s a hidden room you can visit for clues to the game’s puzzles. Credit for this secret has to go to Console Database, because I did not find it, so visit them via the link in the References section. To find the hidden room, go east from the Lab until you hit the edge of the map. Next, go north, then west where you should see a tiny path running through the trees. This leads to a small path that looks like a dead end. Push against the trees on the southern side of the gap to find a hidden path.
It’s difficult to navigate the path, but you can get through it if you press along the edges while moving northwest. Eventually you will reach the next screen. Continue west and you will enter a hidden chamber that is actually the Nunnery. Kulkucan will give you a clue based on where you are in the game if you look at anything in the Nunnery. The clues are kind of vague, but they are better than nothing.
Equip the Sword before every fight.
You’re going to get tired of me saying this, but it is really important to have the Boy hold the Sword with the Use command at the start of every battle. If you do not do so, the Boy will fight with his bare hands and will probably lose. Later on it becomes necessary to place jewels in the Sword and use other items, so there’s a lot of setup involved with combat.
This is the main walkthrough for Tombs and Treasure. As I said in the intro, be sure to follow the instructions in this section carefully or you may get stuck.
a. Laboratory
The game will start after you enter a name for the Boy and Girl. Interestingly, the game will fill in the blanks if you do not enter anything. The default names for the heroes are Rick and Tess. For the sake of simplicity, this guide will refer to them as the Boy and the Girl.
Perform any action and the secretary will fill you in on events. Take the following items from the desk.
-Lighter
-Sword
-Silver Key
Look at the notebook on the desk, then select Go and choose the Down Arrow to meet Jose. Look at Jose and he will dump a lot of info on you as well as explain how to get a Password to continue your game. Use the Go command after talking to Jose and choose forward (Up Arrow) to leave the Lab.
b. Nunnery
The party will end up on the main map after you leave the Laboratory. Head north to find the Nunnery.

Simply step onto the stone building to enter the Nunnery. You should see a big gem in the hands of the statue on the left. Use the Take command on the gem to get the Ixmol Jewel. Using the Look action, then hitting the B Button and selecting the Ixmol Jewel will give you a password whenever you want one. We’re done in the Nunnery, so select Go and the Down Arrow to exit to the Map.
c. Tomb of High Priest
Tip: Get a password before entering the High Priest’s Tomb. You will have to fight an enemy.
From the Nunnery, go north two screens, then west two screen to find a Mayan Pyramid.. Walk up the steps to enter the High Priest’s Tomb. Skorper will attack the party once you enter the tomb.
———-
Fight: Skorper
Weakness: Sword
———-

This battle is easy if you do it right. Search for the Use action on the command bar by pushing Right on the D-Pad. Select the Use command, then choose the Sword to equip it. Next, choose the Fight command to attack Skorper. You will likely miss a lot, but with the Sword equipped you will do a fair bit of damage to this monster. Keep slapping Skorper with the Fight action until it dies.
Be sure to Use the Sword, because Skorper can be dangerous if you try to fight him unarmed!
———-
Once the monster is history, switch to Jose by using the Change command. If you Look at the wall, Jose will note that it looks fishy, try using the Push command (which is hidden on the far right side of the command bar) to reveal a secret passage. Go Right to enter a hidden room with a stone coffin. Take the Mosaic Tile from the coffin lid. The lid will slide open. Take the One-Eye Mask from the skeleton, then leave the tomb.
d. El Castillo, the Temple of Kukulcan
Head east from the High Priest’s Tomb once you are back on the world map. You will see El Castillo pyramid if you keep going east for a couple of screens. Get ready for your second battle, because a creature called Two-Beak will appear when you try to do anything in this pyramid.
———-
Fight: Two-Beak
Weakness: Sword
———-
The Boy should be level 2 when he has to fight Two-Beak. Use the Sword to equip it for this battle just as you did before and hit the Fight command. You should slice and dice this fearsome fowl in about five turns. Two-Beak does considerable damage when its attacks land, which can be scary, but you should be able to out-damage it.
———-
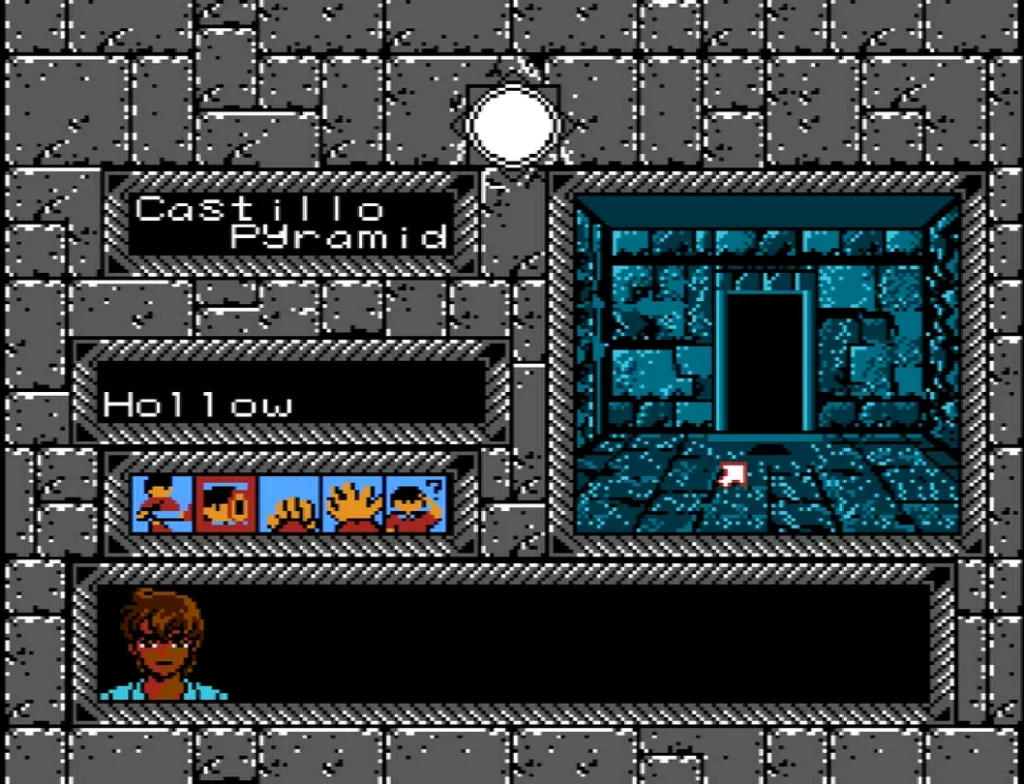
Once Two-Beak’s goose is cooked (ok I’ll stop with the bad bird jokes) Go foraward one space to reach a dead end. Take a Look at the hollow in the wall, then use the Put command to insert the Mosaic Tile in the hollow.

Take the following items from the treasure chamber:
-Gold Stand
-Silver Globe
-Shallow Bowl
-Gold Mirror
After snagging all the items listed above (leave everything else alone) use the Smash command on the far right side of the command bar to break the Tall Flask left of the Headless Statue. The Girl will take the Ring of Itza and put it on her finger.
Next use the Look command to examine some of the things in this room. Look at the flask on the right to get the Small Rod, which is automatically placed in your inventory. Next, Look at the stone box near the bottom of the screen to discover three stone tablets that you cannot take with you.
After that, use the Move action on the pile of gold to receive the Red Jewel. Use the Join command to place the Red Jewel in the One-Eye Mask, then Use the One-Eye Mask to read the stone tablets in the box you looked at earlier. The Boy will be able to see the pictures and get a few clues. Leave Castillo when you are done.
e. Well of Paradise
Exit El Castillo, then walk south two screens. Turn right when you reach three clumps of trees and you will see a pond. Step onto the stone structure to enter the Well of Paradise.
Use the Wash action on the Golden Mirror to get it to shine. The Boy will notice some Golden Pipes in the water after cleaning the mirror. Take the Golden Pipes.

If you look at the pipes, you will notice that they are damaged. Use the Join action to combine them with the Bandage from your inventory and repair them. Use the Go command and select back to exit the Well of Paradise.
f. El Caracol
El Caracol is a pyramid directly west of the Well of Paradise. It may be wise to get a password by Looking at the Ixmol Jewel before entering the pyramid, because Snake Master is waiting for you inside…the jokes really do write themselves.
———-
Fight: Snake Master
Weakness: Sword + Red Jewel
———-
Before fighting Snake Master, Join the Sword with the Red Jewel you found in El Castillo. Don’t forget to Use the Sword after placing the jewel in it to make the Boy wield it. Snake Master will wait politely while you get ready to fight, so do not worry about taking damage.
The Boy should be Level 6 if you have been following this guide, which is good enough to beat Snake Master. This monster hits like a truck, but you should be fine.
———-
After sending Snake Master packing, use the Put command to place the Silver Globe on the pedestal in the center of the room. Use the Change action an have the Girl Use the Golden Pipes you got at the Well of Paradise. The Silver Globe will glow once you play the pipes. Now it’s time to go to the Court of Columns.
g. The Court of Columns
Our next stop is a long way from El Caracol and there’s a monster waiting for the party at the end, so be sure to get a password if you haven’t done so already. Travel north two screens to an area with three trees, then walk east two screens. You should be at El Castillo. From there, head north a screen and you will see some broken columns. Squeeze through the columns to go north, then step east a screen. There should be another row of shattered columns just above the party.

It can be tricky to enter this area, but you should be able to step onto the northeastern part of the court, then take a few steps west to enter it.
Make sure the Sword and Red Jewel are combined, because El Slug will attack when you enter the court.
———-
Fight: El Slug
Weakness: Sword + Red Jewel
———-
Yes, they actually named an enemy “El Slug”. Despite the stupid name, this demon means business, so make sure you have the Sword ready. You should be Level 8 at this point, which is good, because you will need the HP and dodge ability to survive this fight. Aside from needing to Join the Red Jewel to the Sword, there’s nothing special about this battle, so hack away at El Slug until it’s “El Muerto”.
———-
With El Slug out of the way, the team is free to Look at the light shining into the Court of Columns. After examining the shining column, you will get a close up of the ground by it, check it and your hero will note that there’s something odd about the stone beneath the column. Use the Smash action to break the stone tile and find a Golden Globe. Take the Golden Globe and backtrack to El Caracol.
h. El Caracol (Revisted)
Take the Silver Globe from the pedestal and put the Golden Globe on the pedestal. Now Change to the Girl, then have her play the Golden Pipes. The Golden Globe will emit a beam and it’s time to backtrack to the Court of Columns.
i. Court of Columns (Revisted)
Nothing will harass the party this time, so Look at the glowing column to zoom in on the ground by it, them Smash the tile under it just like you did before. This time you will find a Silver Head.
At this point the party should have visited the Court of Columns twice to get the Silver Head. You should also have the One-Eye Mask and Red Jewel as well as a bunch of other items.
a. El Castillo
Backtrack to El Castillo from the Court of Columns. El Castillo is just a few screens to the south, so it’s not a long trip. Go into the room with the headless statue where you found a bunch of treasures and use the Put action to place the Silver Head on the statue.
A passage will open in the floor, choose the Go action and the arrow pointing down some steps to enter a secret room. There’s a stone box near the bottom of the screen, Look at it to get a Leather Bag, then Look at the bag when it’s in your inventory to get a piece of Incense. Afterwards, Take the green Small Flask and the Large Flask. Get out of this room when you are done using the Go action and the arrow pointing up the steps, then leave El Castillo.
Warning: Do not take the head off the statue, you do not need it and doing so can cause problems when you have to come back here later on.
b. El Caracol
Walk two screens west and two south to get back to El Caracol from Castillo. Take the Golden Globe from the pedestal, then Change to Jose and have him Push the pedestal. Stairs will appear on your right.

make these steps appear.
Use the Go command and the arrow going up steps to climb up to yet another chamber with a pedestal. Put the Golden Globe on this pedestal, then Look at the spot on the wall the light hits. Next, Smash the glowing brick in the wall to get the Crystal Key. Use the Go action and Down Arrow to get back to the pedestal and Take the Golden Globe.
Select the Put command and stick the Gold Stand on the pedestal, the Put the Golden Globe on the Gold Stand. Change to the Girl and play the Golden Pipes to make light shoot out of the globe again. Look at the block the light is shining on just like you did before and Smash the block to get the Silver Censer. Now it’s time to leave El Caracol. Do not bother to take the Golden Globe or Stand, you do not need them.
c. Temple of Warriors
After all that backtracking it’s time to visit a new place: The Temple of Warriors. The Temple is located very close to the Court of Columns, to get there walk north three screens from Caracol, then east two screens. You should see a row of columns, go north and you will see the Temple of Warriors pyramid.
Cadaver (who is about as cute as its name implies) will ambush the party when you step in the Temple.
———-
Fight: Cadaver
Weakness: Sword + Red Jewel
———-
By now you know the drill: Join the Sword and Red Jewel, then Use it, then select Fight to begin trading blows with Cadaver. This demon does scary amounts of damage. However, the Boy should have about 1000 HP at this point, which is enough to survive.
———-
After burying Cadaver for good, you are free to look around. Take the Sun Necklace the female statue is holding, then consider getting a password, because another dangerous event is coming up…
Once you are ready, Take the Blue Jewel from the jaguar statue. The statue will morph into an actual Jaguar that will try to eat our brave explorers.
DO NOT try to fight the Jaguar, it will kill you. Instead, select the Go command to get the heck outta here. Luckily the Jaguar is not all that hungry and will not follow you.
d. Well of Paradise
Remember the Well of Paradise? It’s four screens south and one screen east of the Temple of Warriors. It’s also Jaguar free, so go there. Step on the stone building to enter the well and use the Wash action on the Sun Necklace. The necklace will display the position of the sun at the top of the screen once clean. The colors tell the time as follows:
Yellow = Dawn
White = Noon
Red = Dusk
Black = Night
e. Temple of Warriors (Revisited)
Tip: Use the Wait action at the Well of Paradise to make the Sun Necklace turn Red before going to the Temple of Warriors.
Now that we can tell time, return to the Temple of Warriors and wait for the Sun Necklace to turn Red…the Jaguar will not be in the Temple if you enter at dusk.
Look at the hole in the wall once inside the Temple to find the Iron Key, you will have to use the Small Rod you picked up back in Castillo to get the key.

fish the Iron Key out of the hole.
After grabbing the key, use the Wait command to make the Sun Necklace go white and the Jaguar will return to the Temple of Warriors. This time you can Change to the Girl and Use the Golden Pipes to turn the Jaguar back into a statue. Now you can Take the Blue Jewel from the Jaguar Statue. Leave the Temple when you are finished here.
g. Ball Court
The Ball Court is conveniently placed just two screens west and one south of the Temple of Warriors. However, you will have to walk to the step-like structure in the back of the Ball Court to enter it. Unfortunately, Hornskull will try to kill the party once you go inside the tunnel under the court.
———-
Fight: Hornskull
Weakness: Sword + Blue Jewel
———-
This time around you will need to Join the Sword and the Blue Jewel, then Use the Sword as always. The Boy should be level 16 and will only need to hit Hornskull about three times to defeat it.
———-
After dealing with the monster, use the Go action and Up Arrow to move forward one space. Have a Look at the Blue Block on the side of the wall, then Take it. DO NOT go into the doorway that opens up or you will be trapped, instead leave the Ball Court.
h. Tomb of High Priest
Walk south once and west from the Ball Court to get to the Tomb of the High Priest. Go into the Coffin Room and Look at the Skeleton. Use the Move action to set the skull aside and reveal a keyhole. Use the Iron Key from the Temple of Warriors and the coffin will slide, exposing a hidden staircase.

Using the Go command, walk down the steps to a maze. Before you try to explore, Join the Small Rod to the Shallow Bowl to create a compass that will lead you through the maze. Simply select the Use action and the party will end up in a chamber in the Ball Court.
i. Ball Court (Revisited)
Take the Akbal Jewel from the pedestal and the passage to the High Priest’s Tomb will close. This is fine, because you can use the Go command and the Right Arrow to get back to the Ball Court’s main passageway.
Go back to the Ball Court entrance and take the Stone Pawl from the left side of the hallway. The passage will seal up once the Stone Pawl is removed. Return to Castillo.
j. El Castillo (Revisited)
Walk south to screens from the Ball Court entrance, then east three screens to get to El Castillo. Once inside the pyramid, look for a hole in the floor of the entrance room just under the doorway.
hollow.
Use the Put action to insert the Blue Block into the hollow. Some steps leading down will appear right beneath your feet. Go down the steps to reach a room with a mechanism on the wall. Put the Stone Pawl you just got from the Ball Court in the mechanism and Change over to Jose.
Have Jose use the Move action to turn the Stone Handle on the bottom of the mechanism. You will hear the rush of water.
This section picks up just after you have Jose drain the Well of Sacrifice using the Stone Pawl from the Ball Court. You should have a lot of items at this point, including the Blue Jewel, Sun Necklace, and Akbal Jewel.
a. Well of Sacrifice
If you are still at Castillo, go two screens north, two east, then one north to reach the Well of Sacrifice. Please be aware that this is a rough estimate of how to get there, since you kind of move at an angle to get through the columns near the Temple of Warriors.
Use the Go Downstairs command to descend into the Well of Sacrifice. Both the Girl and Jose stay back after urging you to bring the Gold Mirror, Crystal Key, etc…
The Boy will arrive at a door and another monster will attack him…it’s about time.
———-
Fight: Venum
Weakness: Sword + Blue Jewel and Akbal Jewel
———-
Join the Sword and Blue Jewel, then use the Sword to hold it as always. Before Fighting, Use the Akbal Jewel to weaken Venum. This battle go should very smoothly for the Boy once he has used the jewel.
———-
Move the statue on the right to open the door, then Go forward. You’ll end up in a chamber with a coffin that has a beam of light shining on it. Use the Gold Mirror to make a door open in the back wall. Next, look at the coffin. Use the Crystal Key on the coffin to open it. Now you can Take the Two-eye Mask.
The door that opened up leads to Castillo, so go through it to proceed.
b. Castillo and The Well of Sacrifice
You will turn up in the basement of El Castillo Pyramid after going through the door in the Well of Sacrifice. Walk up the stairs and leave the pyramid. Back on the main map, head northeast to return to The Well of Sacrifice. Something happened while you were gone and Jose will fill you in on events if you Look at him a few times.
c. Tomb of the High Priest and Ball Court
Jose will tell you to go to the Ball Court, but it’s sealed, so you will have to go through the High Priest’s Tomb. To find it, just go southwest back to Castillo then walk west three screens.
Once in the Tomb of the High Priest Go right to enter the coffin chamber, then Go down the steps. Use the Shallow Bowl to get through the Ball Court maze.
Once in the small room where you got the Akbal Jewel, Go left to get back to the Ball Court entrance. Use the Join action to set the Red and Blue Jewels on the Two-eye Mask you found under The Well of Sacrifice, then Go forward one space. Use the Two-eye Mask to locate a White Block on the left hand wall. Push the White Block to make a door open on the left.

Enter the newly opened door and prepare to fight another creature.
———-
Fight: Tezcat
Weakness: Sword + Blue Jewel
———-
The Akbal Jewel does not affect Tezcat, so just Join the Blue Jewel and the Sword, then whack away at him. It takes a lot of hits to do away with this monster, but you should be able to win at Level 21.
———-
Tip: This is a good time to get a password as you are nearing the end of the game.
Use the Large Flask in the room with the tiny pyramid and Scarface will attack…Say hello to my little friend!
———-
Fight: Scarface
Weakness: Sword + Blue Jewel and Akbal Jewel
———-
Make sure you Use the Sword and the Akbal Jewel when this battle starts. You may also have to Join the Blue Jewel to the Sword, but I was able to beat Scarface without doing so since it was already combined with the jewel from the previous battle. It will take about nine hits to defeat Scarface and you will get the Ring of Itza as a reward.
———-
After slaying Scarface, Wait until night when the Sun Necklace turns black then Use the Large Flask again. The Boy will shrink and the pyramid will look gigantic. Go forward to enter the temple. You will see a huge key on a stand and a keyhole to the left, Use the Silver Key to unlock the temple.
Back out of the temple, the Use the Small Flask to return to regular size. Choose the Move command and use it on the temple to open it like a box. Take the Sun Key and you will be transported to The Shrine of Tentacula.
d. Shrine of Tentacula
Tip: Get a password before the last battle!
The Girl is laying unconscious on a stone slab when you enter the shrine. Tentacula will appear when you attempt to do anything.
———-
Fight: Tentacula
Weakness: Sword + Blue Jewel, Akbal Jewel, and Itza Ring
———-
This fight requires quite a bit of set up. Make sure the Blue Jewel is plugged into the Sword and the Boy is holding it. You will also need to use the Akbal Jewel and Itza Ring to weaken this boss. Tentacula is tough and managed to kill me twice even though I used the correct items and was level 30. It’s likely that luck plays a role in this battle and Tentacula will win if he manages to dodge enough of the Boy’s swipes while landing his own blows. Just keep at it and you will eventually win after hitting him about 15 times.
———-
With Tentacula sent back to the underworld, you can free the Girl. Look at the Stand and the Girl, then use the Put command to place the Censer on the ground after stepping back a space. Next Put the Incense in the Censer and Use the Lighter to light it. The Girl will awaken and tell you to Use the Sun Key on the hole in the stand, do so and you will complete the adventure! Congratulations!
Note: If you wait for the credits to end you can make the portraits of the Boy and Girl move slightly using the D-Pad and Select Button.
I had to use a couple of walkthroughs to solve some of the more difficult puzzles, so credit goes to them. Both of the guides listed below are very good and provide slightly different perspectives on the game. That said the process is basically the same in every walkthrough, because Tombs and Treasure does not give players much leeway. The final link is to Console Database, which is where I learned about the Nunnery secret. There’s also a few other cheats on that page so it is worth checking out.
Walkthrough with Map:
https://huguesjohnson.com/guides/tt/
Walkthrough:
https://gamefaqs.gamespot.com/nes/587713-tombs-and-treasure/faqs/34711
Clue Room:
https://www.consoledatabase.com/cheats/nes/tombsandtreasure/
Thank you for using my Tombs and Treasure (NES) Walkthrough!
RetroMaggedon.com ©2023