

Shadow Hearts Walkthrough (PlayStation 2)
~By tankMage (January 2023)
About this Walkthrough
Shadow Hearts proved to be far bigger and more complex than I expected. It’s also a great PS2 RPG, so I hope you enjoy it as much as I did and find this guide useful. As for the walkthrough itself, I tried to structure it with completionists in mind, so it is a bit long winded towards the end where side quests become prevalent. I use the default name for each character, so try to learn them if you choose to change anyone’s name. Finally, the game spells the name of an area in two ways, so do not be surprised if this guide calls a certain place “Neameto” while the game refers to it as “Neameeto”; I intentionally chose one spelling for the sake of uniformity.
Contents
Click the links below to jump to a section.
IV. Walkthrough Part 2: Europe
V. Walkthrough Part 3: The End Game (Europe)
I. Basics
Shadow Hearts differs from most RPGs from this era in a number of important ways. This section looks at the three features of this game that set it apart from other JRPGs: The Judgement Ring, Malice Meter, and Graveyard. It is also important to remember that Shadow Hearts also employs a lot of mechanics commonly seen in other RPGs. These include a basic experience system, equipment for characters, shops, towns, special abilities, random battles, and a weapon upgrade system.
A. The Judgement Ring
Players will encounter the Judgement Ring often and from the very start of the game. The Judgement Ring is a circle that pops up on screen when the player orders a character to attack, execute a special ability, or use an item during combat. In order to get the character to perform the command, the player must hit the X Button on the green, yellow, or red section of the circle as a line called the “Indicator” sweeps around the circle. These colored sections are referred to as hit zones and are shaped like slices of pie. hit zones vary in size and can be very wide or thin, they also often have a red section that counts as a bonus if the player can hit it.
Most abilities require the player to hit multiple points on the ring and basic physical attacks always have three hit zones. Physical attacks can hit an enemy up to three times if the player manages to hit all three zones.
Furthermore, the Judgement Ring will occasionally appear outside of combat. This usually happens when Yuri or another character is attempting a difficult task, like moving a heavy plank of wood or kicking a door down. This can either take the form of a standard Spin RIng or a Push RIng. While Spin Rings will be familiar to anyone who has read this section or fought in a battle, Push Rings are a little different. A hit zone will appear somewhere on the Judgement Ring and the player will have to tap the X Button rapidly to move the indicator into the hit zone. Push Rings have a time limit and the player will pass or fail depending on whether or not he managed to keep the indicator in the hit zone. Push Rings can be difficult, because the player must keep the Indicator in the hit zone by tapping the X Button at just the right speed to keep the indicator from leaving the zone.
B. The Malice Meter
The Malice Meter is unique to Shadow Hearts and plays an important role in the game. Monsters that are slain by Yuri (and later Alice) will be sent to the Graveyard and build up as malice. Once the malice reaches critical mass, Fox Face will appear in random battles. Fox Face is extremely dangerous and can wipe out the entire party.
Luckily, Yuri has a pendant that indicates how much malice is present in the Graveyard according to its color. Malice is low and Fox Face will not attack the party if the pendant is blue, green or yellow, but Fox Face will attack if the pendant turns red. Yuri can clear malice by visiting the Graveyard and fighting a short battle. Doing so resets the Malice Meter back to Blue. Yuri will also receive a modest reward like a Thera Leaf for clearing Malice.
C. The Graveyard
The Graveyard plays a key role in this game. Yuri can access it at any time by going to a Save Point and selecting the Graveyard option from the main menu. Many story events play out in this area and the player may be brought here automatically in situations. That said, the Graveyard serves two main purposes. The first is to clear Malice by defeating a monster summoned by the Four Masks at the back of the Graveyard. The second is to learn new Soul Fusions by fighting and defeating monsters at gravestones scattered around the Graveyard. To battle a monster, Yuri must first gather Soul Energy by fighting bosses and random battles, then examine the Gravestone the monster is connected to and defeat it in battle. Detailed information on Fusion Souls can be found in Section VI of this guide.
II. Hints
Here are some tips that can make life easier for players.
A. Master the Judgement Ring
The Judgement Ring plays a major role in combat and can determine the outcome of a battle. Learning how to make all of the hit zones for a spell or physical attack will make combat much easier. Getting the Indicator to hit in red zones will greatly increase the efficacy of your character’s abilities if you can learn to do so reliably.
Getting good with the Judgement Ring is ultimately a matter of reflexes and practice. Fighting random battles is the safest and most reliable way to master it. Spells and weapons become harder to pull off as the game progresses, so be prepared to practice occasionally.
B. Do not Waste Time and Cash Upgrading Weapons Until the End of the Game
You will be able to upgrade everyone’s weapons early in the game, but the process is extremely expensive. Couple the cost of upgrades with the fact that your heroes will frequently find new weapons and you will find yourself in a situation where you are constantly grinding to make money for upgrades. Even worse, the bonuses from upgrades are rather small.
Save your money for when you have the best weapons in the game, since you will want to upgrade them for the final boss. If you are really having trouble, I recommend just upgrading the hit zones for your weapons, then experimenting to see if that helps.
C. Invest in Status Ailment Protection
Status ailments become very common as the game progresses. Items Like Leornado’s Bear, Pocket Watches, and Zodiac Bracelets can save the day during a tough boss fight or even in some random battles. Later on, you will start finding Crucifixes that protect against every status ailment in the game and collecting them all can make the end game far less daunting.
D. Agility is Important
Agility is one of the most important stats in the game, because it determines how frequently a hero gets turns. It is also weighed against the enemy’s agility, so it is possible to get more or fewer turns than an enemy depending on your agility score. Sadly, items that upgrade agility are very rare and the only reliable way to boost it is with a Flash Badge, which also makes the indicator on the Judgement Ring spin more quickly. That said, wearing Flash Badges can really pay off if you can get used to the increased indicator speed or have a huge supply of Gold Hour Glasses.
E. Stock Up on Restorative Items
Healing and support items are very useful in Shadow Hearts. Tents, Thera Roots, and Mana Roots are all great ways to heal party members. There are also useful items like Gold Hour Glasses that make it easier to use the Judgement Ring. Stock up on such items, because you may need them in a pinch.
F. Watch Out for “Missable” Items and Events
There is a lot of hidden stuff in this game and it is very easy to miss something important. For example, a book found rather early in the game is important for unlocking a powerful ability at the very end of the game. Explore thoroughly and take your time moving forward.
G. Watch Your SP
SP or Sanity Points represent how comfortable a character is fighting supernatural creatures. SP will reduce by a point every turn and some monsters can lower it with special abilities. Yuri will consume SP every time he transforms. Heroes that run out of SP will go Berserk and act unpredictably. This can mean death in some battles, so use Pure Leaves, Seeds, and Roots to maintain SP. There are also several accessories like the Huge Jug and Will Power that conserve SP.
III. Walkthrough Part 1: Asia
The first half of the game is linear for the most part and serves as an intro in many ways. That said, there are some puzzles and important things that can be missed. This guide covers all of the side quests and important events in this half of the game.
A. Trans-Siberian Express
| Items | Mana Leaf | Thera Leaf |
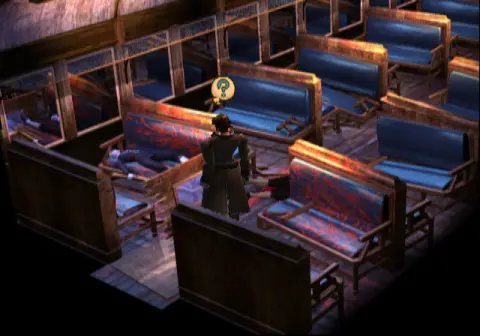
You will be in control of a character known as the “Rude Hero” after a cutscene. Get used to moving around the train and fighting random battles. All of the monsters that appear in this train are really weak, so it is safe to practice here a bit if you need to get used to the battle system.
Look for a pair of corpses near the exit of the second car and walk around until a “?” appears over the hero’s head. Press the X Button while this “?” is visible to pick up items. In this case you will find a Mana Leaf and a Thera Leaf.
Do not enter the third car until you are ready to leave the train, because a cutscene will begin once you reach the end of the third car. A man named Roger Bacon and the Rude Hero will face off on the top of the train after the cutscene. Bacon is essentially undefeatable and the battle will end once he casts his Revelation spell. Another movie will run and the hero will escape to the plains with the girl.
B. Plains
| Items | Pure Leaf | Leather Belt | Mermaid’s Tear |
| SluiceGateHandle | Raging Tiger (Fusion Soul) | Holy Mother Bust | — |
The hero will enter the Plains from the World Map. Take a moment to save your game by opening up the menu (press Square) and navigating down to Data.
1. Plains Part 1
After the movie, the hero will talk to the girl a bit before she runs off. Check the lower left side of the train tracks to get a Pure Leaf before going after the girl. Monsters attack in the next area and they are stronger than those on the train. They also tend to appear in greater numbers, so use a Thera Leaf when your health starts to get low. Look for a hidden path near the northeast part of the second screen to find a secret path that leads to a chest that holds a Leather Belt.

Return to the previous area and walk west to find the girl. After a lot of dialog, you will be prompted to name the girl and the hero. For the purposes of this guide, they will be known by their default names (Yuri and Alice) but you are free to name them whatever you wish. Alice can use the Cure spell and assist Yuri in battle. Walk over to the bridge south of where you found Alice and examine the bank below it before crossing to get a Mermaid’s Tear. Cross the bridge to enter the next section of the Plains.
Alice will state that the duo needs to operate the sluices to pass once they enter this next area. There are a couple of metal sluices here with glinting handles as well as a Save Point in the lower right. Save your game before touching anything, because you will need to play a mini game using the Judgement Ring. It is possible to get a special prize if you pull the ring game off perfectly and saving before attempting it will allow you to reload and try again if you fail, though the item in question is not all that special.
After saving, examine the gate in the center of the screen and Yuri will observe that it is missing its handle. Now you can check out the gates to the left to play one of the Judgement Ring games and get the handle. The gate to the north is a Spin Ring, while the one to the south is a Push Ring. I recommend doing the Push Ring, because you can get it fairly easily by rapidly pressing the X Button to get the line in the red field, then slow down to keep it there. Reload the game if you fail, because the prize you get is based on how many tries it took to get the handle.* Win the ring game and you will get a SluiceGateHandle regardless of how many attempts it took.
Take the handle to the gate in the center of the screen and examine the right side of the gate to use it. Another cutscene will play out and Yuri will have to fight Fox Face. This is another battle Yuri cannot win, so do not waste items trying to heal.
*The prize can range from a Leather Belt to a Thera Leaf and is found after the ditch drains. None of these items are extremely important so it is not necessary to get the mini game on the first try.
2. Graveyard
After getting defeated by Fox Face, Yuri will awaken in the Graveyard. This area is an important feature of the game, so refer to Section 1C of this guide for more information on it. A glowing green tombstone is located just left of the entrance gate. Examine it to learn that it is the Earth Stone and battle Raging Tiger. This foe is easy to defeat and Yuri will earn the Raging Tiger Fusion Soul after the battle. Be sure to go into the Equipment menu and equip the Raging Tiger Soul to get another Fusion transformation in battle.
Yuri can look at the other graves, but there is little of import here at the moment. Head over to the large door on the left when you are ready to leave. The spooky masks that guard the door will tell you about the Malice System. Yuri will have to battle a creature called “Evil” during this scene, but it should be easy to slay with a few basic attacks. Exit the Graveyard via the gate to the right to return to the plains.
D. Plains Part 2
Judgement Ring Mini Game Prize: Leather Belt, Thera Seed, or Thera Leaf
Warning: The Malice Meter, which can be viewed in the Status Screen, will be active upon returning to the Plains. You will need to visit the Graveyard while at a Save Point or on the World Map to clear Malice every now and then or a powerful enemy that can easily defeat the party will appear when the meter is red.
Head back to the area where you found Alice by going to the exit left of the Save Point. You will notice a box in the newly drained ditch near the bridge, Open it to get a Leather Belt, Thera Seed, or Thera Leaf depending on how many tries it took to get the SluiceGateHandle. The Leather Belt is the best prize, but the consolation prizes are still useful.
Cross the bridge and go down the newly exposed ramp to the left. Follow the trail to get to the next area, which is a simple path leading to a village. Be sure to open the box that is just left of the village gate to get a Holy Mother Bust. Approach the gate to enter the village of Zhaoyang.
C. Zhaoyang Village
| Items | Angel’s Feather | Bronze Arrowhead | Tent | Talisman of Luck | Anti-Cat Powder |
| Phoenix Tail | Metal Vessel | Torch | Shell Bracelet | Guild Card | — |
Head back to the gate after talking to the children and entering the village. Search the ground in the upper left to find an Angel’s Feather.

After that, go back to the main road of the village and look for an old man standing in front of a merchant’s stall. Walk to the ruined building right of the old man and check the ground there to get a Bronze Arrowhead. You can talk to the people on this thoroughfare to get a few hints about the nature of this village.
Go north to reach an area with a Save Point and a well. Examine the spot on the right side of the well to get a Tent. The ground by a house in the northeast is home to a Luck Talisman. Take a moment to save your game and visit the merchant wearing a straw hat, then continue north to learn the awful secret of the village.
Yuri and Alice will return to the well area and the children from before will invite them into their house. Step inside (press X at the door to enter the building) to meet the mayor and the heroes will automatically rest. The children will return and the party will have to fight a pair of Hellcats. Despite being rather durable compared to most of the monsters you have fought thus far, the Hellcats are pushovers as long as you focus your attacks on one at a time.
Leave the house and save your game if you wish. You can also talk to the merchant near the Save Point if you need anything. Be careful, because monsters will attack in this village now that its true form has been revealed. These creatures can cause status ailments like confusion, so try to eliminate them quickly or run from battle. Remember you can buy restorative items from the merchant by the well if you are worried about negative status effects.This is a decent place to level up a bit, so fight a few battles here if you do not feel strong enough.
Go north to the skull shrine from earlier. The mayor will confront the party, then flee. Go back to the main gate. The mayor may pop up from time to time and taunt the party, but you cannot do much about her right now. Once at the gate, Yuri will meet Zhuzhen and Meiyuan.
Get ready for a long dialogue session while the duo explain what is going on in this village. Zhuzhen will join the party, bringing powerful attack magic with him. Do not equip Zhuzhen with anything important or spend money on him right now, because he will not remain in the party for long. Meiyuan can increase a weapon’s damage AND widen its hit area on the Judgement Ring for a fee. He can also reset the upgrades for a weapon, though I am not sure why anyone would want to do such a thing.
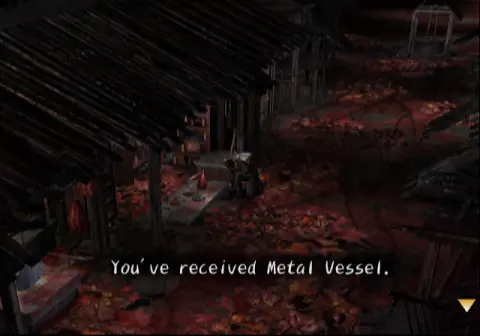
Now head back to the mayor’s house where you fought the Hellcats earlier. Look around a bit and the mayor will appear. Zhuzhen will give the party the Anti-Cat Powder after the mayor vanishes again. Search the dresser in the upper right to get a Phoenix Tail before leaving.
You will need a metal vessel and a torch to burn the Anti-Cat Powder as Zhuzhen instructed. Check the shop stall on the main road of town to get the Metal Vessel after completing a simple Judgement Ring game. Head over to the gate and examine the ground behind Meiyuan to get the Torch.
Return to the Save Point by the well, heal up, save, and prepare to fight the first real boss of Shadow Hearts. Enter the house once more and check the pit in the center of the building to use the Anti-Cat Powder, Metal Vessel, and Torch. The ritual will *ahem* smoke the mayor out of her hiding place and she will transform before attacking the party.
=====================
Boss: Felinus
| Drops | Lottery Ticket |
Felinus mainly strikes the whole party with Wind Fang, which does about 15 damage. Zhuzhen can dish out a lot of damage with Ogre Flame Dance, so use it as much as possible. Yuri should use his Raging Tiger form and Alice should heal or attack as needed. A few hits from Ogre Flame Dance and Raging Tiger’s Flying Stones skill, should kill Felinus in a few turns, so you may not even need to heal.
=====================
Your work is not done yet, so go back to the Save Point and rest. Remember to buy a Tent from the merchant if you need one. Enter the skull shrine to the north when you are ready to finish things at this village. Examine the small shrine on the other side of the skulls now that they have moved and the battle with Yamaraja will commence.
=====================
Boss: Yamaraja
| Drops | Star Brooch |
Yamaraja is much tougher than Felinus. His Whirlpool spell hits for about 30 damage and can halve the Hit space of a character’s Judgement Ring. He can also inflict a lot of pain with his melee attacks. Watch out for Flash Flood, which can deal about 40 damage. Use Yuri’s Death Emperor and Zhuzhen’s Ogre Flame Dance in this battle. While Yamaraja may be able to dish it out, he cannot take it and the battle will end quickly. Just keep an eye on everyone’s HP and have Alice heal whenever someone drops below 40 HP.
=====================
The trio will talk for a while after the battle. Check the shrine after the conversation to get a Shell Bracelet, then return to the gate. Look for the merchant with the straw hat on the way out and talk to him to get a Guild Card. Take anything you want to hold onto off of Zhuzhen, because he will leave the party once you go through the gate. The World Map will pop up after Zhu leaves. Use this opportunity to save before going to the next town.
D. Fengtian
| Items | Talisman of Luck | Pedometer | Lottery Ticket |
A rather long bit of story exposition will begin when you enter Fengtian. Check behind and slightly to the right the fountain where you regain control after the scene to get a Talisman of Luck. The man in green to the left of the fountain is a member of the World Lottery, you can use your Lottery Tickets by talking to members of the lottery to win all sorts of prizes. See Section VI, Part A for more information on the Lottery. For now, I recommend saving your game before playing the lottery in case you do not like your prize. Make sure you play the lottery at least once with every Lottery Member when you find them if you want to find Member 00 at the end of the game.
Talk to the “Silent Peddler” wearing a Straw Hat in green to get a Pedometer. Equip this item on a party member and it will count their steps in dangerous areas. You can visit certain NPCs once you get enough steps and use them to “buy” special items. See Section V, Part B for more on the Pedometer. Yuri is a good candidate for the Pedometer, since he has high stats. It is also a good idea to equip this item while leveling up in relatively safe areas and replace it with something else in more dangerous areas.
Speak to Alice after talking to everyone around the fountain, then walk over to the street on the left. Look for a box that has a Tent inside of it in the alley just north of the street entrance. Walk west a bit and a shop keeper will invite you into his store. Entering the shop will trigger a brief scene with the “Alluring Spy”. The scene will switch to the shop with the player in control of Yuri. Use the Save Point in the shop, especially if you plan on trying for discounts with the Guild Card. Meiyuan is here, but you should save your money for the new weapons sold in the shop.
Buy a ShootingStarTome and Knuckle Blade first, since weapons are generally more helpful than armor. Using the Guild Card to get a discount is also a good idea. Get a Leather Vest and Skirt if you have enough money left over. If not, you will get a chance to earn some money soon. This is also a good time to stock up on Thera Leaves, Mana Leaves, and Tents. The Gold Hourglass is also a nice buy, because it will make it easier to use the Judgement Ring in combat. Talk to Alice when you are ready to leave.
Another event will take place and the way to the Sewers will open up. You can return to the shop any time to talk to the Lottery Member 15, Silent Peddler, and the merchant as well as use the Save Point. Examine the ground under the hanging banner northwest of the manhole to get a Lottery Ticket. Hop down the open manhole when you are ready to enter the Sewers.
Tip: You may want to save your game and try your luck with the Lottery Ticket you got earlier by talking to Lottery Member 15 in the shop. The best prize he gives is the Jade Lariat, which increases the Hit size of its wearer’s Judgement Ring. You can always reload and try again if you fail.
E. Fengtian Sewers
| Items | Gold Hourglass | Type 94 Pistol | Sealing Stone | RosewoodBreacelet |
Make sure you are prepared when you enter this area, because there are random battles here. The monsters in this sewer can paralyze the player’s party members, so bring a few Angel’s Feathers along. Level up and earn some money. This is also a good place to get water and light Soul Energy.
Check the steps leading into water right of the entrance ladder to get a Gold Hourglass. Head, north, then east down the tunnel from the steps to get to a Save Point with a ladder near it. Try to climb the ladder to learn that it is sealed by magic. Go west from the ladder to get back to the entrance tunnel where you will find a chest to the north. Open it to receive a Type 94 Pistol.
Backtrack to the entrance ladder and go north. You will see a path leading off to the left. Take the lower part of this path to find a box with a Pure Seed, then return to the previous screen and take the higher path to get to the hole in the wall north of the chest you just opened. A brief scene will begin when you reach the hole, check it a second time to find a Lottery Ticket.
Go back to the entrance once again and you will find Magarete, who will join the party. Be sure to give her the Type 94 Pistol you just picked up. Check the ladder by the Save Point on the east side of the sewer after Magarete joins and she will explain that you need to defeat a guardian to unlock the seal on the manhole cover.
Return to the entrance ladder once again and head to the north end of the sewer while keeping to the wall on the left. You should see a crumbled wall and a glowing blue orb once you reach the end of the line. Check the orb to get the Sealing Stone. You can also get a RosewoodBracelet by checking the corner right of the Sealing Stone. Go back to the sealed exit by the Save Point. Rest with a Tent and save your game (a boss is coming up), then examine the ladder to place the Sealing Stone in the manhole cover. Two Kappas and a Water Tiger will attack the party once you place the Sealing Stone.
Tip: Try to get everyone up to level 11 or so before setting the Seal Stone. The boss of the sewers is pretty tough at level 9.
=====================
Boss: Water Tiger and Kappa x2
| Drops | Tent x2 | Spikes |
The Water Tiger and Kappas can dish out a lot of damage. Keep everyone healed up with Alice’s Cure spell and use Magarete’s Grenade ability to eliminate the Kappas as well as soften up the Water Tiger. Yuri should use Death Emperor and focus on taking out the Kappas one at a time, because they can heal themselves as well as the Water Tiger. Watch your SP in this battle. Alice is in the greatest danger of running out of SP, but it can happen to everyone if the battle goes on long enough, so have a Pure Leaf or two ready.
=====================
Save and heal up before ascending the ladder, because a pair of soldiers and a boss will attack the party after you surface. The Elite Guards should not present much of a challenge despite their name, but they will attack in two waves making it important to keep everyone healed. Another dialogue event will take place and the plane the party was trying to steal will explode. Yuri and the gang will have to fight Beast Dog after the conversation.
=====================
Boss: Beast Dog
| Drops | Voodoo Doll |
Beast Dog is really dangerous thanks to his Breath of Fire skill, which can roast the entire party for about 30-60 HP. Expect this boss to raise its attack power and use some pretty devastating melee attacks. Alice’s Blessed Light spell is really effective against Beast Dog if you are about level 11, but she will need to prioritize healing wounded allies unless you brought a lot of Thera Leaves. Yuri can dish out a lot of damage to this boss in Man Dragon form with Flash Flood, but Death Emperor or his normal form will suffice if you did not pick up Man Dragon.
Margarete can do a fair amount of damage to Beast Dog with Grenade, but she may be better off healing wounded allies with Thera Leaves in this fight if you have Alice’s Blessed Light magic. While Beast Dog is capable of dealing a lot of damage, he is another boss that cannot take a lot of punishment, so he should not last long.
=====================
The party will discuss the situation a bit after the boss and Magarete will snatch an airplane. The party will fly to Dalian and the game will shift over to the World Map where you should save as usual.
F. Dalian
| Items | Lottery Ticket x2 | Talisman of Luck | Silver Hourglass | TeaofTheHealer |
| Seal of Aura | Tent | Flare Brooch | Dried Fish | 2000 Cash |
Yuri will have a flashback on the way to Dalian. Open the chest on the north end of the dock once you are free to roam around to get a Lottery Ticket.
The man standing in front of the fenced-in pasture south of the boat will ask you to find his turtle, agreeing to do so will start a mini-game where Yuri has to check around the pasture to find the turtle. The prize Yuri gets is based on how many tries it takes him to find the man’s turtle. I recommend going to the next screen west of the pasture and saving at the Save Point before talking to the man, because you must find the turtle in two tries to get the best prize, which happens to be another Lottery Ticket. Save your game and reload if you do not find the turtle on your first or second try. The game is random so it may take a few attempts to get the Lottery Ticket.
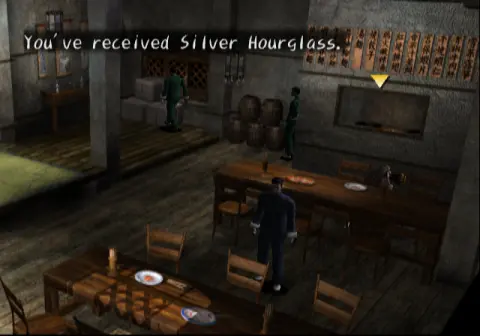
Yuri can get a Talisman of Luck by checking the racks west of the turtle pasture. As mentioned before, the next screen features a Save Point as well as plenty of people to talk to in the bustling town of Dalian. Pop into the building with the red chinese characters near the entrance to this screen and talk to the man next to the counter to buy some items. I recommend purchasing a Casual Belt or two. You should also get about 5 Thera and 5 Mana Leaves as well as a few Pure Leaves for the next area. Check behind the table near the counter to get a Silver Hourglass.
Leave the restaurant and go southeast to a pair of crates. Check the ground just north of the crates (an old man will be standing near here) to get a TeaofTheHealer. After that, enter the shack in the northwest (right above the Save Point) to watch a brief bit of story exposition. Do not leave the inn after the dialogue, go downstairs instead.
You should see an armory in the basement. Talk to the clerk and buy a Hexagonal Staff and Leather Vest for a new ally that will join shortly. You can pick up a Seal of Aura in the northeast corner. There is also a chest behind the shopkeeper, but the boy guarding the steps will not let Yuri pass until later.
Head back up the steps and search the boxes to the left to get a Tent. Unequip Alice of anything important before you leave the inn. Save your game once outside, then get ready to watch a lengthy cutscene involving Li Li after you take a few steps east of the Save Point. Alice will be incapacitated and removed from the party. Zhuzhen will join the party in Alice’s place. Equip him with the Hexagonal Staff and Leather Vest you bought at the armory under the inn.
Return to the dock in the north and search the lower left corner of the turtle pasture to get an R. Phoenix Talon. Monsters will attack the party now that it is night time at the docks, so use this opportunity to make sure everyone is about level 12. In fact, Zhuzhen learns Nourishing Potion at level 12, so it is worth leveling him up if you want to use magic to heal instead of items.
You can also visit the item and weapon shops if needed. Save before touching the glowing red seal in the upper right, because it will trigger a boss battle if interacted with.
Double check your gear and make sure Yuri is equipped with the Tornado Soul if you have it, then examine the glowing seal to start the battle with Yamaraja.
Tip: This is a good place to get Wind and Light Spirit Energy. Be sure to visit the Graveyard and collect any new Fusion Souls that may be available before the boss.
=====================
Boss: Yamaraja (Wind)
| Drops | Seal of Life |
Yamaraja is really dangerous unless you put a lot of effort into grinding and get everyone up to level 14 or so. Even then, this boss is no pushover. The main source of concern is Yamaraja’s melee combo, which can do about 100 damage in total if every attack hits, but his Shockwave spell can also hit the entire party for 50-60 damage.
Physical attacks are basically useless against this boss, so use magic to take him out, Magarete’s Grenade and Zhuzhen’s Ogre Flamedance do a fair amount of damage, but it’s Yuri’s Tornado form that really shines in this fight. Use Wind Shear while in Tornado form to hit this boss for roughly 125 damage every turn. Have him use Death Emperor if you do not have Tornado. Make sure you keep everyone healed. If you are level 12 you will have to heal every time someone takes damage.
=====================
Zhuzhen will suggest going back to the restaurant after the battle, so step back inside the building with the red sign east of the Save Point. Alice will rejoin the crew and everyone will rest at the inn. Meiyuan will be at the inn when Yuri wakes up, though I do not recommend upgrading your weapons unless you are having a lot of trouble.
Visit the armory in the basement of the inn and speak to the boy standing at the steps behind the counter. He will let you pass; open the chest he was blocking to receive a Flare Brooch, a powerful accessory that will boost some of Yuri’s stats and decrease the amount of SP he consumes when transforming!
Leave the inn and talk to the woman standing by the fish racks to get some Dried Fish for Sea Mother. Enter the restaurant and talk to Sea Mother to give her the Dried Fish. In gratitude, she will tell Yuri about some hidden money just left of the entrance to the Sea Turtle Restaurant. You may want to save your game before attempting to get this treasure, because the prize is based on a Judgement Ring game. Step outside, take three steps to the left from the door and examine the ground to start the ring game. Get all three hits and Yuri will find 2000 Cash. The prize will be smaller if you just get one or two hits.
Talk to Lottery Member 14 in the restaurant before leaving. Try to win the best prize from him (saving before playing is recommended as always) to get a Pocket Watch, which protects its wearer from nasty Judgement Ring debuffs. Go to the port in the northern part of Dalian when you are ready to move on.
Talk to the Silent Peddler in the northern part of the dock if you want to pick up some items. Do not buy the Iron Clogs if they are available, the 15 point Agility penalty is not worth the reduced Judgement Ring Indicator speed.
G. Smuggler’s Boat
| Items | Rosewood Bracelet | Witch’s Broth | Lottery Ticket |
Yuri will be seasick when you get control of him, so he will not be able to move quickly. Check the bed to the left to find a semi-hidden chest that contains a Rosewood Bracelet. Go topside to talk to Magarete a bit, then head over to the front of the boat. Check the barrels in front of the cabin to get a Witch’s Broth. Zhuzhen can be found at the bow, talk to him if you want a bit of info on what is going on.
If you examine the door to the cabin on top of the boat, Yuri will listen in on a conversation between Kawashima and Kato. Go back to Alice when you are finished exploring. Magarete will warn Alice and Yuri that something is going on after they talk a bit. Use the Save Point by the bed to save your game, then head up top.
Enter the cabin and search the boxes right of the wheel to find a Lottery Ticket. Exit the cabin and go to the front of the ship to find out what is going on. Li Li will show up and threaten everyone on board. Sea Mother will also turn up and the party will end up in the bedroom again.
The fishing boat will be infested with monsters, so be prepared to fight when going back up to the deck. Enter the wheelhouse and defeat the Ogre Flames attacking Kato and Kawashima. You can reenter the wheelhouse after the battle to talk to Kato, who also happens to be Lottery Member No. 13. It is possible to win some Iron Clogs from Kato, but they are not worth the ticket, so go with another item.
Go back to the bedroom and fight the monsters attacking Sea Mother after you save Kawashima and Kato. Save your game again after you rescue Sea Mother, then go over to Zhuzhen, who is attempting to seal the evil spirit. Talk to Zhuzhen and more monsters will attack. Talk to Zhuzhen again when you are ready to fight Li Li.
=====================
Boss: Li Li
| Drops | W. Tiger Hair |
Li Li is dark elemental and it is unlikely Yuri has the light elemental fusion (Heaven’s Fiend) at this point, but you should use it if you have it. Otherwise, have him transform into one of the other creatures aside from Death Emperor. Alice’s Blessed Light spell is really effective vs. Li Li, so have her cast it every turn. Magarete should take up the role of healer by using Thera Leaves to heal anyone who is wounded since her attacks are not all that effective on Li Li and Alice will be busy dealing the damage.
Li Li can do a fair amount of damage to one target with Dark Messenger and paralyze a single character with a medium strength melee attack. Use an Angel’s Feather to cure anyone who gets paralyzed. Li Li should not last long between Yuri’s melee attacks and Alice’s Blessed Light.
=====================
Dehuai will show up after the battle and unleash Li Li’s full power, forcing the party to fight her again.
=====================
Boss: Li Li (Round 2)
| Drops | B. Tortoise Fang |
I recommend healing everyone immediately. Be sure to use Mana Leaves to top off Alice’s MP, since Blessed Light works just as well in this battle as it did the last one. It also helps to use items like the Gold Hourglass and Bronze Arrowhead to give the party as much of an advantage as they can get, because Li Li hits hard.
The party will often have to focus on healing unless you happen to be level 16 or higher, since Li Li can hit the entire party for upwards of 50 damage with Hate Storm. Her paralysis attack and regular melee combo are also stronger. Luckily, Blessed Light is enough to carry the party to victory, even if you do not have Heaven’s Fiend.
=====================
A cinematic will begin after Li Li is finally defeated. Afterwards the party will be on the world map and you can enter Shanghai.
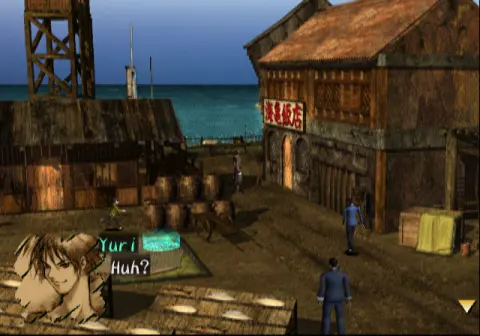
H. Shanghai (Huayuan, First Visit)
| Items | Mana Seed | Pilgrim’s Staff | Lottery Ticket x2 |
| TalismanofMercy | B. Dragon Horn | Seal of Life | — |
Shadow Hearts starts to open up a bit once the player enters Shanghai, because it is possible to leave and revisit Shanghai as you please. A flashback will begin once you enter the Huayuan district of Shanghai. During the flashback you will take control of Colonel Hyuga in a brief fight with a pair of Kappas and Wugui. This battle is basically impossible to lose, so defeat the enemy however you like.
After the flashback, you will be in control of Zhuzhen. Exit the hotel room and talk to the Silent Peddler in the hallway if you wish, then head downstairs. You can use the Save Point here and talk to Magarete.
Step out of the hotel and look for a chest across from the hotel door to get a Pilgrim’s Staff. Look for some steps leading down to a building with a sign that reads “Entertainment Show”. Check the barrel south of the steps to get a Mana Seed. You will also find a wagon with a barrel on top of it just above the steps, search the wagon to get a Lottery Ticket.
Walk east to get to the next screen. You will see a yellow sign right of the entrance, check below the sign to get a TalismanofMercy. Head over to the intersection to the south and you should see a red sign near the steps leading down. Search under the red sign to get a B. Dragon Horn. There are a lot of shops here, but they are all closed.
Head south to the docks and check the barrel to the right of the man in blue to get a Seal of Life. Hop on the boat you used to get to Shanghai and enter the bedroom below decks. Talk to the boy who happens to be Lottery Member No. 12. As usual, you may want to save before attempting the lottery. This lottery member has a Star Card, which can get you a discount on shop items.
Tip: Equip the Pocket Watch to make Lottery Member No. 12’s Judgement Indicator spin more slowly.
Head back over to the hotel screen when you are ready to get on with the story. Enter the building with the Entertainment Show sign in the south. Another cutscene will play, check the barrel near the steps after you get control of Zhuzhen again to receive a Lottery Ticket. Talk to the guy behind the bar to start another cutscene. Zhuzhen will have to fight a couple of Kappas after the scene. Wugui will attack Zhuzhen after he defeats the Kappas. This battle is impossible to win, because Wugui will finish Zhu off with Game of Death no matter what happens.
Yuri will show up to save the day. Wugui’s Game of Death does not work on Yuri, so transform into Death Emperor during the rematch with Wugui and beat him down with melee attacks. A lengthy cutscene will take place after the fight with Wugui. You will get control over Yuri, Zhuzhen, and Alice after the scene. Now it’s time to set for Shadow Hearts’ first major dungeon: The Temple Ruins.
I. Temple Ruins
| Items | Lottery Ticket | TalismanofMercy x2 | Tent x3 | Bronze Arrowhead |
| TeaOfTheHealer | W. Tiger Hair | Bronze Dagger | Mana Seed x2 | Bell Bracelet |
| B. Tortoise Fang | Thera Seed x2 | Silver Hourglass | Western Belt | Voodoo Doll |
| Gold Hourglass | Witch’s Broth | Soul Benediction | Leonardo’s Bear | Seal of Wisdom |
| Pure Seed | Wood Token | Studded Cap | FruitOfYggdrasil | — |
Make sure your game is saved, then leave the hotel and walk north up the street to get to the world map. Select the Temple Ruins to enter the dungeon.
Enter the temple proper and step into the shrine area near the center of the screen. Look behind the pillar on the left to get a Lottery Ticket. Take a look at the shrine in the center of the room. Zhuzhen will leave the party and tell everyone to look around while he tries to remember how to unlock the temple.
Step away from the shrine and go down the path on the left to find “The Smuggler Boss” and ”Courier Subordinate” standing by a locked gate. You can buy some items from Kato (AKA The Courier Subordinate) if you wish. He sells standard healing items as well as Studded Caps and Western Belts which give nice Defense and Attack boosts respectively. You should also buy Leonardo’s Bear, which protects against instant death magic.
Use the Save Point south of Kato if you wish and open the box by it to get a TalismanofMercy. Return to Zhuzhen at the shrine and have a word with him. He will open a stairway leading deeper into the temple.
Go downstairs and follow the tunnel to another Save Point. Master Xioafang will appear and inform the party that they must pass several trials to enter the heart of the temple. He will then pick Yuri and Zhuzhen to enter the first trial, Dan Tian Court. Xioafang will seal item use in combat, but you can still heal up between fights.
1. Dan Tian Court
Save and talk to Xioafang before you actually enter the court. He sells a Steel Claw for Yuri and a Studded Harness for both characters. You should already have a Pilgrim’s Staff for Zhuzhen, but feel free to buy one for him if you do not possess one.
Tip: Take a second to clear out the Malice Meter by visiting the Graveyard if you do not want Fox Face attacking the party.
Enter the open door left of Xioafang to begin the trial. Open the box near the entrance to get a Tent. Continue along the path and get ready for a tricky maze. Use the green seal on the ground to warp to the maze by pressing the X Button. It is easy to get lost in this maze, so try to memorize the way you came and follow the instructions carefully.
Run right from the warp seal to find an empty chest, then go north to an intersection with a chest that contains a Bronze Arrowhead in the center. After grabbing the arrowhead, take the passage in the lower left to get to a yellow warp seal.

Use the yellow seal to warp to the next part of this maze. Xioafang will be just north of the seal when you appear in the next area. He will kindly sell you some items if you need them. Continue north past Xiaofang and you will eventually see another empty box on the right hand wall.
Keep going north from the empty box to get a TeaOfTheHealer on the next screen. From there, head north a few paces, then east when you see a pillar with a lighter section of wall and floor by it. Open the box in the hallway to get a W. Tiger Hair. Return to the previous hallway, then go down the passage left of the chest that held the TeaOfTheHealer to get to the next screen.
Open the box near the entrance to this screen to obtain a Bronze Dagger.
Go south from the dagger chest to another screen where you will find an empty chest. Enter the passage left of the empty chest. On this screen you will find another empty box to the southwest. Walk south from this empty container to find another chest with a TalismanOfMercy inside. Backtrack to the previous hallway and go north from the empty box to a chest that contains a Mana Seed.
Next, go down the tunnel in the lower left to get a Bell Bracelet, then return to the previous intersection. Go north past the chest that contained the Mana Seed and you will arrive at a path that splits left and right. Take the left path. On the next screen, go north and use the red seal at the end of the passage.
Xiaofang will give you another opportunity to buy items from him on the other side of the seal. Make sure you have a few Tents and equip Zhuzhen with the Bell bracelet if you have not already done so, then head north. Keep going until you pass through a door to a room with a Save Point. Heal up, save, then interact with the altar to fight the boss: Xieshi.
Tip: Equip Yuri with the Man Dragon Soul before fighting the boss.
=====================
Boss: Xieshi
| Drops | Jade Lariat |
This fire based…thing can be quite dangerous. Use Yuri’s Man Dragon fusion on Xieshi and cast Flash Flood every turn to dish out heavy damage. Zhuzhen will likely have to heal every round. Xieshi can hit pretty hard with his melee attacks, but the real problem is Flaming Arm of Death, which can silence its targets and deals about 60 damage to both heroes. Luckily, Zhuzhen’s Nourishing Potion is enough to keep the duo on their feet. This boss has a moderate amount of HP, so expect the battle to last four or five turns unless you are a high level.
=====================
The scene will switch to Magarete and Alice after the boss battle.
2. Jiang Palace
Xiaofang being the considerate guy that he is will seal your special skills, rendering Magarete and Alice reliant on standard attacks. Luckily they can also fall back on items. Talk to the lad and buy a Tome of the Moon as well as a Nanbu Pistol. A pair of Studded Bustiers is also a wise purchase. As usual, saving your game before venturing forth is strongly encouraged.
Tip: Make sure Alice is in the front row so she does more damage.
Enter the door to the right of Xiaofang after making preparations. Another complex maze awaits the ladies, so follow directions closely to avoid getting lost. Open the chest on the other side of the door to get another Tent, then go north to an intersection. Follow the passage north from the intersection to a green seal that will take you to the next section of the maze.
After using the green seal to warp to the next section of Jiang Palace, walk west through a narrow passage until you reach an intersection with an empty box near its center. Enter the tunnel to the north to get to a small room with a B. Tortoise Fang. Head back to the intersection and take the passage in the lower left to reach another intersection.
Continue south until you find a yellow seal that will take you to a hallway with Xiaofang. Buy anything you need from him, then go right and continue through another screen to a box that contains a Thera Seed. Walk south from the box to an intersection where you will find an empty treasure chest. Take the upper right path in this room to find a narrow tunnel that leads to yet another empty box.
Head south from the empty chest to a horseshoe shaped passage with a chest that holds a Silver Hourglass then walk west to a screen with an empty chest. Keep going west to an intersection. Look for a path going west in the lower half of this intersection. You will find a box with a Western Belt in it if you went the correct way. Hop into the hallway south of the Western Belt to find a chest that contains a Voodoo Doll, then return to the previous screen and go into the tunnel in the northern end of the hallway.
Continue north until you come to a passage that forks east and west. Take the eastern path to get back to where you found the Thera Seed a while back. Head south from the box, then go down the passage on the right when you come to the next screen. Keep moving right through another narrow passage and you will come to a familiar intersection with another empty box. Duck into the tunnel in the upper right, then open the box near the start of the next screen to get a Gold Hourglass. Walk east some more to a hallway that turns north to a tunnel where you will find a box that holds a Witch’s Broth.
A red seal is just north of the Witch’s Broth. Xiaofang will be waiting for you south of the seal after you warp, so buy anything you may need. I recommend buying and equipping Rosewood Bracelets for the upcoming boss. Head north to a door that leads to a shrine like the one from the last maze. Use the Save Point and rest up. You may also want to use this opportunity to level up a bit, since it helps to have both women at level 15 or 16 for the boss of this maze. Interact with the shrine when you are ready to battle Baigu.
Note: Alice will leave the party in the near future, so make sure she is not wearing anything you want to use while she is absent.
=====================
Boss: Baigu
| Drops | Coral Lariat |
Baigu is not exactly a tough boss, but the fact that you cannot use skills complicates matters. Items that make it easier to get Judgement Ring hits can make this battle a bit less painful, but you will ultimately have to rely on physical attacks to slay Baigu. Shining Arm of Death will hit both girls for 30-50 damage and can paralyze them if they do not have Rosewood Bracelets equipped. Use an Angel’s Feather to remove paralysis if you neglected to equip the bracelets.
Remember to heal up with Thera Leaves or Seeds and watch your SP in this match. Both Magarete and Alice have fairly poor SP. Luckily, the duo can finish this thing off pretty quickly if you can get red hits on the Judgement Ring.
=====================
With the defeat of Baigu, a cutscene will play and Ni Wan Palace will open up.
3. Ni Wan Palace
You will regain control of Yuri after the cutscene, but Xiaofang will seal your skills and items this time…ouch. Use the Save Point in the shrine room before moving out. Check out the Graveyard while you are at it. Clearing the Malice Meter is not a bad idea and all the kills you got in the two mazes (even those that did not involve Yuri) count towards soul energy, so you may be able to grab a new fusion or two.
Go through the door right of the shrine when you are ready to move on with the quest. You should see a chest with a Tent in it on the next screen. Continue along the hallway until you come to a fork in the road. Turn east at the fork and keep going until you reach another intersection with a path leading north and one leading east. Take the north path and you will come to a room with a green seal that will warp the party to another area of the maze.
Walk north from the seal until you reach another chest that just so happens to be empty. Walk north from that chest to another screen where you will find a box that contains a Thera Seed. Head down the passage in the lower left part of the Thera Seed hallway, then go into the tunnel to the north to get a Soul Benediction from a chest.
Next, go into the hallway northeast of the benediction. You will arrive at another intersection with an empty box at its center. Head south, which will bring you back to a familiar intersection. Go east on this screen to find a small hallway with a Mana Seed box. Walk right and follow the passage until you get to another intersection that branches off right and left. Take the path on the right to get to a tunnel with a Leonardo’s Bear and a yellow seal.
Use the seal to warp to a tunnel where Xiaofang is waiting. Buy a few restorative items if you need them. Go left, then left a second time at the intersection. You will end up in a long hallway with several branching paths. Check out the path to the north to get a Seal of Wisdom, then return to the intersection you just came from. Take the lower left path to an identical intersection where you will find yet another empty box to the south. Walk south for two screens to find Xiaofang, who will reveal himself to be a lottery member. The Flash Badge he gives you if you manage to hit red is a very good accessory, thanks to the massive Agility boost it provides, but it also makes the Judgement Ring Indicator spin twice as fast.
Head North from Lottery Member Xiaofang twice to get back to the empty chest hallway you just came from. Take the hallway left of the empty box to get to an intersection. Go south at the intersection and you will find a chest with a Pure Seed. Continue south to find another box, which contains a Wood Token that will be useful later on. Turn around and go north for two screens, then turn west at the intersection. There should be a box that contains a Studded Cap on the next screen.
Next, go south from the Studded Cap and follow the long passage until you come to a red seal that will warp you to another hallway where Xiaofang is waiting. The uh…lad will tell you that you need a Wood Token (which you already picked up) to awaken the guard. He will also offer to sell you items as usual. Be sure to grab anything you need or want before moving onward.
Head north to a small door to get to a room with a shrine and Save Point. Rest up and give Yuri the Pocket Watch if you have it. You should also make sure both Yuri and Zhuzhen are wearing things that boost physical attack power, like Western Belts. Interact with the shrine to battle the boss.
=====================
Boss: Qinggu
| Drops | Leonardo’s Bear |
This creature can cast Icy Breath which does about 25-40 damage depending on the target’s magic resistance. It also casts LargeWhirlpool, which can cause Narrow Ring status and hits both characters for about 30 damage. Last, but not least, Qinggu can deal respectable amounts of damage with its melee attack.
Expect a fairly long and drawn out confrontation with Qinggu. Without magic, Zhuzhen is nearly useless and Yuri is stuck dealing the bulk of the damage. Even worse, you cannot rely on items to speed up the battle or heal the duo. This makes getting good Judgement Ring hits really important, so pay close attention to the ring when executing attacks.
=====================
Xiaofang will open the door to Nirvana Palace after the boss is defeated. Save your game before going forward.
4. Samsara Pavillion
Enter the small door left of the shrine to start a cutscene With Kawashima and Kato. Afterwards, Yuri and the rest of the team will meet with Master Xifa who will restore their powers and give them a FruitOfYggdrasil for their trouble. Dehuai will crash the party, taking Alice with him. The party will be transported to the Samsara Pavillion. Equip Zhuzhen and Magarete with Leonardo’s Bears and Yuri with the Heaven’s Fiend Fusion if you have it, then walk east to encounter Wugui who will transform into Yamaraja: War.
=====================
Boss: Yamaraja (War)
| Drops | R. Phoenix Talon |
This incarnation of Yamaraja is extremely dangerous, because it can wipe out the entire party (aside from Yuri) with Game of Death unless they have the Leonardo’s Bear accessory equipped. Yamraja also hits the entire party for about 60 damage with Nightmare and can hurt single targets fairly badly with its melee combo.
Special attacks heal Yamaraja, so stick to melee attacks. Zhuzhen does little damage and should heal with Nourishing Potion if needed, while Yuri and Magarete should dish out damage with their regular attacks. Yuri’s Heaven’s Fiend Fusion is good in this fight if you need to heal the entire party.
=====================
The party will end up back in Shanghai after the fight.
J. Shanghai (Huayuan, Second Visit)
| Items | Yawang Gate Key | TeaOftheHealer |
| Lottery Ticket | Leonardo’s Bear | Monkey Paw |
To begin, leave the room and use the Save Point, that way you can reload the game in the event that you make a mistake, because a very important side quest is coming up. Visit the Silent Peddler near the front desk if you wish to buy something with your Pedometer steps. Go back upstairs and visit the room next door to where the party awoke. Kawashima and Kato will fill Yuri in on recent events.
Yuri will leave the hotel automatically. Enter Mr. Zhen’s bar to the southwest after Zhuzhen and Magarete rejoin the party. Leave the bar and enemy soldiers will be in the streets. Yuri can be attacked randomly and by the soldiers if he talks to them. Walk north a bit and Kato will come rushing out to warn you about the reason behind the invasion. Head over to the docks by going east, then south. Examine the trap door on the bow of the boat to get the Yawang Gate Key.
Return to the hotel and enter the room on the right on the second floor. Some sergeants will attack the party. They are stronger than the soldiers found in the streets, but you should be able to defeat them without too much effort. The scene will change to Kuihai Tower with Alice and Dehuai. It is very important to answer all of Dehuai’s questions with the first option if you want to unlock the Kowloon Fortress side quest.*
*Important: You MUST choose the first option three times when Dehuai is talking to Alice to unlock the Kowloon Side Quest. Choose another answer and Kowloon will be unavailable.
The party will arrive at Kuihai Tower after the scene with Alice. Walk the other way and return to Shanghai before entering the tower. There are a few items to pick up and side quests to do, but they will become unavailable when you complete the tower.
Back in Shanghai, you can visit Mr. Zhen’s bar and open the curtains near the back of the building to find a special room. Talk to Zhen and he will tell you about the Pitfights. I recommend leveling up a bit and doing Kowloon Fortress before attempting the Pitfights.
Go east from the hotel to the next screen, then look for a door in the lower right that was locked until now. Enter the building and walk up to the piece of furniture with a birdcage on it and examine it to get a TeaOftheHealer. The tea is a bit tricky to get, because you will have to wiggle between the pillars blocking the bureau to examine it. You can also visit several shops in Shanghai, but none of them sell anything special.
Go to the docks. A man in blue will offer to let Yuri play a dog picking contest for 300 Cash. The game is fairly simple, but gets harder as you win. The prizes for it are: Lottery Ticket, Leonardo’s Bear, and a Monkey Paw. The game is pretty easy and you can win by random chance, but only the Lottery Ticket is really worth the trouble in my opinion.
You can visit the fishing boat and use it to sail to Kowloon Fortress if Alice answered Dehuai’s questions correctly.
K. Kowloon Fortress (Optional)
| Items | Mana Root | Hand Needle | Wugui’s Room Key | Face Guard |
| Seal of the Soul | Thera Root | Pure Root | Soul Benediction | Lottery Ticket |
This quest is totally optional and only available if you chose the first option each time Alice tried to stall Dehuai in the cutscene in Kuihai Tower. Skip down to the Pitfights or Kuihai Tower if you cannot do this quest or are not interested in it. To access this quest, leave Kuihai Tower and return to Shanghai, then get on the fishing boat. This quest is only available until you complete the Kuihai Tower.
Outside the fortress, you will find several scared NPCs and the Silent Peddler who will sell you helpful items as well as his usual Pedometer services. The Zodiac and Cosmic Bracelets he sells are fairly useful for preventing negative statuses, but expensive. He also sells stuff like Thera Seeds and Tents. Lottery Member No. 10 is also waiting outside the fortress. The Mind’s Eye accessory is the big prize from this lottery member, but it is not that great as it makes your Judgement Ring hit area invisible, though it also doubles damage. The Moon Shallow is a consumable that turns all attacks into critical hits. Get the Mind’s Eye if you feel like you can use it well.
Tip: You can leave Kowloon Fortress by going down the ramp to the right of Lottery Member No. 10. After that, press Triangle to flip the map back to Asia. From there you can go back to Shanghai. This is a good way to save and heal up, because you can always return to Kowloon by getting back on the boat at Shanghai.
Watch out for the monsters in the fortress. They are really strong and have nasty attacks that can render your Judgement Ring invisible. Some monsters, like the Speckled Creeper, can only be harmed by special abilities. Despite the danger, this is a good place to level up. In fact, it’s not a bad idea to make sure everyone is about level 21 or higher.
Tip: Magarete’s Snipe ability is really helpful in this area, because it can instantly kill enemies.
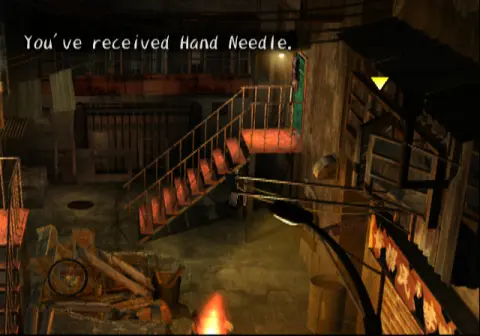
Enter the fortress via the large door in the north. Grab a Mana Root from the chest by the steps, then go through the door at the top of the steps to get to the next screen. Go up the steps on the right when you enter a narrow hallway to reach a room with a flaming oil drum and some junk in it. Check under the steps on the right to get a Hand Needle. Have Yuri equip this powerful weapon.
After getting the Hand Needle, go up the steps above you to enter a rather gory chamber. Search the table with the light on it to get Wugui’s Room Key, then climb the ladder to the right. Walk to the back of the loft and examine the chest there to get a Face Guard. Now, backtrack through the room with the oil drum to the hallway north of the fortress entrance.
You may want to take this opportunity to buy a few healing items or even return to Shanghai to save. Either way, look for some steps to the left of a red arrow painted on the way in the hallway near the entrance and take the steps to a passage with some trash cans that leads to some steps that go up to the next floor.
Open the door on the next screen to enter a room with a bunch of oil drums. Take a few steps forward and check the ground under the light hanging from the ceiling to get a Seal of the Soul. After that, go through the door in the upper right to return to the upper half of the screen you just came from. Check the chest across from the door to obtain a Thera Root.
Go up the steps to the north and take the Pure Root from the chest on the landing. Head up to the next floor, then cross the bridge to the left. Check the box just south of the bridge to get a Soul Benediction, then examine the urinal north of the chest to receive a Lottery Ticket.
After getting the ticket, head up the steps and use the Save Point to heal up. This is also a great place to grind for exp or money. Remember, Wugui likes to use instant death abilities, so have everyone equip a Leonardo’s Bear before opening the door right of the Save Point. You may also want to equip Yuri with the Heaven’s Fiend Soul. The door will not open without Wugui’s Key, so make sure you got it from the torture room. Wugui is a bit under the weather, but be prepared for a dangerous battle nonetheless.
=====================
Boss: Cursed Puppet
| Drops | Seal of Wisdom |
The Cursed Puppet is another one of those bosses that absorbs special attacks, so get ready to use your standard weapons on him. Items like the R. Phoenix Talon and Gold Hourglass are fairly helpful in this battle. Wugui’s Game of Death skill can kill you outright, but you should be safe if everyone is wearing a Leonardo’s Bear. Nightmare is also fairly dangerous since it can hit everyone in the party for roughly 70 HP. Heaven’s Fiend can heal all that damage in a single turn.
Yuri is really valuable in this fight, since he can do a lot of damage as Heaven’s Fiend and heal everyone with Sacred Remedy. Margarete and Zhuzhen should focus on attacking and using items as support. Of course, Zhuzhen’s Nourishing potion is a good means of healing that should be used whenever needed, especially since Yuri is better off attacking. This battle can last a long time, so keep an eye on everyone’s SP and use Pure Seeds if necessary.
=====================
There is nothing left to do here once Wugui is defeated, so return to Shanghai.
L. Shanghai Pitfights (Optional)
| Items | Anne’s Cross | 5000 Cash |
Before we begin, I strongly advise anyone who wants to participate in the Pitfights to stock up on curative items like Angel’s Feathers, Holy Mother Busts, Pure Seeds, and Thera Seeds. If you unlocked the Kowloon side quest, you can buy a Zodiac and Cosmic Bracelet for the person you want to enter the fights. It also pays to be level 21 or higher, because many of the foes in this series of battles are bosses from earlier in the game.
Head over to Zhen’s Bar south of the hotel in Shanghai and go through the curtain at the back of the bar, then talk to Zhen to learn about the pitfights. You will have to win ten consecutive battles to get the only prize awarded for this side quest: Anne’s Cross and 5000 Cash.
It costs 300 Cash to fight in the pit and only one person can participate at a time. It goes without saying that Yuri is the best choice for this side quest due to his strength and versatility. However, you can beat the pitfights with anyone given they are a high level and equipped with the right stuff. You can use any combination of souls you like, but I prefer Death Emperor, Heaven’s Fiend, and Inferno.
The monsters summoned by Zhen are random, so use the matches with weaker monsters as an opportunity to heal up. Here is a brief list of some of the more dangerous monsters that may appear in the Pitfights:
Custom WindShear – This nasty little demon has a powerful melee attack that can do excess of 100 damage if he manages to get a good combo off. He also uses Tight Ring, which reduces the hit zones of the Judgement Ring for three turns. Try to take this guy down with melee combos and use a Fusion with healing powers like Man Dragon or Heaven’s Fiend.
P. WindShear – This creature has no special attacks, but can hit fairly hard in melee. Be sure to keep your character healed when you encounter this monster.
Yamraja (Wind) – Having once been a boss, Yamraja can take a lot of punishment before perishing. It can also deal a moderate amount of damage with its melee attack, so take care when fighting this foe. Luckily, its Shockwave ability will not be able to do much damage to your hero.
Li Li – Another former boss, Li Li has a paralysis skill that can cause a lot of trouble. The rest of her abilities are irrelevant. Yuri’s Heaven’s Fiend form can deal a lot of damage to Li Li with simple combos.
Win all 10 battles and Zhen will reward you. You can attempt and repeat this side quest as many times as you wish.
M. Kuihai Tower
| Items | Seal of Life | Third Key | B. Tortoise VP | Lottery Ticket | Erotic Book |
| R. Phoenix VP | B. Dragon VP | W. Tiger VP | Lottery Ticket | TalismanOfWisdom | — |
The party will arrive at the tower automatically after the Temple Ruins and completing a few tasks in Shanghai. It is possible to leave by walking left and you can revisit the tower by selecting Shanghai on the map of Asia, then navigating to the Kuihai Tower. The tower marks a sort of point of no return, because the party will leave Asia forever after completing their mission. Make sure you have everything you want and need before completing this area. It also helps to be level 18-20.
1. Kuihai Entrance
Look for a set of steps leading up to a chest in the upper right side of the screen from the entrance. The chest is hard to see, but it is flanked by torches. Open it for a Seal of Life. Seek out a similar set of steps across from those you just climbed to find a box that contains the Third Key. Ascend the central stairs and examine the main gate to battle the first boss of the tower.
=====================
Boss: Yamaraja (Stone)
| Drops | B. Dragon Horn |
This incarnation can hit like a truck with his melee combo and boost his physical evade by 15% with Illusion. Aside from that, he has little in the way of tricks. Unfortunately, Yamaraja also has a ton of HP and will take a while to kill even if you completed the Kowloon side quest. Use Margarete’s Snipe skill and Zhuzhen’s Life Sucker spell if you have them. Yuri can fall back on physical attacks for this fight. Zhuzhen’s Nourishing Potion should be enough to keep everyone healed since this boss can only hit one target at a time. Watch everyone’s SP as this battle wears on.
=====================
Margarete will find the B. Tortoise VP on the ground after the battle. Enter the tower and take a moment to use the Save Point near the center of the room on the next screen. Circle around the altar in the center of this room to get to a chest behind the Save Point. Open it to obtain a Lottery Ticket.
Next, go up the steps on the right (it is important to go here first or a gate will close when you try to take an important item in another chamber) and look for a small altar when you reach the top of the steps. Insert the B. Tortoise VP into this altar.

Enter the small door south of the altar and follow the balcony to a chest that contains the B. Dragon VP. The door by the chest is locked, so go all the way back down to the main entrance where the Save Point is located.
Look for a hallway with blue light emanating from it to the left of the altar and go inside. Check the ground by a teapot on the left side of the room to find an Erotic Book, then examine the machine near the center of the room to get an R. Phoenix VP. A beam of electricity will block the exit when you take the R. Phoenix VP, so place the B. Dragon VP on the altar to stop the electricity.
Note: The Erotic Book may seem like a joke item, but it is an important part of a side quest later in the game.
2. Kuihai Tower: Tracking Down Dehuai
Head back to the main entrance after getting the R. Phoenix VP and go up the staircase on the left. Another altar is located at the top of the steps, place the R.Phoenix VP in it to unlock the door on the right, then enter the door. Open the box in the room on the other side of the door to get a W. Tiger VP.
Return to the room where you got the R. Phoenix VP and swap the W. Tiger VP for the B. Dragon VP. Take the B. Dragon VP to the big altar in the main entrance and place it in the altar to unlock the door on the second floor.
Go up the staircase on the left again and return to the lab. There will be a Save Point in here that you should probably use, because a boss is coming up. Climb the steps to the right to enter Dehuai’s chamber. A brief conversation will take place, then Dehuai will sic the Badger Devil on the party.
=====================
Boss: Badger Devil
| Drops | Seal of Luck |
The Badger Devil barely qualifies as a boss. He can deal a fair amount of damage with melee attacks, but that’s about it. Margarete and Yuri can instantly kill this creature with the Snipe Skill or Death Emperor’s Dark Messenger skill if you get lucky. Zhuzhen can also help by casting Life Sucker or Corpse Arm if you have it. Either way, this fight will not last long unless you are woefully underleveled.
=====================
Do not approach Dehuai right away after the battle. Instead, check the junk to the right to get a Lottery Ticket. You can also go through the exit in the lower right to unlock the door from earlier, though there is not much point in doing so. Finally, there is a small, easily missed staircase just left of the exit that leads down to a chest behind a gate that you may have noticed on the second floor. Open the box to receive a TalismanOfWisdom. Approach Dehuai when you are ready to fight.
=====================
Boss: Dehuai
| Drops | Hermit’s Staff |
Dehuai can inflict a light amount of damage on the party with his Magnard spell and even more damage with Blaze. His combo attack also deals a fair amount of damage and he can inflict fast ring status on a single target. Overall, Dehuai is not a huge threat as long as you keep everyone healed. The same abilities that work on the other bosses you have fought in this tower work on Dehuai, though he is not susceptible to insta-death.
=====================
Another cutscene will begin after the battle with Dehuai and Alice will rejoin the party. From here you can swap Margarete out for Alice. I prefer Margarete, but Alice is fine too if you want to use her. The Japanese army will roll into the tower as well. Go back to the Save Point and rest up. Do not forget to equip Zhuzhen with the Hermit’s Staff.
3. Kuihai Tower: The Final Battle
The Japanese army will be friendly to Yuri and the rest of the gang. In fact, some of the soldiers sell items. The first soldier standing by the door to Dehuai’s lab where you rescued Alice is actually Lottery Member No. 9. Of the prizes he offers, the Warlock Earrings are the most notable, because they increase their wear’s magic damage and the amount of damage they take from enemy magic attacks. Lottery Member No. 9 can also switch party members for you.
Tip: It is very difficult to win the Warlock Earrings from Lottery Member No. 9 due to the speed of the indicator and the tiny hit area for the earrings. Wear the Pocket Watch and save your game before playing the lottery.
The soldier standing next to Lottery Member No. 9 will sell you some useful items, so stock up on any supplies you happen to be running low on. In fact, you may want to buy a few Mirror Bracelets for your heroes, because the next boss likes to use petrifaction magic.
Head up the steps to the platform where you fought Dehuai and enter the door he fled into at the top of the steps. Use the Save Point near the top of the tower to rest and make your final preparations. Equip everyone with Zodiac or Mirror Bracelets and Bell Bracelets. Use your favorite souls with Yuri. Approach Dehuai at the top of the tower when you are ready.
Tip: You may want to level up a bit if your average party level is under 23.
=====================
Boss: Yamaraja (Calamity)
| Drops | Fifth Key |
Calamity Yamaraja is notable for many reasons. It does not have an elemental alignment, so Yuri and everyone’s elemental attacks will not do bonus damage. It can also petrify a single character (which is why you should have a Mirror or Zodiac Bracelet on everyone) and damage the entire party with special attacks. Crimson Flame is particularly dangerous since it can inflict Silence. Lastly, but not least, Yamaraja’s combo can dish out a lot of damage to one victim.
Pull out all the stops for this fight. Use Bronze Daggers and Gold Hourglasses to ensure that you get perfect hits on the Judgement Ring. If you are really skilled with the Judgement Ring, use items like W. Tiger Hair to boost your power. Zhuzhen’s Corpse Arm and Life Sucker skills work well. Magarete should use her Snipe ability. Yuri’s Heaven’s Fiend form is good for healing the entire party, but lacks damage. That said, you can use a more melee oriented soul like Death Emperor or Inferno if you took Alice, who can heal the party quite easily.
Yamaraja will not go down easily, so be ready to use Pure Seeds and Mana Roots to keep everyone in fighting condition. This boss seems to use Crimson Flame almost every turn once his HP drops to about 50%, so be ready to heal frequently.
=====================
A dramatic movie will play after you beat Yamaraja, marking the end of the first half of the game. This walkthrough picks up again in Europe, which is covered below.
IV. Walkthrough Part 2: Europe
The game will pick up six months later in Prague. Yuri will not be available for some time, so options like the Graveyard will be grayed out and you will not have to worry about the Malice Meter for a while. There are a lot of important items needed to beat the final boss in this section (as you may have guessed) so follow the walkthrough carefully.
A. Prague
| Items | Zodiac Bracelet | Kirin Scale | Lottery Ticket | Priest’s Wine |
You will be in control of Zhezhen and Alice in the city of Prague after the movie. Stick to the right as you walk behind the wall near the entrance to Prague and you will find a Zodiac Bracelet. Head north to the next screen to find a Save Point with a man sleeping by it. Talk to the man who happens to be Lottery Member No. 8. You can win Brsrkr Earrings, which increase their users HP by a whopping 20%, from this guy. Needless to say, it is worth picking up a pair or two of these earrings for your more squishy party members.
Head north past the bar and turn right to reach a narrow ledge where you will find a Kirin Scale on the ground after playing the lottery.
Continue north to the next screen and search behind the trees on the left to find a hidden box with a Lottery Ticket. Head back to the previous screen and enter the bar. Zhuzhen will step into the bathroom once inside the bar. Check the table by the left wall to get a Priest’s Wine.
The woman standing by the table will sell you some items if you talk to her. I recommend buying the Chainmail Vest and a Silk Bolero along with any supplies you may need. Zhuzhen will exit the bathroom after you talk to the old woman.
Talk to Zhuzhen and a man named Terry will enter the bar looking for exorcists to help his hometown, which is haunted by strange monsters. The pair will hear a scream outside after the conversation. Be sure to equip Zhuzhen and Alice with their new armor, then exit the bar.
Walk north to where you found the Lottery Ticket and get ready to fight a few weak monsters. The party will return to the bar after the battle. Make any preparations you need to, then set off for Bistritz.
B. Bistritz
| Items | Lottery Ticket | Mana Seed | TalismanOfWisdom |
| East Gate Key | Moon Swallow | Moon Card | — |
Step back to the screen with the main gate after entering Bistritz and search the left side of the gate to find a Lottery Ticket. Feel free to use the Save Point on the next screen, then go north to a smaller metal gate behind the church. Examine the ground on the left side of the metal gate to get a Mana Seed.
Head east to the next screen and follow the road to a spooky gate, check the left side of this gate to find a TalismanOfWisdom. The houses of Bistritz are locked tight, but you can gain entrance to the home southwest of the spooky gate by examining the door and saying “I’m a friend of your father.”.
Zhuzhen and Alice will explain the situation to Michelle, then Mayor Kevin will pop in and warn you that the ghosts attack when the fog turns red. The duo will exit the house after the conversation and the fog will turn red, so watch out for random battles. Luckily the monsters that attack in this area are fairly weak.
Head back over to the screen with the church and examine the door of the house with the cross above it. Zhuzhen will comment that this is the mayor’s house. Now check out all of the buildings in town. A weapon shop is located right next to the mayor’s house, buy Alice a Tome of the Sun. Visit Terry’s house again after talking to everyone in town through their doors.
Nina will talk to the party for a bit, then give them the East Gate Key. Check the lower right part of the shop to find a Moon Swallow by a barrel, then search the wall on the right to open a chest that contains a Moon Card. The Moon Card will allow you to get up to a 30% discount at shops. Speaking of shops, Nina sells stuff, be sure to pick up a Pocket Watch.
Leave Terry’s house and use the East Gate Key to open the spooky gate to the right to enter the woods leading to Blue Castle.
C. Blue Castle and Bistritz (Revisited)
| Items | Cosmic Bracelet | Thera Seed | Star Swallow | Tent | Pocket Watch |
| Lottery Ticket | Seal of Speed | Pure Root | Headgear | Lottery Ticket | Tent |
| Seal of Force | Dark Gravestone | Flash Badge | Seal of Strength | — | — |
The monsters in Blue Castle are slightly tough, so buy some tents before setting out for this dungeon. Do not be shy about using Zhuzhen’s Corpse Arm spell to wipe out groups of monsters in the castle and forest path.
1. Forest Path
The wooded path leading to Blue Castle is pretty straightforward, but there are a few hidden items. You may want to have someone wear a Zodiac Bracelet to protect from paralysis while traveling here. Take a few paces north and check behind the trees to the left to find a Cosmic Bracelet.
Follow the path north to reach a torchlit gate. Turn right just before the steps to the gate and you will find Meiyuan. Look for a chest to the right and open it to obtain a Thera Seed. Next, walk left from the Thera Seed while keeping to the upper wall to find a nook. Search this area to open a hidden chest that contains a Star Swallow. With all that done, go up to the castle gate and examine it, then walk away to get it to open.
2. Blue Castle
The castle entrance looks like something out of a Salvador Dali painting. Make sure you equip the Pocket Watch in here, because some of the monsters in the castle inflict tiny ring status. Start out by heading north and Alice will stop as someone passes behind them. Continue north to a Save Point, then turn left and follow the path to some steps beneath a locked door with a chest that contains a Tent nearby.
Go south from the Tent chest and up some steps, then cross a set of steps that act as a bridge that goes over the entrance. Alice will get the creeps again. Keep going right, then down some steps. Look for another nook with a hidden chest by the steps you just descended to get a Pocket Watch.
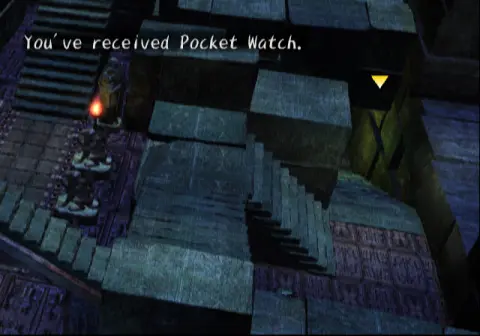
From there, descend the steps leading down into the castle basement just northeast of the Pocket Watch. You will end up in a room full of coffins. Examine the corpse leaning against the wall to get a clue regarding the locked doors, then head over to the open coffin on the left.
Nina and Zhuzhen will talk briefly while looking at the coffin. Look for a narrow ledge northeast of the coffin. Alice can walk along this ledge to an area in the upper right corner of the room. Check the wall in this area to open a box with a secret Lottery Ticket.
Return to the lower portion of the room with its row of coffins. Examining a coffin will give you the name of its occupant and the option to pray. Pray at the coffins in alphabetical order to unlock the door. The order is as follows: Abel, Edgar, Frank, Helen, Leon, Maria, Robin, then Steven. Head back upstairs and return to the Save Point.
The door to the right of the Save Point should be unlocked now that you have solved the coffin puzzle. Exit the room and you will meet Keith who will join the party after a brief conversation. Give Keith some gear, then return to Bistritz.
3. Bistritz (Revisited)
Bistritz is as haunted as ever. Visit the weapon shop and buy Keith a Royal Estoc, then go to Terry’s house once again. Get ready to pay the mayor a visit after a long conversation. Save your game, then examine the side door of the mayor’s house and choose the “I’ll do it!” option to break in. You will have to fight Tindalos after a brief conversation with Kevin.
=====================
Boss: Tindalos
| Items | Iron Clogs |
Tindalos can hit the party with Fire Breath and reduce a victim’s HP by about 90% with Deathtouch. His physical attack is also really powerful. Luckily, everyone in the party can heal. Additionally, both Zhuzhen and Kieth are capable of dishing out a lot of damage. Alice will best serve the party as healer, though there’s little point in healing Kieth who can use Blood Sucker. Keep an eye on Alice’s SP in this fight, because it’s naturally low and she is at risk of going berserk if you cannot end the battle quickly.
=====================
The party will end up outside of Terry’s house after the fight with the mayor. Check the house north of Terry’s to meet Lottery Member No. 7. The big prize this guy offers is the Oracle Earrings, which increase your MP by 20%.
Go back to the mayor’s house. Check the chest by the painting to get a Flash Badge. Next, search the floor in the upper right corner near the cross to get a Seal of Strength. Make any final preparations you feel are necessary, then set off for Blue Castle once more.
4. Blue Castle Tower
After entering the main hall of the castle, go left from the Save Point and examine the door that was previously locked. Kieth will unlock the door for you and you can enter the castle tower. Search around the blocks to the left after you go through the door to find a Seal of Speed.
Start climbing the spiral staircase until you see a door. Go inside the door and open the box in the cell on the other side to get a Pure Root. Leave the cell room and start climbing the steps again.
After a long climb you will come to another door. Enter this one to find another cell room with a box that contains a Headgear. Check the corner of the cell next to it to get a Lottery Ticket. Resume your journey up the spiral staircase until you reach another door to a cell room. Check the upper right corner of the cell on the left to find a Tent. The cell on the right has a Seal of Force in its right corner.
Continue your ascent until you reach the top floor. A Save Point will be at the top of the steps, be sure to save and heal up for the battle ahead. Equip Leonardo’s Bears on everyone and enter the room to fight the next boss.
=====================
Boss: Yuri
| Drops | None |
Yuri can really dish out punishment with his combo attack, luckily everyone in the party can heal. Do not expect to do much damage with physical attacks in this battle and skill attacks are not much better. That said, Zhuzhen’s Corpse Arm and Alice’s Blessed Light do respectable amounts of damage. Kieth can break through Yuri’s defenses with his physical attack to a degree.
Damage Yuri a bit and he will morph into Death Emperor. In this form he can use Dark Messenger which can instantly kill a target. Keep everyone healed up and focus on attacking when possible. The battle will abruptly end when you damage Yuri enough to weaken him.
=====================
Alice will wake up in the Graveyard. Examine the gravestones as you go through the Graveyard to get some insight into Yuri’s inner world. Talk to the masks by the big door to the left. The gate in the northern part of the Graveyard will open, step inside to confront Yuri and Fox Face. Yuri will have to do battle with Fox Face after a conversation.
=====================
Boss: Fox Face
| Drops | Brass Knuckles |
Fox Face can lower your SP, so be prepared to use Pure Seeds. He also uses a fairly medicare physical combo. The real danger in this battle is Fox Face’s !!! ability, which reduces Yuri’s HP to 1. Consequently, you will need to heal with a special ability or item every time Fox Face casts !!!. A fusion that can self heal like Man Dragon or Heaven’s Fiend is good in this battle. Try to get attacks of your own in when not healing and you will defeat Fox Face without too much trouble.
=====================
The party will be reunited after the encounter with Fox Face and you can pick who you want to participate in battles. As an added bonus, you will not have to worry about Fox Face anymore. Equip Yuri with the Brass Knuckles, then climb all the way back up the tower to Yuri’s former cell. Examine the glint on the floor of the cell to get the Dark Gravestone. This extremely useful item will allow Yuri to unlock the Level 3 Dark Fusion. There are several similar gravestones for the other elements. Return to Prague now that you are done here.
D. Prague (Revisited)
| Items | Monk Earrings | Lottery Ticket |
There are a few important tasks waiting in Prague. Start out by resting at the Save Point and paying the Graveyard a visit. Many, if not all of the gravestones should be lit up now that Yuri has defeated Fox Face. Take some time to defeat the monsters associated with each grave to earn powerful new Fusion Souls. Check out Section V, Part D of this guide for more information on Fusion Monsters.
Enter the bar and approach Gismot. You learn that Margarete is waiting in Rouen, which is your next destination. Yuria will disappear into the bathroom and the party will ask Alice to go check on her, so enter the ladies’ room to the left of the bar.
Make sure Alice is fully healed. Check both stalls, then examine the dripping sink. Check the sink a second time, then check the stalls again. Look in the mirror again after checking the stalls and Olga will attack Alice. Olga casts fire and holy spells, but cannot do much damage to Alice. Just attack her and heal when needed. Olga will drop the Monk Earrings, which are pretty good for boosting experience. Be sure to check the corner of the ladies’ room for a Lottery Ticket before leaving. Set out for Rouen.
E. Rouen
| Items | Tea of the Holy One | Lottery Ticket | Huge Jug | Lottery Ticket | Air Gravestone |
Rouen is your next stop after rescuing Yuri. There are a few pieces of equipment worth buying in this town as well as an important Lottery item you can win called the Accelerator, which doubles the Pedometer points you earn by walking around in dangerous areas.
1. Exploring Rouen
Check the side of the box by Newly Wed Jane near the entrance to town to get a Lottery Ticket. Enter the inn to the north. The party will rest and Yuri will find himself in the Graveyard. Talk to the masks to learn that the Malice Meter is now tied to Alice. From now on, Malice will build up while Alice is in the party and one of the Masks may attack once it turns red. You can clear Malice by visiting the masks and fighting the malice spirits in the Graveyard just like before.
Tip: It probably goes without saying, but you will want to avoid fighting the masks until you get very strong. They inflict nasty Judgement Ring debuffs that cannot be healed in combat and are very strong in general, so keep your Malice Meter clear.
Leave the room after the Graveyard scene and check the first room on the left to discover that Alice has left the building. Feel free to use the Save Point, then set out in search of Alice. Check the rooms on the first floor to find Meiyuan. The Silent Peddler is by the front desk. Be sure to buy everyone new weapons and armor. You may also want to get Loin Guards and Charming Pareos for everyone.
Talk to the clerk at the desk to learn that Alice went to meet a priest. Leave the inn and go down the narrow alley right of the inn. Examine the barrels near the start of the alley to get a Huge Jug. The Huge Jug is really great for low SP characters like Alice, since it cuts SP expenditure in half. You will find Alice at the back of the alley.
Bacon, Olga, and even Margarete will join the party. The bad guys will send some weak monsters after you, though the battle should go smoothly. The trio will return to the inn after the fight. Arcane Olga will interrupt a lengthy conversation at the inn, then you will be prompted to choose a party lineup. Enter the room on the right side of the second floor and check the nightstand between beds to get a Tea of the Holy One. Double check your gear and buy anything you need from the Silent Peddler, then head outside.
2. Haunted Rouen
Rouen will be full of monsters when you exit the inn, so expect random battles. In fact this is a good time to level up to about 32 or 33 and earn some money. You can also max out your Dark Soul Energy and get the strongest Dark Fusion Soul, by fighting the Bifronze that appear in random battles in this town. Just remember to keep track of your Malice Meter now that the masks will strike when it hits red.
Go back up the narrow alley from before and search the barrels in the upper right to receive a Lottery Ticket. Examine the door near the barrels; you will have to complete a special Judgement Ring three times to open the door. The indicator gets faster as you complete the spins, but there is no penalty for failing aside from having to attempt the spin again. Be prepared to deal with a boss that uses poison status on the party when entering the church. It’s a good idea to have some Mermaid’s Tears in your inventory and/or equip people with accessories like Shell Bracelets to protect them against poison.
Enter the church to meet Father Doyle and learn a bit more about Alice’s connection with Roger Bacon. Olga will pop in to disrupt the conversation by attacking the party.
=====================
Boss: Olga
| Drops | Small Jug |
Olga will be a lot more difficult this time around. Luckily, you have Shell Bracelets or Mermaid’s Tears to deal with the poison inflicted by her Black Fog ability which also does direct damage to everyone in the party. Alternatively, you can clear the poison with abilities like Wish and Pain Killer. What attacks you will use depends on who is in your party. That said, if you have unlocked Yuri’s Czernobog fusion, you can do a lot of damage to Olga with his melee combo every round. Aside from that, it’s wise to use everyone’s most powerful abilities in this fight.
Having a healer also helps, because Olga can do a lot of damage to the entire party if she decides to cast Blaze, Rock Storm, and Black Fog repeatedly. Luckily, Olga tends to use her rather weak melee combo fairly often. Olga is fairly stubborn and takes a long time to kill, so be ready to use Pure Seeds and other restorative items to keep your party in the fight.
=====================
Olga will flee again after the battle and Rouen will return to normal. Tie up any loose ends in Rouen and save your game. Be sure to check the back alley to meet Lottery Member No. 6. You can win an Accelerator that doubles Pedometer steps from this guy, so it is worth playing against him. Set out for London when you are done here.
3. Prague (Air Gravestone)
Come back to Prague when you get a chance and make sure you have the Tissues consolation prize from the lottery. Talk to Owner Gismot in the bar and he will tell you that Guard Darcie has been in the bathroom too long. Enter the men’s room to the left and check the stalls. It seems that Darcie is in dire straits. Yuri will give the man a Tissue to help him out of his predicament. Leave the bathroom and exit the bar. Darcie will stop Yuri and give him the Air Gravestone as thanks.
F. London
| Items | Sun Card | Lottery Ticket x2 | Mana Extract | Thera Extract | Demon Earrings | Soul Benediction |
| Crucifix | TalismanOfPurity | Warning Device | Kirin Scale | Lottery Ticket | Seal of Force | — |
Choose Old Castle Street on the map of London. Talk to the man (Penniless Mike) standing by the steps a few paces from the entrance to buy the Sun Card. He will charge you money without displaying the amount on screen if you agree to buy the Sun Card.*
*From what I can tell from testing and sophialiegh’s walkthrough, Penniless Mike takes 7,000 Cash for the Sun Card.
Check the wall by the hotel across from Penniless Mike to get a Lottery Ticket. The man kneeling on the ground north of Mike is Lottery Member No. 5. The big ticket item you can win from him is the Priest’s Earrings, which are great for characters that have high MP consumption since it reduces the cost of spells by 20%. Be sure to use the Pocket Watch while playing this lottery.
Walk north and a scene will start. Some kids steal the party’s money during the scene, so you will have to track them down to get it back. Enter the bar south of the bridge to learn about the “London Rats”. The bartender will tell you about Halley who is the leader of the London Rats. You can rename Halley if you like.
A Silent Peddler is in the bar, but you do not have money at the moment. He sells stuff you should already have so it is no big deal. Run around the bar so that you are behind it and look for a Mana Extract in the lower left corner. Leave the bar. You can explore this screen and talk to a few people, but there is not much of import here at the moment, so go back to the previous screen where the hotel is located.
You will meet up with the rest of the team once you enter the hotel. Margarete will vow to track the money down. There’s a Save Point you can rest at in the hotel lobby. Exit the hotel and return to the screen with the bridge. Look for a house north of the bridge and west of the abandoned building. Walk over to the tree in the yard and check the ground to get an Oak Slingshot. Head over to the abandoned house and walk up to the front yard. Walk left along the edge of the screen and check the crumbled wall to get Thera Extract.
Check out the door laying on the ground to bring up a Push Judgement Ring. This one is really tough, because you have to tap the button rapidly to get the indicator in the green zone. To make matters worse, you only get about six seconds to move the indicator. This one has a bad reputation and for good reason. It took me several tries to get it to work. I recommend putting your controller on a flat surface and rapidly tapping the X Button with your index finger to get the indicator in green.
After moving the door, Yuri will go down a ladder to a secret hideout. Stay on the raised platform and go left, then check the ground to get a pair of Demon Earrings. Descend the small ramp and go to the lower right corner to find a Lottery Ticket. Go up the ramp to the left to cross a makeshift bridge that leads to a Save Point.
Go right from the Save Point and follow the path to a ladder. Climb up the ladder to a room that was barricaded with furniture. Check the box next to the hatch you just came from to get a Soul Benediction.
Ascend the steps. A scene will play out with Chris from earlier and one of the children will give you a Crucifix. They will also return most of your money. Look around the hideout to get a few items after the cutscene. A TalismanOfPurity is hidden by the crates stacked up next to the boarded up door in the upper right. Take a look at the desk under the window far to the left to get a Warning Device.
Leave the hideout and knock on the door of the house to the right of the abandoned house. Old Carl will tell the party where to find the Orphanage. Before leaving, search the bookshelf in the upper left to obtain a Kirin Scale. Take a look at the bookshelf just below the Kirin Scale shelf to get a Lottery Ticket. Finally, check the bench near the exit to get a Seal of Force.
You can leave Old Castle Street by walking right from Carl’s house. Pay the Orphanage a visit. All you can do here is walk up to the door and knock. The team will talk to Jack for a while, then he will shoo them away.
Return to Old Castle Street. It’s time to investigate by asking around town. You can stay at the inn now for 300 Cash. Feel free to talk to the townspeople if you want some background on Jack, but your real destination is the hideout. Head back to the abandoned house and go down the hatch that’s under the door you moved earlier.
A cutscene will start when you reach the living area on the second floor of the hideout. Halley will join the party and you can swap characters out. While in the hideout, you can only switch between Magarete and Alice, but you can go see Meiyuan in the hotel to choose from the others. I strongly recommend placing a good damage dealer in the party since Halley can heal. Double check everyone’s gear and buy any healing items you need, then set out for the Orphanage again.
Tip: Hold on to the Slingshot Halley starts with, because it can be upgraded later on.
G. The Orphanage
| Items | Zodiac Bracelet | Eye of Ouroboros | Seal of Luck | Guestroom Key |
| Pure Extract | Monkey’s Paw | Lottery Ticket | Monk Earrings | — |
The Orphanage will be a hostile area complete with random battles when you revisit it. Be wary of enemies that lower SP and inflict status ailments like Tight Ring. Pocket Watches and the Crucifix can help a lot in this dungeon. You may also want to level up to level about 33 if you have not already done so.
Simply walk up to the front door and enter the Orphanage as you did before. Go up the steps and check the balcony on the left to get a Zodiac Bracelet. The balcony on the right has an Eye of Ouroboros. Most of the doors in this hallway are locked. Use the Save Point on the right side of the entrance hall and check the door to the left of it. The mysterious Man in Black from earlier will attack the party.
=====================
Boss: Night Stalker
| Drops | Kid’s Room Key |
This creature does not really have much in the way of special moves. However, his gun attack is pretty powerful and he can speed himself up with Gale. That said, you will not have trouble with Night Stalker if you have powerful fighters like Yuri and Kieth in the party. Halley’s Strong Earth ability is great in this fight, so use it when he is not busy healing. In fact, you may want to put Yuri on healing duty and have Halley use Strong Earth throughout the battle.
=====================
Use the Kid’s Room Key dropped by Night Stalker to open the door on the left. Joshua will give Yuri the Guestroom Key. Check behind the bed on the lower left to find a Seal of Luck. There’s also a Pure Extract by the bed north of the Seal of Luck. Search the floor between the two beds on the north wall to get a Monkey’s Paw.
Return to the main entrance and go back upstairs, then enter the room on the left. Check the table by the fireplace to find a book that you must complete a simple Judgement Ring spin to get. There’s another book on the desk. Both of these items hint to a passcode needed to open a door in the main hall, which we will get to later. Examine the fireplace to find a Lottery Ticket, then leave the room.
Go over to the door on the upper right side of the main entrance and have a look at it to enter a passcode. The code is 5375 based on the dates in the books upstairs. Step inside the room after entering the code. Check the fireplace on the left to get some Monk Earrings. You can search the desk on the north wall to find Jack’s Diary by completing a Judgement Ring.
Before leaving the room, check the painting by the bed to get a hint at the next passcode.
Go back to the main hall yet again and use the Save Point to rest up. You should make sure someone is wearing the Crucifix and put Zodiac Bracelets on everyone else to protect the party from the next boss. You may also want to equip Yuri with an air or light elemental soul.
Approach the main door in the center of the hall. Examine it to bring up the passcode input. The code is 3754 this time. You will have to battle Jack after a dramatic scene.
=====================
Boss: Jack
| Drops | Seal of Speed |
Jack is not very dangerous aside from his ability to paralyze targets. It’s wise to conserve your MP in this fight, so stick to physical attacks. Another battle is coming up after this and you want to go in strong. Have Halley heal or use items to restore HP. If you want to speed this battle up, use items like the Bronze Dagger to ensure you get good hits in on Jack.
=====================
Mammon will emerge from the cauldron in the back of the room after the battle with Jack.
=====================
Boss: Mammon
| Drops | Demon Earrings |
You may want to spend a round healing up if you are wounded from fighting Jack. Mammon can deal quite a bit of damage with Shock Wave (about 100 HP to everyone) and petrify a single target. Worse yet, this thing can heal itself for about 300 HP with Howling. You should also watch out for Needlerain, which does about 200 damage. Even Mammon’s physical attack is fairly powerful.
Hopefully you equipped Zodiac Bracelets and a Crucifix before this battle. If not, use an Imp’s Fang to cure anyone that gets petrified ASAP. There are a few ways you can approach this fight with Yuri. Option one is to use a light based fusion and have Yuri keep everyone healed and buffed with magic protection. Option two is to go with an air fusion and use it to attack. Both work well, so it’s up to you.
Halley’s Air Shot is excellent in this battle, so use it if you have it. Otherwise, you may want to relegate him to the role of healer. Your third character should focus on supporting the others with items as well as their own attacks. Pummel Mammon enough and it will die.
=====================
With Mammon defeated, the party will return to the London Rats’ hideout. You can swap party members out by talking to those waiting in the hideout. Give Joshua, who is waiting in the hideout basement, Halley’s old slingshot and he will upgrade it later.* Return to the Orphanage and enter the room where you fought Mammon, then check behind the curtain to get Draze, a new gun for Margarete.
*It is not a big deal if you lost or sold the old Slingshot, because the Improved Slingshot Joshua gives you is not the best weapon for Halley.
H. Rouen: Fighting Couple (Water Gravestone Side Quest)
| Items | Water Gravestone | Seal of the Soul | Jasper Cape |
You can begin this quest after completing the Orphanage and should try to finish it before meeting Koudelka if you want the best outcome for the quest. You will find the fighting couple on the second floor of Rouen’s inn. Talk to them to initiate the brief side quest. The reward for this quest is the Water Gravestone. If you get the best outcome, you will get the Gravestone for free. Otherwise, you will have to pay for it.
1. Getting the Best Outcome
To get the best outcome for the lovers (and a free Water Gravestone) talk to them, then head over to the church. Check the altar to get a Seal of the Soul, then enter the door on the right. Enter the confessional booth at the back of the small hallway and Upset John will walk into the other one. He will begin to confess to Yuri thinking he is a priest.
Yuri will be prompted to answer the man’s question. Choose the second option “It’s about love, not the ring.” and he will respond favorably to the advice. Check the other booth to get a Jasper Cape after John leaves. Return to the inn and John will give you the Water Gravestone as thanks for your services.
2. The Second Best Outcome (Pay 3000 Cash)
Talk to the couple as you would in the step above, then go to the church. Be sure to check the altar for a Seal of the Soul and get the Jasper Cape from the booth. Enter the second confessional booth and tell John to just buy her the ring (Option 1) then return to the inn. The couple will not be as happy if you had chosen Option 2 and John will charge 3000 Cash for the Water Gravestone instead of giving it to you.
3. Worst Outcome
This outcome occurs if you tell John to leave his wife over the ring in the confessional booth or if you do not get to Rouen before meeting Koudelka. You will find John wandering around the streets of Rouen. Talk to him and he will sell you the Water Gravestone for 10,000 Cash.
I. Calios Mental Hospital
| Items | DemonWardNecklace | Laurel Slingshot | Bronze Coin |
| Lottery Ticket | Heart Key | Silver Coin | Club Key |
| Key to Success | FruitOfYggdrasil | Diamond Key | Gold Coin |
| Platinum Coin | Spade Key | Dungeon Key | Fire Gravestone |
Calios Mental Hospital represents something of a difficulty spike in Shadow Hearts. The monsters can take a lot of punishment before dying and instant death is a constant threat from Buggs unless you have Leonardo’s Bears or a Crucifix equipped.
The entrance to Calios Mental Hospital is guarded. Do not feel bad about picking a fight with the guards, because they are not human. A brief scene with Bacon will take place after the fight. Check behind the front gate to open a secret chest with a DemonWardNecklace.

Look in the small guardhouse across from the DemonWardNecklace to find a Laurel Slingshot. Run up to the big door and examine it to enter the hospital. Two more Spectres will attack the party when they step inside the hospital. Look for a sparkle on the floor in the northwest part of the hallway to get a Bronze Coin after dealing with the guards.
Turn right after grabbing the coin and continue down the hall to fight another pair of guards. Open the box on the right end of the hall to obtain a Lottery Ticket. Go through the door south of the ticket to enter the next area. A creepy chair dominates this room. Halley will react when you approach the chair.
Go through the door to the south of the chair. Another set of Spectres will assault the party in this room. Search the body after the fight to get the Heart Key, then examine the sparkle just north of the body to get a Silver Coin. Use the Save Point behind the dead friar to rest before moving on.
Backtrack to the first hallway in the hospital and check the first door on the lower right. The Heart Key will unlock this door. The cell on the other side contains a Key to Success and a Club Key in two separate chests. Exit the cell and step inside the one above it. Open the box in the next cell to get a FruitOfYggDrasil.
Now, go back to the hallway just before the room with the chair and open the first door on the left. You will find a Diamond Key in the cell. Enter the third door from the left after taking the Diamond Key. Look for a sparkle by a table on the north wall of the cell to get a Gold Coin, then leave. Check the room on the far right and you will see another sparkle by a table. Examine it to get a Platinum Coin.
Now that you have collected all the Bronze, Silver, Gold, and Platinum Coins, return to the room with the Save Point. Back at the Save Point room, check each of the fountains that line the north and south walls. Drop a coin in each fountain (the game automatically chooses what coin Yuri drops) and the table near the center of the room will move to reveal some steps leading down.
Save and rest before going downstairs. You may also want to equip Cosmic Bracelets or a Crucifix on everyone if you are worried about silence status attacks. It’s also not a bad idea to equip Yuri with the Dragner or Egil Fusion Soul if you have one of them. Walk up to the big door after descending the stairs and interact with it. Rausan will attack the party.
=====================
Boss: Rausan
| Drops | Spade Key |
Rausan does not have many tricks up his sleeve, but he can be dangerous nonetheless. His Elder Sign skill reduces magic and skill damage and he can use Silence on a single target while dealing about 120 damage. Rausan’s Blaze spell is the biggest threat in this fight, since it can deal a lot of damage to everyone.
Keep the team healed in case Rausan decides to use Blaze a lot and have Halley use Aqua Blade on Rausan. Yuri can use Dragner’s Icy Breath or Egil’s Dragon Cry if you managed to get the final water fusion. Have your third hero use whatever attacks you think are effective as well as provide support with healing items. Punching through Rausan’s magic resistance can be difficult, but most special skills are still effective if you can get perfect ring hits. Using a Bronze Dagger or Arrowhead is a good idea.
=====================
Rausan Drops a Spade Key in battle. Halley will leave the party after the fight. Go back to the Save Point, rest up, then head over to the second hallway. Watch out for monsters on the way, being down a member can make fights more dangerous, especially when fighting Buggs. Enter the second room from the left using the Spade Key in the hallway that runs west to east.
Open the chest in the cell to get the Dungeon Key. You can use the bed in this room to restore HP/MP. Be sure to check the chest a second time before leaving this cell to get the Fire Gravestone.
Go back to the Save Point once again. Make sure you have some means of poison protection equipped and give Yuri a Light Fusion, preferably Baldo. Head back downstairs and open the big door with your newly acquired Dungeon Key. A scene will play out when you enter the room where Halley’s mother is held captive. Olga will attack at the end of the scene.
=====================
Boss: Olga (Rematch)
| Drops | Warlock Earrings |
Olga will use Black Fog in this battle as frequently as she did in the last one. She will also use AoE spells like Icy breath, so be prepared to heal the party often. Yuri’s Baldo Fusion is really helpful in this battle, because he can do massive damage to Olga with Nova or heal the party in an emergency. Halley can take over as main healer in this fight and your third party member can use his or her best damage dealing abilities. You should also be prepared to use a Mana Seed or Root to restore MP, because Olga can steal MP with Mind Assault.
=====================
The party will automatically return to London after defeating Olga.
J. London Rats Hideout, Rouen, and Calios Mental Hospital (Revisited)
Items: Oath Grail, Improved Slingshot, Deathblade Jiru, Earth Gravestone
There are a few odds and ends to tie up after exploring Calios Mental Hospital. Some of the items you will find in this brief section are extremely important if you want to get the good ending, while others are more sidequest oriented. At any rate, I strongly recommend following the directions for each area carefully unless you are trying to get the bad ending.
1. London Rats Hideout (Part 1)
Head down to the basement where the Save Point is located after talking to Alice. Make sure you talk to Joshua (the little boy) in this room to get the Oath Grail, an extremely important item for getting the good ending.
You may also notice a new ramp to the left of the Save Point. Use the new ramp to reach a summoning room where Sharon and Knowledgeable Carl wait. Talk to Sharon to fight a few weak monsters with Yuri. Later on, you will be able to compete in more challenging Pit Fights in this room. Leave the hideout and head over to the bridge where you will find Halley. A dramatic scene will take place with Yuri, Alice, and Halley. Alice will set out for Rouen and Halley will join the party permanently.
2. Rouen
You will be in control of Alice after Halley joins the group. She can only enter Rouen, so check the town out. Your goal is the church, but the front door is sealed. Go through the alley to the back of the church and examine the door. You will have to complete a Push Ring to open it, but this one is not too difficult. Remember, Push Rings are easy to complete if you place the controller on a flat surface and use your index finger to push the X Button rapidly.
Once inside, head over to the confessionals on the right side of the building. Enter the second booth, then examine the floor to bring up a Spin Ring. This ring is fairly easy to complete and will yield Father Doyle’s secret confession. Exit the booth after learning the truth and a cutscene will begin. Alice will return to London after the scene.
3. London Rats Hideout (Part 2)
You can choose the third person in your party after returning to the hideout. If you gave Joshua the Slingshot when Halley first joined, talk to him to get the Improved Slingshot. Stop off at the bar to replenish your supplies. Do not forget to check the SIlent Peddler’s Pedometer Service, you may have unlocked some good items like the Leather Suit or Belt of Power. You will also find Wanderer Meiyaun in the hotel. Set out for Calios Mental Hospital when you are ready.
4. Calios Mental Hospital (Revisited)
Despite having been cleared out by the party recently, Calios has a few new secrets. Head over to the chair room to find someone sitting in the spooky chair. This happens to be Lottery Member No. 4. He has a few goodies up for grabs, but the most important one for collectors is the Eternity Card, which can push your discount/ markup rates up to 50% and 25% respectively. As always, I highly recommend saving before playing the lottery. Head down to the hidden cell where Koudelka was held and search the pile of rags on the floor to find Deathblade Jiru.
4. Bistritz
Head back to Bistritz and talk to Nina who can be found standing outside of her house. She will have planted the seeds and gives you the Earth Gravestone she found while tending her garden.
K. Nemeton Monastery
Items: Light Gravestone, Mant.OfNobility, TalismanOfPower, Lottery Ticket, Silver Wolf Fang, Mauser Prototype, Mind’s Eye, HolyBook-Martyrs, Coat of the Sage, Seal of Vitality, DestructionStone, Seal of Strength, Punk Jacket
Nemeton is a fairly dangerous late game dungeon where monsters occasionally use instant death abilities, so make sure everyone has a Crucifix or Leonardo’s Bear equipped to prevent party wipes. This dungeon is also home to a side quest that awards players with the Amon Fusion Soul as well as an important quest item that can be obtained after the boss.
1. Entering the Nemeton Monastery Ruins
The party will encounter a rather bizarre looking house upon arriving at Nemeton. Check the door with the glowing heart above it twice to enter the building. Go down the steps and follow the path as it loops around the structure. You will find the Light Gravestone at the end of the line. Leave the building after getting the Gravestone.
Run up the dirt road to get to the monastery ruins. You will come to a cliff where the ruins rest. Look for a grave to the west that is inscribed with James O’Flaherty’s epitaph. You will find the Mant.OfNobility (a unique armor for Keith) in a chest just right of the grave.
Enter the archway to the right to get to the next screen and you will meet the “Strange Creature” who invites the party back to the unusual house. Head over to the far right side of the screen and check the remains of the altar to find a TalismanOfPower. Return to the strange house and Roger, the strange creature, will fill you in on events.
Use the machine with the heart on it next to where you found the Light Gravestone earlier to buy new weapons and armor. The Will Powers sold here are useful too. Return to the monastery ruins when you are done.
Roger will open the way for Yuri and his friends once you reach the ruins. Follow Roger down the steps. Use the Save Point and go left. Roger will open the Door of Judgement for you. Talk to Roger to get free healing whenever you like. Step through the door and search the corner to the lower right of the door to find a Lottery Ticket.
This next section is important for getting a sidequest, but you can skip straight to the boss if you like. However, I recommend going through with the side quest for the items alone.
2. Unsealing the DestructionStone (Optional)
This is something of a side quest, but it is well worth doing for some powerful items. You will find hints to this puzzle throughout the ruins, but this guide skips all of that for the sake of brevity. Simply put, you will find several sets of chests that are blocked by barriers and you will have to operate switches that control the barriers to get the treasures in the chests. Flicking a switch will cause a torch in the dungeon to change color in accordance with the color of the switch.
Start out by going east from the Door of Judgement. Walk north on the next screen and you will see a chest poking out from the edge of the cave wall on the left. Open it for a Silver Wolf Fang and equip Yuri with it. Take note of the two chests sealed by blue and white barriers north of the Wolf Fang. Go down the steps to the southeast.
Go right past an inscription on the wall that acts as a hint to the puzzle. Take note of the chests in this room, opening one will close another, leave them alone for now. The blue switch is sealed for the time being and you have to manipulate the chests to unseal it. Head west to the Door of Judgement to get to the other box.
Walk west from the Door of Judgement to reach another hall with a wall inscription. Go west one more screen and open the box to the left just behind a pillar to obtain the Mauser Prototype for Magarete. Next, go down the southeastern path. Follow the path over a bridge of fallen blocks and you will come to the screen where the blue switch is located. Close the chest here, then backtrack all the way to the blue switch to the east. Interact with the chest north of the blue switch and the boxes should vanish, unsealing the switch. Activate the switch and you will see a flame turn blue in a brief cutscene.
Next, go back to the screen on the left where the sealed chests are located. The chest that was sealed by a blue barrier can now be opened for a Mind’s Eye. Head back west to the Door of Judgement again, then go west three screens. You should arrive in a room with a chest sealed by a purple barrier next to a red switch.
Press the red switch to make the flame turn purple and drop the seal around the chest. Check the chest to obtain a HolyBook-Martyrs for Alice. Descend the steps in the lower left after grabbing the book. Take note of the hole spewing red vapor to the right on the next screen and follow the path south to reach the torch room.
East of the torch room you will come to a yellow barrier chest. Climb the steps north of the yellow barrier. Follow the passage to get to the green switch. The flame will turn white when you flick the green switch. Backtrack to white sealed chest east of the Door of Judgement. This is also a good time to see Roger for healing, save, and clear the Malice Meter. Look at the chest that was previously sealed by the white barrier to get a Coat of the Sage.
Go east, back to the blue switch after getting the coat. Deactivate the blue switch to change the flame from white to yellow. Now you will have to backtrack all the way to the yellow seal chest. Remember to go west three times from the Door of Judgement, then follow the path south to get to the chest. Check the box now that it is no longer locked behind the barrier to get a Seal of Vitality.
Now that you have gotten all of the sealed treasures, go west past the torch to get back to the area with the fiery hole. Step up to the hole to get the DestructionStone.
3. Clearing the Monastery Ruins
If you got the DestructionStone, you will be standing near a fiery hole in the ground. If you chose to skip the DestructionStone, you will have to go west from the Door of Judgement Roger for three screens, then south until you see a well with flame emanating from it.
Either way, head south from the well and east past a huge torch. You will come to a room with the yellow barrier chest. Go east from the chest. This should bring you to another Door of Judgement that is flanked by two huge crosses. Each cross has a chest next to it. Open them to obtain a Seal of Strength and a Punk Jacket.
As always, save and rest at the Save Point before opening the door. You may also want to make sure someone is wearing a Crucifix and that the others have Leonardo’s Bears equipped. The Will Power accessory is also useful in the upcoming boss battle. Yuri should use a Light Fusion Soul like Baldo or Sandalphon.
Note: Make sure you have the DestructionStone before going through the Door of Judgement if you want the Amon Fusion Soul.
=====================
Boss: Albert Simon/Amon
| Drops | Angel Earrings |
Phase 1: Albert
Watch out for Albert Simmon’s spells. Holy Chest not only decreases your party’s HP, but it also reduces SP. The Will Power accessory helps nullify the effects of Holy Chest or you can feed everyone Pure Roots. Revelation is the big threat in this battle if you do not have Leonardo’s Bears equipped, since it can instantly kill as well as inflict about 100 damage on everyone. Last, but not least, Albert can do a fair amount of damage with his physical attacks.
This battle can be really easy if Alice has learned the Arc spell at about level 36, since she can keep everyone healed with it. It is also good to have unlocked Sandaphon’s Pulse spell, because it can do a lot of damage to Albert. For the most part this phase is easy as long as you come prepared. Albert will transform into Amon once you damage him enough.
Phase 2: Amon
Amon has a powerful melee attack, but prefers to cast his Atomic Dust spell, which does about 150 damage to the whole party. Amon also uses Demon Rays. Watch out for this spell, because it can do about 280 damage to a single character.
It goes without saying that it is important to keep everyone healed in this fight, so use whatever means you have at your disposal to accomplish this goal. Both Yuri and Alice have access to excellent healing spells, so it should not be hard to keep everyone on their feet. Restoring MP and SP should be a priority for whoever occupies the third party slot. Yuri should cast Sanctuary to shield everyone from Amon’s spells if he has Sandalphon.
Amon does not have an elemental alignment, thus he is not weak to anything. However, he is not strong vs. any element either, so you are free to use any attacks or abilities you wish. The need to heal frequently and keep up everyone’s SP reserves will likely cause this battle to last many turns unless you are a level 50 or higher.
=====================
Yuri will get the Soul of Amon Fusion after the battle with Albert if you found the DestructionStone. A movie will roll after the fight and the party will end up back in Roger’s house.
4. Back at Roger Bacon’s House
Roger will fill the party in on events and ask Yuri to power up his teleportation machine. Complete a spin ring and Roger will demonstrate the teleporter. Roger will need time to calibrate the machine, so the party will set out for the London Rat’s Hideout in Old Castle Street to see Koudelka.
**Important**
Do not talk to Bacon after returning to the London Rats’ Hideout until you have broken the curse placed on Alice if you want the good ending!
V. Walkthrough Part 3: The End Game (Europe)
Completing Nemeton Monastery will bring you to the end of the game, since the only main story line dungeon left to visit is Neameto Float or Neameeto as the game sometimes calls it. However, there are many side quests available to those willing to explore a bit. These include breaking the curse placed on Alice to get the good ending, secret dungeons, and even a new series of pitfights. These side quests can be completed in just about any order, but this guide recommends a certain sequence since some things are easier to do with certain weapons and armor. If you want to complete all of the extra content, then read on or skip to Neameto at the end of this section if you just want to beat the game. Keep in mind, the final boss is tough and I strongly recommend at least finding three Crucifixes, leveling up, and buying some Willpowers before fighting it if you want to just finish the game.
Important: Do not go to Neameto until you have finished all of the side quests, because entering it acts as a trigger that cancels some of the side quests.
A. Old Castle Street (London)
Go to the second floor of the hideout to see a scene with Halley and Koudelka. You can also talk to Sharon to participate in the Pitfights, but that is covered in another part of this section. Old Carl will tell you how many different monsters you have fought and how many treasures you have found. Use this opportunity to stock up on anything you need.
B. Preparing for the Trials Ahead
Level up in Nemeton to get everyone you want to use in the side quests to about level 40. If you are patient and get most characters to about level 47, you can unlock their best special abilities, which will really give you an edge in battle. You should also take some time to unlock all of Yuri’s Fusion Souls and go berserk with Level 3 souls in battle by running out of SP to unlock their special attacks.
C. Magarete’s Confession and Quihua’s Letter (Rouen)
| Items | Pearl Ring | CoatofTheAdept |
Return to the church in Rouen with Margarete and Yuri in the party (you will have to go through the back door) and approach the altar. Yuri and Margarete will go into the confessional room. Enter the door near the top of the screen and Margarete will confess to Yuri, then give him the Pearl Ring. This also unlocks Lottery member No. 2.
Place Zhuzhen in the party and enter the room on the right on the first floor of the inn. Meiyuan will talk to the party and give them a letter with a sad story from Shanghai. He will also hand over Zhuzhen’s best armor, the CoatofTheAdept.
D. The Final Lottery Members
The final four lottery members are generally well hidden and often tied to other side quests, so be ready to play the lottery as you explore the end of the game. You can also refer to Section VI for a complete list of lottery members.
1. Lottery Member No. 3 (Orphanage)
Return to the Orphanage in London after rescuing Koudelka and you will find the place inhabited by children. Talk to Insolent Jean and win Hide and Seek to unlock this lottery member. The children switch hiding spots and are often behind objects, so it can take a few tries to win. Be sure to return to Jean as quickly as possible after talking to all of the kids to win. As a reward, he will move out of the way of the giant cauldron in the back of the room where you fought Ammon.
Check the cauldron to talk to Pot Lover Macken. He will turn out to be Lottery member No. 3. Make sure you have a Pocket Watch equipped when playing, because the wheel is invisible otherwise. Macken will also give you the Emigre Manuscript. While this Lottery is fairly worthwhile overall, the best item you can win is the Crucifix, which blocks all negative status effects, so prioritize getting it.
2. Lottery Member No. 2 (Rouen)
Lottery Member No. 2 can be found in the alley in Rouen after completing Magarete’s Confession. He is also Member No. 6. You can win Magarete’s best weapon, the 10 Gauge, from this member. He will leave when you win the weapon, so be careful if you want any of the other prizes he offers.
3. Lottery Member No. 1 (Blue Castle)
Get Keith’s best weapon by defeating the Golden Bat in Blue Castle, then remove Keith from the party. After that, return to Blue Castle once more and enter the throne room to find an invisible man pacing around. Talk to him to play the penultimate lottery. The indicator for this lottery is really fast and I recommend saving if you want the Thief Earrings, which boost Cash earned by 20%. This makes them great for players who want to max out all of their best weapons. The Fruit of Yggdrasil prize is also really good.
4. Lottery Member No. 0 (Roger Bacon’s House, Nemeton)
Roger Bacon should become available as a lottery member after you find all the other Lottery Members and complete the side quests, then defeat Soul Block in Neameto. He offers some powerful items, like the Cotton Underpants, which reduce the elemental damage Alice takes and the damage boosting Comet Mask.
E. The Secret Books
There are several books that become available near the end of the game. These books are hidden in various places in Europe. Collecting them will unlock special weapons, powers, and areas. It’s worthwhile to get these books (with the exception of the Pulse Tract) in one run, since a lot of stuff is locked behind them. This also does away with much of the backtracking in the end game and allows you to focus on the secret dungeons and getting the good ending.
1. Emigre Manuscript
Go back to the Orphanage in London after saving Koudelka and play hide and seek with Insolent Jean. The children are scattered sound the building and often change hiding spots. Keep trying and you will find all four of them, but you have to return to Jean after finding all of the children to win. Jean will move out of the way of the giant cauldron in the back of the room and you can examine it to meet Pot Lover Macken and get the Emigre Manuscript. Examine the Emigre Manuscript in the Valuables section of your inventory to unlock the Cave temple, which can be found on the map of Britain.
2. Book of Rituals
I recommend picking this book up along with the Codex of Laurie, since they are near one another. Place Alice and Zhuzhen in the party and go back to Nemeton Monastery. Approach the ruins and a scene will begin at Father O’Flaherty’s Grave. Zhuzhen will break up the touching moment by bringing the Book of Rituals to Yuri. Look at this book in the Valuables section of the inventory screen to unlock the Ancient Ruins on the map of Europe.
3. Codex of Laurie
Simply return to Nemeton and backtrack to where you fought Simon. The Codex of Laurie is sitting in the seal that occupies the room.
Hold onto this book until you break the curse on Alice, then take it to Roger Bacon.
4. Pulse Tract
You will need to complete many of the game’s side quests to get this book, including Breaking the Curse of the Masks, the Cave Temple, and obtaining the Amon Fusion Soul. In addition to all this, you will also need the Erotic Book from Dehaui’s Tower way back in Asia. Talk to Roger Bacon after completing all of the prerequisites to get the Pulse Tract. With this item in hand you can unlock Yuri’s ultimate Fusion Soul: The Seraphic Radiance.
F. Dollhouse (Optional Dungeon)
| Items | Oracle Earrings | Crank | Lottery Ticket | Storeroom Key | Slide Plate |
This is the first secret dungeon we will explore in this walkthrough. The Dollhouse is a good place to start with, because Alice will get her best weapon in this area, which makes breaking the Curse of the Masks easier. Return to Prague and talk to Owner Gismot. If you already completed the Air Gravestone quest, Gismot will tell you about a guy standing near the middle of the room. Talk to the man (Runaway Ewan) and he will tell you that his house is haunted. The Dollhouse will now appear on the map when you leave Prague.
You may want to visit the Silent Peddler in the north end of Prague before leaving. He sells Extracts and Weird Bottles that can be very useful. I also recommend taking someone like Alice along for the ride, because the monsters in the Doll house use Petrify and other status effects. The Crucifix is also really useful in the Dollhouse. Finally, watch out for ghostly creatures called Spanky; they can cast powerful lightning spells that deal about 250 damage and should be taken out immediately.
Tip: The Dollhouse is a good place to build up Fire Soul Energy.
Check the spot in the southwest corner of the first screen of the Dollhouse to find the Oracle Earrings. The side door is locked for now, so enter the building via the front door. You will see a Save Point in the main entrance to the house. Check the old clock on the left to get the Crank, then go through the door right of the Save Point. Examine the shelf with pictures on it on the southern end of the next room to get a Lottery Ticket.
Go through the narrow doorway in the northern part of the room with the antelope head to a small fountain. Stand by the left side of the fountain and check it to start a really difficult Push Ring. You can attempt this ring as many times as necessary and it is easier to complete if you place the controller on a flat surface. Complete the Push Ring to get the Storeroom Key.
Head back outside via the main entrance and check the storeroom on the left to unlock it with your newly acquired key. The room will be too dark to explore at first, so interact with the generator north of the entrance. Alice will use the Crank from the clock to start the generator and light up the room. Take a look at the rack near the shelf at the back of the room to get a Silver Hand.
Climb down the ladder to get to the basement. Examine the barrel with a few bottles of wine and a glass sitting on top of it to get the Slide Plate. You can check out the room in the upper right, but it just leads to a door blocked by water for now. Return to the main part of the house and head upstairs, then go through the door at the top of the steps. You will find a projector in the room on the other side of the door. Check the projector to place the Slide Plate in it and get a clue about how to drain the water in the basement.
From the projector room, head back downstairs and into the antelope head room. The fireplace should be lit up by a strange dial when you return to the room. Use the dial to enter the number: 1224. This drains the water in the basement. Go back to the basement and use the Save Point to heal up on the way.
Go back down the ladder and enter the hallway on the upper right side of the basement. Open the heavy door to step into a rather unsettling room. Take a look around and be sure to look for a hidden chest that contains a Crucifix to the right of the bed. At this point you should have three Crucifixes, make sure everyone has one equipped for the upcoming fight. Zodiac Bracelets will suffice if you do not have enough Crucifixes to go around. Make sure Yuri has Amon or a Dark Fusion Soul equipped and heal everyone as needed. Attempt to leave the room and Orb Chaos will attack the party.
=====================
Boss: Orb Chaos
| Drops | Holy Book-Flesh |
Start pummeling this thing with everything you have right away. Buffs also help. If you have Yuri’s Amon Fusion and unlocked The End, use it. Gold Hour Glasses and the like are also helpful in this fight. Alice’s Gospel can be really useful as well, but I recommend waiting two or three turns to cast it if you have her in your party.
Orb Chaos will spend a few turns buffing itself with damage and resistance spells. It also casts Expression, which deals about 150 damage to everyone and can cause Paralysis. Zodiac Bracelets and Crucifixes nullify the status effect. As bad as Expression can be, the real concern in this fight is Orb Chaos’ melee combo which can do around 300-400 damage to a single target. This thing has a massive HP pool of about 7,500, so be prepared to spend a lot of healing items to keep your party fighting unless you are a really high level.
=====================
You will receive Alice’s best weapon, Holy Book-Flesh, as a reward for defeating Orb Chaos. It’s a good idea to upgrade this weapon a bit if you plan on breaking the mask curse, since Alice is pretty weak in terms of attack power.
On a side note, going back to Prague will reveal that Ewan has vanished without a trace…seemingly. Check the spot by the table where Ewan was standing to get a clue regarding his fate.
G. Ancient Ruins and Seraphic Radiance (Optional Dungeon/Boss)
| Items | Angel Earrings | Lottery Ticket | Volt Snipe |
| Pulse Tract | Stone of Rebirth | Seraphic Radiance | Father’s Coat |
The Ancient Ruins are unlocked by getting the Book of Rituals by visiting Nemeton with Zhuzhen and Alice in the party. I recommend visiting this dungeon once to get Alice’s best armor (the GoldthreadCoat) in preparation for breaking the curse of the masks, then later on to defeat the boss and get Yuri’s best Fusion Soul. That said, the entire dungeon will be covered in this section to keep the walkthrough from getting too cluttered. Finally, it is wise to enter the Ancient Ruins at about level 40 then return for the boss at level 45 or higher.
Note: The monsters in this area are fairly strong and can inflict petrification, so make sure your party has appropriate protective equipment like Crucifixes.
1. Ancient Ruins: GoldThreadCoat
Step inside the Ancient Ruins to find a Save Point by a staircase submerged in water. Go through the door to the north to enter a hallway with multicolored torches and a chest that contains some Angel Earrings. The torches are part of a simple puzzle alluded to in the Book of Rituals.
To solve this puzzle, start out by going into the passage lit by the red torch in the middle. Go through the hallway to find yourself in another torch room. Next, walk down the orange hall to the right. After that, go down the yellow torch path on the left, then the green one in the center. This should bring Yuri to a torch room with a chest in the lower right. Open the chest to receive a Lottery Ticket.
Take the blue path on the left after getting the ticket, then go down the hallway by the dark blue flame on the right. Finally, take the violet path on the right when you reach the next torch room. This should cause the water that was blocking the steps in the entrance to drain.
Descend the steps and open the chest in the room with the cross to get Alice’s best Armor: the GoldThreadCoat. At this point, I recommend leaving the Ancient ruins and breaking the curse of the masks now that you have Alice’s best weapon/armor, but you are free to explore more of this dungeon if you wish.
2. Ancient Ruins: Volt Snipe
Come back to the Ancient Ruins (or stay here if you use Halley a lot) and use the directions below to reach the boss, who will award the player with the slingshot called Volt Snipe upon defeat. Make sure everyone has some sort of protection from status ailments as usual and bring a good healer like Alice. Be sure to return to the world map and examine the Book of Rituals again to unlock the hint to the next section of this dungeon.
Using the entrance with the Save Point as a starting location, go north to the colored torch hallway. This time we are basically going in the reverse order, which is as follows: violet (right), indigo (left), blue (right), green (center), yellow (right), orange (left), then red (center). Yuri will emerge back at the entrance and the water will drain from the staircase again if you took the correct route.
Use the Save Point, heal up, and make sure everyone has a Crucifix, because the boss of the ruins is waiting at the bottom of the steps. Yuri should equip Sandalphon.
=====================
Boss: Seraphim
| Drops | Volt Snipe |
Seraphim is a boss to be feared thanks to his mighty physical combo. His Divine Punishment, which hits everyone for roughly 250 damage and can inflict any number of negative status effects is also a problem. The biggest danger is that Divine Punishment can set someone in the party up to be killed by Seraphim’s melee combo, so keep everyone healed up. If you are unlucky, this boss may just haul off and kill someone with a crit, so be ready to resurrect fallen allies.
If Yuri has Sandalphon, you should cast Sanctuary to cut down on the threat posed by Divine Punishment. Any attack works well against this boss since he has no elemental alignment, so use your strongest abilities to damage him. Luckily, Seraphim does not have a lot of HP, so this battle should end fairly quickly if you can keep everyone alive.
=====================
With Halley’s ultimate weapon and Alice’s best armor, you are just about done with the Ancient Ruins, but there is one more secret to uncover in this dungeon after you visit Neameto for the first time.
3. Acquiring the Seraphic Radiance
This part of the quest will take you back to Nemeton to talk to Roger Bacon. I strongly recommend breaking the curse of the masks and saving Alice before talking to Roger, so skip to the next section and come back here after doing that if you want the good ending. You will also need to complete the Cave Temple, have ALL of the Fusion Souls (including Amon), the Codex of Laurie, and the Erotic Book to get the Pulse Tract, which unlocks the path to the Seraphic Radiance.
Return to Nemeton and visit Roger Bacon yet again. He will exchange the Erotic Book for the Pulse Tract after an amusing bit of dialogue. Look at the Pulse Tract in the valuables screen to get another tip regarding the Ancient Ruins.
Start out at the Ancient Ruins entrance where the flooded staircase is located and go through the door to the north as you did in the past. Take this route through the colored torch passages: yellow (left), red (left), green (center), violet (right), indigo (left), red (center), then light blue (right). The party should end up back in the entrance with the water to the steps drained away once more. Go down the steps and open the box for the Stone of Rebirth.
That was the easy part, now Yuri will have to fight the Seraphic Radiance that blew up Shanghai. I strongly recommend saving your game and making sure Yuri is at least level 55 before challenging the Seraphic Radiance. You may also want to gather more special items from side quests, like the Crystal Ring (Pitfights) and Seven-Eyed Mask (Breaking the Curse of the Masks) to give Yuri an edge in this battle. Personally, I recommend equipping the Power Belt, Berserker Earrings, and Seven-Eyed Mask if you have them, but it is not a bad idea to experiment if you are having trouble. The Voodoo Doll may be a good choice, though more limited in use than the others. It is also a good idea to upgrade Yuri’s weapon and stock up on Pure and Thera Extract. Lastly, equip a soul that gives Yuri extra physical defense like Lobo. You may even want to move him into the back row, though this also reduces his damage output.
Visit the Graveyard when you are ready. Go through the open gate in the north part of the Graveyard to the grassy hilltop where Yuri fought Foxface long ago and examine the setting sun. Leave the way you came and Yuri will be stopped by his father who will talk to him for a while before challenging Yuri.
=====================
Boss: Colonel Hyuga/Seraphic Radiance
| Drops | Diamond Ring |
The battle will start with Yuri facing off against his father. Ben has a powerful melee combo that can do about 200-300 damage per round, but that’s all he has up his sleeve. Use a fusion like Sandalphon or Amon to speed the fight up. Damage Ben enough and he will transform into the Seraphic Radiance.
Seraphic Radiance is far tougher than Ben. She has a powerful physical combo that can deal upwards of 400 damage if you are unlucky and can drain your life with Malcto. Lobo’s Charge ability is really great in this battle, since it takes a lot of the edge off the boss’s main attack. As an added bonus, not having to heal so often leaves Yuri able to focus more on attacking, which is always a good thing.
Be sure to heal using Shout or an item whenever Yuri gets down to about 400 HP. You will also have to watch Yuri’s SP in this long battle, since going Berserk is basically a death sentence. This battle is basically a slug fest; keep the pressure on this boss and she will eventually give in.
=====================
Yuri will earn the Seraphic Radiance Soul after the battle. Return to the hilltop and check behind the tree to get Father’s Coat, Yuri’s best armor.
H. Breaking the Curse of the Masks (Good Ending)
| Items | Seven-Eyed Mask |
Alice’s soul is in jeopardy now that she has taken the Curse of the Masks on herself to save Yuri. You will need to have gotten the Oath Chalice from Joshua in the London Rat’s Hideout to begin this quest. Additionally, it is very important to avoid talking to Roger Bacon and triggering the scene where Alice goes to the Graveyard after defeating Albert Simon in Nemeton before the masks are defeated.
The Oath Grail will give you a hint on how to defeat the Four Masks if you look at it in the Valuables section of the inventory. Simply put, you will have to defeat the masks in a specific order (Grail, Gold, Staff, then Sword) to break the curse. Luckily, the Grail will weaken the masks. The masks attack when the Malice Meter is red, which can only happen if Alice is in the party. Which mask attacks is random, so you will likely have to run from them a few times until you get the mask you need.
Keep in mind that each of the masks can inflict some pretty nasty effects on the party at the start of the battle. It also helps to be a decently high level (35+) if you want to have an easy time taking these guys down. Nemeton is a good place to battle the masks, since there is a Save Point near the entrance and the Exp in this area is good. Players looking to fully flesh out the bestiary will want to make sure they have also fought each mask a second time, since the broken version of a defeated mask counts as a new enemy.
Tip: Complete the Dollhouse for Alice’s best weapon and visit the Ancient Ruins for her best armor to make fighting the masks/Atman easier.
1. Grail Mask
| Drops | Amber Ring |
The Oath Grail will weaken the Grail Mask, causing its curse to actually double the Judgement Ring hit area instead of shrinking it. You will still need to watch out for this mask’s powerful SP Lowering ability as well as Dragon’s Cry which inflicts water damage on the entire party. That said, the grail Mask is weak in terms of defense and can be defeated fairly quickly using regular attacks, so this battle should go well as long as you keep everyone healed.
2. Gold Mask
| Drops | Carnelian Ring |
The Gold Mask is the next target after the Grail Mask. the party won’t get any buffs at the start of this battle, but they will not get debuffed either. Gold Mask cannot be harmed by physical attacks, so bring a good spellcaster like Halley or Zhuzhen along for this fight. You should also have Yuri transform ASAP if he does not have Willpower equipped, because the Gold Mask can lower his SP. Aside from that, this battle is really easy as long as you watch out for Gold’s melee attack.
3. Staff Mask
| Drops | Lazurite Ring |
The Staff Mask is the opposite of the Gold Mask, because physical attacks work on it while magic is useless. As with the other two masks, the Oath Grail will prevent Staff from inflicting negative status on the party at the start of the fight. This leaves the Staff Mask with its SP Lowering attack, weak melee combo, and Hellfire spell. Consequently, Staff should not present a challenge as long as you use physical attacks.
4. Sword Mask
| Drops | Obsidian Ring |
Another easy fight as long if you have been battling these guys in the correct order. The Sword Mask is the last of the four and poses little threat. It has the usual SP Lowering attack and a weak spell, but aside from that there is nothing special about this fight. Both magical and physical attacks work on Sword, so let loose to defeat the last mask.
5. Atman
Recommended Level: 47
| Drops | Moonstone Ring |
Before continuing, visit the Graveyard with Yuri and examine the small gravemarker in the lower left. This will trigger one of the final events needed to get the good ending. Make sure you have a powerful Fusion Soul on Yuri like Sandalphon or Amon and equip Alice as well as Yuri with a Crucifix.

Go back to Roger Bacon’s House in Nemeton and talk to him. He will tell the party to rest as he makes the final preparations for the transporter. Alice will appear in the Graveyard. Walk up to the door guarded by the masks and enter. Atman will appear. If you did everything correctly, Yuri will step in to assist Alice before the fight with Atman.
Atman tends to focus on Alice with his Status Abnormality attack and Eradication. The former can inflict damage as well as status effects, while the latter lowers SP and damages Alice a lot. Atman can also cast spells like Hellfire, so be ready to do some healing.
Despite his powerful attacks, Atman should not be much of a problem if you came prepared. This goes doubly if you followed this walkthrough and got Alice’s best weapon/armor. The primary threat in this battle is Alice’s death, which will spell failure, so keep her healed up. Atman has a lot of HP and this fight can last a while. Use Pure Roots if needed and Alice’s Advent spell to speed things up.
6. Atman Defeated
The pair will wake up after the battle and a cinematic will play where Alice talks about her feelings with Yuri after they defeat Atman. With Alice free from the curse and Atman destroyed, the player will be able to view the happy ending after defeating the final boss. It also unlocks the Seraphic Radiance and other important side quests.
Visit the Graveyard once more. Checking the small gravestone in the lower left will reveal that a new name has been carved on it. You can also approach the masks to watch a funny scene between them and Yuri and receive the Seven-Eyed Mask, a powerful defensive accessory.
I. Getting Yuri’s Best Weapon (Optional)
| Items | Nightbird Claw |
Note: You will need the Codex of Laurie from the boss room in the ruins under Nemeton to trigger this event.
If you have been following this guide, you will be right in Roger Bacon’s house in Nemeton after defeating Atman with Alice and Yuri. Alternatively, you can go for the bad ending and talk to Bacon before defeating the four masks, either way Bacon will run on the treadmill again to warp the party to Neameto. The party can warp back to Bacon’s House from Neameto by stepping on a yellow sigil near the entrance to the dungeon.
After returning to Roger Bacon’s house, the old man will ask Yuri to run on the treadmill again to transport him. This brings up an insanely difficult spin wheel that the player has to complete 10 times. You can attempt this ring as many times as necessary and the only advice I can give for it is stay calm and practice. When you successfully complete the ring, Bacon will warp away only to return moments later with the Nightbird Claw, Yuri’s best weapon. To be honest, this weapon is hardly worth the effort, since it is only about 5 points stronger than the Silver Wolf Fang, though it does have a lot more special attack power. At any rate, this is a good time to wrap up the Ancient Ruins, participate in the Pitfights, or head off to the Cave Temple.
J. Cave Temple (Optional Dungeon)
| Items | Priest Earrings | Lottery Ticket | Mant.OfShivering | Fifth Key | Key to Success |
Note: Bring good physical damage dealers like Magarete and Keith to this area as well as a healer or make sure Yuri has a Fusion Soul that is good at healing equipped. The monsters in this dungeon are nasty and the boss is immune to magical attacks.
The Cave Temple is important not only for acquiring Zhuzhen’s strongest weapon, but also for unlocking the secret path in the Ancient Ruins that allows Yuri to get his mightiest Fusion Soul. Take a look at the Emigre Manuscript given to you by Macken in the Orphanage to unlock this dungeon in Britain.
Get ready for a maze not dissimilar to that of the Ancient Ruins, except there are no colors to follow and the party will be transported to the entrance if you make a mistake. Go through the entrance to find a door and an engraving on the left hand wall. The engraved door leads to an intersection with three more doors. Take the door in the north and you will find a stone chest that contains the Priest Earrings. Return to the intersection, then go through the door on the left, then north, then left again. This should bring you to an intersection with only three exits.
From there, go south twice, then left, then north to reach another stone chest that has a Lottery Ticket. Exit the Lottery Ticket room, then take the door on the left.
Head north, then left to reach a room with a Save Point. Next, go through the door north of the Save Point and open the box to receive an Mant.OfShivering, then get warped back to the beginning of the maze. Exit the dungeon and return to the world map, then look at the Emigre Manuscript (which has changed) to unlock the next part of this dungeon.
Reenter the Cave Temple and go through the double door in the engraving room. Things have switched around and the party can access new parts of the temple. Walk north through the door in the intersection to another treasure room. Open the box to get a Fifth Key, then leave the treasure room. Next, go through the door on the right, then the door to the north, then right once more. This should bring you to a three-way intersection. Go south twice, then right.
Enter the door to the north and open the chest for a Key to Success. Exit the key room. Head right, north, then right to reach another room with a Save Point. As always, save your game. Make sure everyone has a Crucifix or Zodiac Bracelet if you do not have enough to go around. I also recommend equipping Yuri with Sandalphon.
=====================
Boss: Cherubim
| Drops | Holy Peak Staff |
Cherubim is immune to magic, so do not bother using special attacks of any kind on him. The primary threat from this boss is Divine Punishment, which can do about 300 damage to everyone and inflict negative status effects. He can also reduce a single target’s HP to 1 with !!! and has a decently powerful physical attack.
It’s likely your party members are going to die frequently to Cherubim’s attacks unless you spend almost every turn healing, so Yuri’s Sandalphon Fusion comes in handy here. Revive effects the entire party and can heal as well as resurrect. Sanctuary is also helpful for blunting the impact of Divine Punishment. Everyone else should attack as much as possible while keeping Yuri’s MP full. It is also smart to use some Pure Root or Extract every so often, because this battle can take a while.
=====================
With Cherubim finished off, the party has fulfilled yet another prerequisite for Yuri’s ultimate Fusion Soul. You will also get Zhuzhen’s mightiest weapon.
K. Bistritz: Blue Castle (Optional Boss)
| Items | Demon Sword Tyrving |
Note: Make sure Kieth is level 45 or higher before attempting this battle.
Head back to Bistritz with Kieth in the party whenever you want and talk to Nina. The young girl may be inside or outside of her family’s shop depending on whether or not you got the Earth Gravestone. If you already got the Gravestone, she will mention a gold light showing from the castle. If not, she will give you the stone and you will have to talk to her again after leaving.
Either way, this is your cue to visit Blue Castle again. Head into the castle entrance and use the Save Point to save your game. You should also give Keith a Jade Lariat and accessories that boost physical damage in preparation for the upcoming battle. Go across the steps southwest of the Save Point to get to the basement and approach the coffin. Keith’s brother (a big gold bat) will give him the Demon Sword Tyrving and challenge him to a good old fashioned sibling rivalry duel.
=====================
Boss: Golden Bat
| Drops | DemonSwd-Tyrving |
The Golden Bat will not attack you at first. In fact, he gives Keith (who must fight alone in this battle) five turns to knock him out. If Keith fails to defeat his brother in five turns, he will be attacked and killed in one hit. To make matters worse, Keith cannot use magic in this fight AND the Demon Sword Tyrving has a really small hit zone.
Hopefully you equipped that Jade Lariat to make getting hits easier. Even at level 45 you will likely need to get every hit in Keith’s combo to connect, which can take several tries. Luckily, the Golden Bat gives Keith an extra turn before killing him, so do not give up if you fail to beat him on the fifth turn.
=====================
Tyrving is Keith’s ultimate weapon, but there’s more to see in the castle. Leave the castle and remove Keith from the party, then return to the throne room. You will find Lottery Member No. 1 walking around. See Section V, Part D or Section VI, Part A of this guide for more on Lottery Member No. 1.
L. London Pitfights (Optional)
The Pitfights can be found in the London Rats’ Hideout west of the Save Point after Albert Simon is defeated in Nemeton and the party talks to Koudelka. Like the Shanghai Pitfights, players can have one of their heroes battle a series of 10 matches with various summoned monsters in hopes of winning a prize. There are many prizes and they differ according to character.
Alice = Crucifix
Halley = Metal Jacket (Halley’s ultimate armor)
Keith = Belt of Thor
Magarete = Tissues
Yuri = Seventh Key
Zhuzhen = Silver Hand
Beat the Pitfights with Everyone = Crystal Ring
Many of the items awarded to the player are very good, but not necessities. This makes it fairly safe to skip this section if you just want to get on with the end. That said, Halley’s Metal Jacket, Crucifix, and the Crystal Ring are very powerful.
To get started, try to level everyone up to about level 49 to ensure that every character has his or her most powerful abilities. Otherwise, the Pitfights can get really tedious for characters with low attack power, like Alice.
1. Noteworthy Battles
The order of the Pitfights and what enemies appear in them are random. Some battles are very easy, while others can be challenging depending on your level. Here are a few of the more dangerous enemies that can pop up and advice on how to deal with them.
Mammon – The Orphanage boss should be familiar. Be prepared for a long battle, because this monstrosity has a lot of HP and can heal itself. Use items like Thera Extracts and Tea of the Holy one to heal anyone fighting this beast. Try to hit it as hard as possible as frequently as possible, especially when it starts healing itself. One way to pull this off is to conserve your MP until Mammon starts using Howling, then unload on it with your strongest abilities to finish it off.
Rausan – Formerly the boss of Calios Mental Hospital, Rausan is fairly resistant to magic. Luckily physical attacks work fine on him and he cannot heal himself, so do not waste MP on this guy unless you have plenty of healing items.
Perfect Windshear – This nasty beasty can deal a lot of damage with its melee attack, which makes it a threat to characters like Zhuzhen and Alice. Its Shining Death spell can deal upwards of 400 HP, making this fight dangerous for just about anyone. Fortunately, this monster has little in the way of HP and will die fairly quickly as long as you can get attacks in between heals.
Nightstalker – Though weak in terms of attack power, this creature has a lot of HP and can increase its Agility with Ignition. It can also deal a fair bit of damage with its combos. Keep an eye on your health when battling this monster.
FArmorWindshear – Despite being weaker than a Perfect Windshear, this variant can still dish out some punishment. Use the Same tactics that work on Perfect Windshear to defeat it.
2. Character Tips
Here are a few character specific tips for the Pitifghts. Keep in mind that these tips assume you have at least one Crucifix to give your characters.
Yuri
| Prize | Seventh Key |
Winning the Pitfights with Yuri is ridiculously easy, even if you missed out on the Seraphic Radiance Fusion Soul. This also makes him a good place to start, since you can get familiar with many of the monsters Sharon can summon. Give Yuri a Crucifix and the Flare Brooch. These battles should be very easy if you have Amon or Seraphic Radiance, otherwise Sadalhon is a good choice.
Margarete
| Prize | Tissues |
The prize Magarete gets for completing the Pitfight is abysmal and likely a joke on the part of the devs, so you may as well get her out of the way early on. Luckily, Margarete is a decent fighter and can easily clear out most groups of enemies as long as you have unlocked her more powerful skills, like Diving Bomber. While well balanced in terms of offense, Magarete is not great defensively and lacks healing abilities. Make sure you have plenty of healing items going into this fight. It is also wise to give her a Crucifix as usual as well as Priest Earrings.
Keith
| Prize | Belt of Thor |
Keith is one of the easier characters to use in the Pitfights thanks to powerful abilities like Blood Sucker and Gift. That said, Keith is somewhat lacking in terms of MP and can benefit greatly from the Priest Earrings.
Zhuzhen
| Prize | Silver Hand |
While Zhuzhen is great at wiping out hordes of monsters with his powerful magic, he tends to struggle in the Pitfights due to somewhat low single target damage. To make matters worse, the fact that Zhuzhen is not great at dealing physical damage will make enemies that resist magic rather tedious to fight. Last, but not least, Zhuzhen does not have a lot of HP, so you will need to equip Berserker Earrings or watch his health carefully.
On the bright side, Zhuzhen has plenty of MP and can heal himself reliably with Nourishing Potion. Accessories like the Power Belt or Belt of Thor can give him a much needed power boost. The Warlock Earrings can also help, just watch out for the 20% boost to incoming magic damage. Unfortunately, the Pitfights will still drag out for Zhuzhen unless you get him to level 60 or higher.
Halley
| Prize | Metal Jacket |
Halley is well suited to the Pitfights thanks to his ESP abilities. Shock Max will be your bread and butter, but Healing and Black Hole are also useful. Halley should have the usual Crucifix as well as Priest Earrings equipped. An item that increases attack power is also helpful.
Alice
| Prize | Crucifix |
Alice should be about level 50 so she has Advent before attempting the Pitfights. Without Advent, she will not be able to dish out enough damage to win battles. I also recommend making sure she has her best weapon/armor.
M. Odds and Ends (Optional)
As you likely already noticed, Shadow Hearts has a lot of endgame content, some of which tends to be very minor. This section looks at a few small side quests that award players with powerful items and some things players can do before wrapping the game up.
1. Getting Magarete’s Strongest Armor
| Items | Leather Suit |
Magearete’s most powerful armor, the Leather Suit, can be acquired by getting 10,000 steps on the Pedometer. Talk to the Silent Peddler in London and he will automatically give you the armor once you have racked up 10k steps. Equip the Accelerator to speed up the process.
2. Fill Up the Bestiary
| Items | BlackSilkPants |
See Knowledgeable Carl in the London Rats’ Hideout and talk to him. If you got 100% of the monsters in the bestiary, he will give you the BlackSilkPants for Alice. Obviously this is something for the very end of the game, since a good number of monsters are in the last dungeon. Additionally, you have to get these on your second playthrough since the game ends after you beat the last boss who is also counted as a monster.
N. Neameto Float (Final Dungeon)
Recommended Level: 50
| Items | Brsrkr Earrings | Seal of Aura | Lottery Ticket | Crank Slingshot | Sage Staff | SIlverThreadCoat |
| Rubber Suit | Monk Earrings | Heretic’s Coat | TalismanOfPower | V-blade-Blodauth | Mind’s Eye | Fifth Key |
Warning: Do not talk to Roger Bacon after defeating Simon and setting up the teleporter until you break the curse on Alice if you want the good ending.
Talk to Bacon when you are ready to warp up to Neameto and he will tell the party to rest. Alice will be transported to the Graveyard and she will have to talk to the masks. They will open the door for Alice to enter, which leads to a room where Atman wil attack her. If you defeated the four masks and had Yuri look at the small gravestone, he will come to assist Alice in the battle with Atman, see Section V Part H for more on breaking the curse on Alice.
Regardless of the outcome of the battle, the party will assemble in the morning and Yuri will have to run on the treadmill again to fire the teleporter up. This will require you to complete another spin ring. Luckily, the teleporter will charge up even if you fail, though it will require a good deal of work.
Neameto Float is home to some tough enemies, so make sure your characters are about level 50 if you did not do the side quests. It is also smart to bring some healing items along.
1. Neameto Part 1
The party will appear in a strange circular room surrounded by staircases after warping to Neameto. You will be prompted to form a party as soon as you enter, so take whoever you like. A yellow seal that looks a bit like a Save Point will appear, press X while standing on this seal to warp out of Neameto.
Climb the steps, then run over to the northwest corner of the room and ascend the stairs to reach a passage that is blocked by some red beams. Examine the barrier and Yuri will comment on the way forward being blocked. Go back down to the room with the yellow seal and climb the steps to the right. Follow the passage to an empty looking room.
The party will fan out and search the room. Yuri will accidentally trigger another barrier in the room while deactivating the red barrier at the same time. This results in Yuri and Alice getting cut off from the others. The game will prompt you to choose another party. Pick your strongest characters, then set out for the stairs to the west where the red barrier was located.
Your lead character will comment on the red seal being undone. Ascend the steps now that the way forward is clear. You will arrive at a path that forks. Examine the glowing triangle in the center of the path and press the button.

The beams blocking Yuri and Alice will shut off. You will have control of Yuri again, so have him run over to where the others are waiting. Choose your party again once everyone is reunited, then get moving. The path to the southwest leads to a green laser barrier, so take the northeast path.
Continue down the catwalk on the next screen to some steps that lead up to another circular room that is home to a monstrous being. Make sure you are healed up and have full MP, because this boss is only vulnerable to special attacks.
=====================
Boss: Soul Block
| Drops | Monkey Paw |
Soul Block has a brutal melee combo that can deal 400 damage to even high level characters in their best armor, so take care during this fight. Putting someone like Halley or Alice on healing duty is a good idea. Soul Block also uses multitarget spells, so be ready to heal several injured characters per turn. Despite its immunity to physical damage, Soul Block has no resistance to special abilities and any type of magic works well on it. If you unlocked Seraphic Radiance and its “For the Children” ability, you can do some major damage to this boss. Otherwise, attacking with your best abilities should work fine.
=====================
Several seals will appear on the floor once Soul Block is slain. Use the one in the center to rest and save your game. The yellow seal will warp you back to Bacon’s lab, while the purple can be used to swap out party members. Be sure to look for a chest to the right to get a pair of Brsrkr Earrings and look for another box to the left that contains a Seal of Aura. If you go down the steps from where you found the Seal of Aura and follow the catwalk south, you will find another box that has a Lottery Ticket.
Finally, look for a green beam of light in the southeast section of this chamber. Step on it to make it widen into a circle, then exit this room via the way you came. Run back to the triangle button hallway and go down the path to the southwest to the chamber that was blocked by the green laser to find that it has vanished. Check the box to get a Crank Slingshot, which is Halley’s second best weapon. Return to the room where you fought Soul Block.
Note: You may want to return to Bacon’s lab at this point to restock your supplies. Defeating Soul Block should also trigger Bacon as a lottery member if you fulfilled all of the other requirements.
2. Neameto Part 2
From the room where you fought Soul Block, go up the steps in the upper right to get to a catwalk with two staircases leading to other areas. Take the steps on the right, which should be directly in front of Yuri once he climbs up to the catwalk. This will take you to a room with a blue beam directly across from its entrance and a chest that contains a Seal of Vitality to the left.
Step on the blue beam to drop a barrier of the same color in another part of the dungeon, then return to the room with the Save Point.
Look for a doorway just above the green beam on the right and step inside. Yuri will end up in a hallway with a red beam to the right, activate this one as you did the others. Next, go through the doorway above the red beam. This will take you to a room with two chests that contain a SilverThreadCoat and Sage Staff. Return to the room with the Save Point.
Use the Save Point if you need it, then climb up the stairs north of it and go up the steps on the left. This should bring Yuri to a hallway that splits off to the right. Enter the door on the right side of this halfway to get a Rubber Suit and Monk Earrings.
Head back to the hallway and go up the path leading north. Go up the steps to another circular room that is home to a strange wormlike creature. Make sure you have your Crucifixes equipped and give Yuri a light based Fusion Soul if you do not have Seraphic Radiance. If you do not have enough Crucifixes, give everyone a Pocket Watch and anything that prevents poison/paralysis. Walk up to the worm to fight Hate.
=====================
Boss: Hate
| Drops | Seventh Key |
Hate uses a number of attacks that inflict status ailments, most notably Black Fog. It also casts Hate Storm, which can deal a good amount of dark damage to the entire group. That said, it lacks much in the way of defense and will wither under your attacks. Alice should have no problem keeping the party healed and a character like Halley or Zhuzhen can keep the party on its feet by healing everyone whenever possible. Overall this boss is not a problem as long as you equipped something that can block paralysis and negative Judgement Ring status. Unfortunately, a total of 7000 HP keeps this boss from dying quickly, so watch your SP in this fight. Yuri’s “For Everyone” Seraphic Radiance skill really helps speed this fight up.
=====================
Another trio of seals will appear after the battle with Hate. Save and change party members if you need to before going forward.
3. Neameto Part 3
This next section requires the player to navigate a maze of rooms and corridors. Start out in Hate’s room and go up the steps to the north. Continue along a corridor and up a winding staircase. The party will be warped to another part of the dungeon on the next screen. Zhuzhen will comment that the party stepped into a space warp that is invisible to the naked eye. Get ready to encounter more of these warps.
Climb the steps to the north (you can go back to the previous screen by stepping on the spot where the party rematerialized) to another winding staircase that leads to another warp. This warp should take you to a yellowish circular room. Make your way to the left side of this room and climb another set of steps.
Go left a bit more at the top of the steps to get warped again. On the next screen, take a few steps right to a chest that has a Heretic’s Coat, then hop back into the warp you just came from. Back in the circular room, go down the steps near the warp point you just came from, then head all the way to the far right side following the central walkway to another warp point in what appears to be a dead end. Open the box on the circular platform Yuri appears in front of to receive a TalismanOfPower.
After getting the Talisman Of Power, go up the steps to the left and follow them up to another screen. You should see a box at the top of a short set of steps. Open it to get the V-blade-Blodauth. Go back down the steps and up the small path leading north to get warped yet again. This should bring you right back to the initial warp point. Enter the warp to the north again to return to the room where Zhuzhen explained what was happening, then walk down the steps to the south to reach another ornate corridor.
Follow the passage to the right to warp, then go northwest to a corner that looks like another dead end. Examine the end of the path to open a hidden box that holds a Mind’s Eye. Now go back down the steps you just came from to warp back to the previous screen. Head north and open the door, then go north up the steps on the next screen.
The party will be warped back to the circular room when they get near the top of the steps. Climb the short steps just north of where you appeared and turn right to warp again. You should end up on the round platform from earlier with an empty chest in front of you. Head left up the steps to the room where you got the V-blade. From here, climb up the steps on the right to the empty box, then climb up the steps in front of the chest.
This should bring the party back to the room with the round platforms. A box should be right in front of Yuri, open it for a Fifth Key. Descend the steps to the left to warp one last time, then go up the staircase to the north to reach another mid-boss. Make sure you are ready for combat.
=====================
Boss: Scapegoat
| Drops | Crucifix |
Scapegoat is another high HP boss, so be ready to unleash your strongest skills. Despite having a weak melee attack, Scapegoat can deal a lot of damage with Slash and Deathtouch. Consequently, Alice is a good choice for this battle thanks to her healing magic. Watch out for the boss’s Wind Fang, which damages everyone, though it is not any more powerful than the last boss’s multi-target spell. While Scapegoat is fairly weak, it resists water magic pretty well, so avoid using things like Magarete’s Diving Bomber spell on it.
=====================
Once again, a trio of magic seals will appear after Scapegoat has been slain. Be sure to Save after you have come all this way.
4. Neameto: The End of the Line
The area north of the Save Point and other seals is a point of no return, so do not go forward if you are not ready. Double check your gear and make sure everyone is prepared for the boss ahead, which happens to be the final one. I suggest placing Alice in the party, because it helps a lot to have a good healer. You should also give everyone a Crucifix if you have enough to go around. The Will Power accessory is also helpful, but I find SP easy enough to restore using Pure Roots and the like.
Walk north from the Save Point and Albert Simon will challenge the party once again after you step into the center of a large circle.
=====================
Boss: Messiah
| Drops | Silver Hand |
Messiah’s main gimmick is Holy Chest, which does a significant amount of damage (200+ HP) to the party and drains SP by 50%. Messiah’s melee combo is also very powerful and can drop a weaker character in one round if you are unlucky or under level 45. He also uses !!! to reduce a target’s HP and can inflict all manner of status ailments if you do not have a Crucifix (or three). Finally, Messiah can heal himself for a full 999 HP with Grace, which can make this battle extremely difficult if you are not very strong.
As usual, I highly recommend using Yuri’s Seraphic Radiance form in this battle if you have it. “For Everyone” is especially helpful. If you do not have it, use a strong Fusion Soul that can heal as well as attack. Messiah is no pushover, so do not be shy about using your items to heal and buff everyone. Magic and normal attacks work pretty well on Messiah, so use whatever you have at your disposal.
=====================
Albert will send the party off to the final battle once Messiah is history. You will be prompted to choose your party formation again. Keep the party you have, because you cannot change your gear on this screen. The party will also be fully healed, so get ready to fight Meta-God after a brief movie.
=====================
Boss: Meta-God
Do not bother buffing your party, because Meta-God can remove everyone’s buffs with Light of Deprivation. Its Time of Judgement spell does roughly 300 HP to everyone and damages their MP, so have those heals ready. Black Abyss damages SP and MP. Meta-God has a number of abilities that inflict heavy damage on the party as well as debuffs, so be ready to respond to any problems that crop up. If you lack Crucifixes, you’re going to have a hard time with this boss. It is also worth knowing that this boss can reduce a single target’s HP to 1 with Nine Springs.
Hopefully you brought Alice along for the ride, because she will need to cast Arc almost every turn. Maintaining Alice’s MP should be a top priority. This battle is brutally long thanks to Meta-God’s massive 12,000 HP. Yuri’s Seraphic Radiance form is a big help if you have it, because “For the Children” can do around 800 damage to Meta-God. Aside from that, you will have to use your strongest abilities and hope for the best.
=====================
Defeat Meta-God and you will be able to watch the final cinematic. Depending on your actions concerning the curse placed on Alice by the four masks, you will get the good ending or the bad ending. You will also be able to replay the game from the beginning again with a variety of items and power ups if you save your game after the end credits. Congratulations on finishing Shadow Hearts!
VI. Mini Games and Side Quests
This is more or less an appendix for the many side quests and extras that appear in Shadow Hearts. It does not go into great detail, so refer to the walkthrough for particulars.
A. The Lottery
The player can use Lottery Tickets dropped by monsters or found in certain places to play a Judgement Ring game by giving a ticket to a lottery member. There are several lottery members scattered around the game and each one offers different prizes. To unlock the final Lottery Member (No. 00) you will need to find all the rest and complete the sidequests, then defeat the first boss in Neameto. I strongly recommend spending at least 1 Lottery Ticket on every Lottery Member, because the game seems to be very strict about unlocking the final member.
| Member | Location | Prizes |
| 15 | Fengtian | Jade Lariat, B. Tortoise Fang, Talisman of Mercy, Pure Seed, Tissues |
| 14 | Dalian | Pocket Watch, W. Tiger Hair, TeaofTheHealer, Pure Leaf, Tissues |
| 13 | Smuggler’s Boat, Kato | Iron Clogs, B. Dragon Horn, Witch’s Broth, Tissues |
| 12 | Shanghai | Star Card (Guild Card), R. Phoenix Talon, TeaoftheHolyOne, Pure Seed, Tissues |
| 11 | Ni Wan Palace, Temple Ruins | Flash Badge, Kirin’s Scale, Priest’s Wine, Pure Seed, Tissues |
| 10 | Kowloon Fortress | Mind’s Eye, Moon Shallow, TalismanOfWisdom, Pure Seed, Tissues |
| 9 | Kuihai Tower | Warlock Earrings, Star Swallow, Soul Benediction, Pure Seed, Tissues |
| 8 | Prague | Brsrkr Earrings, Seal of Luck, TalismanOfPurity, Thera Root, Tissues |
| 7 | Bistritz | Oracle Earrings, Seal of Life, Tea of the Holy One, Mana Root, Tissues |
| 6 | Rouen | Accelerator, Seal of Aura, Alchemist’s Water, Pure Root, Tissues |
| 5 | London, Old Castle Street | Priest’s Earrings, Seal of Speed, Thera Extract, Thera Root, Tissues |
| 4 | Calios Mental Hospital, After defeating Rausan | Eternity Card, Seal of Force, Mana Extract, Mana Root, Tissues |
| 3 | Orphanage, After Nemeton | Crucifix, Seal of Wisdom, Pure Extract, Pure Root, Tissues |
| 2* | Rouen, After Magarete’s Confession Side Quest | 10 Gauge, Dice of Caesar, Seal of Strength, Eye of Ouroboros, Tissues |
| 1 | Blue Castle, After getting Tyrving | Thief Earrings, Key to Success, Seal of Vitality, Fruit of Yggdrasil, Tissues |
| 0 | Roger Bacon, After defeating Soul Block and finding the other lottery members | Cotton Underpants, Comet Mask, Seal of Soul, Talisman of Power, Tissues |
B. The Pedometer
The party will meet the Silent Peddler in Fengtian. He will give Yuri a Pedometer that counts steps taken in dungeons and other dangerous places. These steps can be exchanged for a variety of items, some of which can only be obtained using Pedometer steps. Players will eventually find the Accelerator, which doubles the number of steps counted. Sadly, both items must be equipped as accessories. Here is a list of everything sold by the Peddler:
| Item | Steps |
| Thera Extract | 100 |
| Voodoo Doll | 300 |
| Weird Bottle | 800 |
| Iron Clogs | 1500 |
| Flash Badge | 2500 |
| Moon Swallow | 3500 |
| Star Swallow | 5000 |
| Monkey Paw | 6500 |
| Silver Hand | 7000 |
| Belt of Power | 8000 |
| Leather Suit | 10000 |
C. Using the Guild Card
The Guild Card can be used at shops to begin a Judgement Ring game that allows the player to get discounts on items or more money for items he or she is selling. Complete the ring game and you will get your price change, fail and you will have to pay the usual price. Failure will also result in a “demerit”, get 5 demerits and you will lose the card. Save your game before using a Guild Card whenever possible and reload if you get a demerit. It is possible to collect several Guild Cards over the course of the game.
D. Fusion Monsters
1. Fusion Monsters
Death Emperor (Dark *) – Yuri starts the game with this soul.
Charon (Dark **) – Charon uses death magic, so equip Leonardo’s Bear before fighting him for safety’s sake. I also recommend getting the Baldo Soul before fighting this monster. Use Nova on this fiend and heal up with Grace. Charon can buff his special attack damage, which can make Nightmare really dangerous, so keep your HP high.
Czernobog (Dark ***) – I strongly recommend being at least level 30 and using Baldo in this fight. You should also equip Leonardo’s Bear to defend against Czernobog’s instant death ability. As a high level monster, Czernobog can do a lot of damage with his melee attacks and Revelation spell, so cast Elder Sign to mitigate some of his magic damage. Nova works well in this battle and Badlo’s melee attack is also effective if you are above level 35. Heal using Grace when necessary.
Raging Tiger (Earth *) – Available near the start of the game when you visit the Graveyard for the first time.
Mad Bull (Earth **) – Mad Bull has strong physical defense and can heal itself with Howling. Use a fire or wind Fusion Soul on this monster and pummel him with special attacks to bypass his physical defense.
Lobo (Earth ***) – The final Earth Fusion is a tough customer thanks to his ability to reduce physical damage by 30%. He can also heal himself for over 400 HP. Use Seravi if you have her and her Shock Barrage unlocked, because she can do tremendous amounts of damage to Lobo. Otherwise, Icarus will suffice.
Tornado (Wind *) – Becomes available once you get enough Wind Soul Energy. Dangerous at low levels, but can be easily defeated with Raging Tiger.
Icarus (Wind **) – Icarus is quick and dodgy as one would expect from a wind elemental. It also has a decent physical attack. Use Mad Bull’s Rock Storm to beat this monster into submission.
Seravi (Wind ***) – This Fusion Monster should not be a problem if you are level 40 or so. Use an Earth Fusion Soul or Amon if you have it. Seravi can dodge Yuri’s attacks if he is at a low level fairly reliably, so use spells on her if you are having trouble getting physical attacks to connect.
Man Dragon (Water *) – Like the other one star monsters, Man Dragon can be dangerous if you are lower than level 10. Use Tornado’s Wind Shear on this creature. Man Dragon can heal himself, so try to make all your attacks count.
Dragner (Water **) – Like Man Dragon, Dragner can heal himself and dish out a fair bit of damage with his spells. He can also boost his Phys Evade by 30%. Use Inferno’s Fireball ability to defeat this monster.
Egil (Water ***) – Egil is another dodgy enemy thanks to its special powers, so be ready to use spells on it. Dealing heavy damage as quickly as possible is also important to counteract Egil’s Holy Tears healing spell. A Fire Fusion is your best bet in this fight.
Inferno (Fire *) – Man Dragon works best on this monster. Watch out for its powerful melee attacks and hit it with Flash Flood.
Ifrit (Fire **) – Use Dragner on this Fusion Monster. Icy Breath can inflict quite a bit of damage on Ifrit, just watch out for his powerful melee attacks.
Forron (Fire***) – The ultimate Fire Fusion Monster cannot heal himself, but he hits like a truck. A Water Fusion works well in this fight, since it will allow Yuri to outheal the damage Forron inflicts.
Heaven’s Fiend (Light *) – Use Death Emperor to fight this creature. Be prepared to heal with a Thera Leaf or something, because Yuri is naturally weak vs. the Exorcist Arrow spell it casts.
Baldo (Light **) – Like Heaven’s Fiend, Baldo can cast a powerful holy attack spell called Nova and protect himself from special attack damage. Use Death Emperor’s Dark Messenger ability to slay Baldo.
Sandalphon (Light ***) – Once again, a dark soul like Charon or Czernobog is the way to go with this Fusion Monster. Sandalphon’s Pulse spell will be nearly ineffective against Czernobog and you can attack at will. Revelation is especially good if you unlocked it. This creature heals itself, so be ready for a long fight.
Amon (Neutral) – Amon can only be acquired through special means. Get the DestructionStone in Nemeton before fighting Albert Simon and you will get Amon as a prize when you defeat Simon.
Seraphic Radiance (Neutral) – The ultimate fusion soul requires a lot of work to get. Players who want this soul will need the Book of Rituals, Erotic Book, and Pulse Tract just to find it in the Graveyard near the end of the game. Details on how to find and defeat this Fusion Monster are in Section V, Part G of this walkthrough.
2. Unlocking Level 3 Fusion Monsters
The strongest Fusions require a bit bit more than Soul Energy and a fight to unlock. Yuri will have to collect special items called Gravestones for each element to unlock the final Fusion for that element. Gravestones can be found scattered around Europe.
Dark Gravestone – The first Gravestone that is available in the game can be found at the top of the tower in Blue Castle in the room where Yuri was staying. You have to return to the castle to pick this one up after saving Yuri.
Air Gravestone – Get some tissues from the Lottery by losing, then see Owner Gismot at the bar in Prague after beating Olga for the first time. Next, talk to Darcie in the men’s room and he will give you the AIr Gravestone in exchange for the Tissues.
Fire Gravestone – Check a chest in Calios Mental Hospital twice to get this stone.
Earth Gravestone – Talk to Nina in Bistritz after finishing Calios.
Water Gravestone – Complete the Fighting Couple sidequest in Rouen after the Orphanage. See Section IV Part H.
Light Gravestone – Search the strange building outside of Nemeton.
DestructionStone – Obtained in Nemeton, needed to unlock Amon after defeating Simon.
Stone of Rebirth – Found in the Ancient Ruins after completing a long series of quests, unlocks the Seraphic Radiance. See Section V Part J for more info.
3. Unlocking Level 3 Fusion Monster Skills
The process to unlock the “?????” skill for each of the Level 3 Fusion Monsters is quite simple: Let Yuri run out of SP and go Berserk. Yuri will unleash the locked ability of whatever Fusion Monster he is using while in its form. This is best done during random battles where the threat of defeat is very low.
E. Kowloon Fortress
This quest can be unlocked in Shanghai after you complete the Temple Ruins. A cutscene involving Alice and Dehuai will begin once you talk to Kawashima and Kato in their hotel room after getting the Yuwang Gate Key. Alice wil try to stall Dehuai. Choose the first option each time Alice attempts to stall to unlock Kowloon Fortress. To visit the fortress, get on the old fishing boat in the Shanghai dock. You cannot attempt this quest after completing Kuihai Tower.
F. Pitfights (Shanghai, Zhen’s Bar)
The player can participate in a series of battles with monsters summoned by Zhen after completing the Temple Ruins and before completing Kuihai Tower. To find the Pifights, simply visit Zhen’s Bar south of the Hotel in Shanghai and go through the curtains at the back of the room. Players that win all ten matches will receive Anne’s Cross and 5000 Cash. See Section II, Part L for more info on the Pitfights.
G. The Fighting Couple (Rouen)
Revisit Rouen’s inn and go upstairs to start the quest. You will find the couple in the room on the right. Talk to John, then head over to the church and hop into the confessional on the right. Step inside the second booth and John will confess to Yuri thinking he is a priest. You will be given three possible responses for John’s confession, choose the second response that urges him to tell his wife his true feelings. The other two responses yield less than desirable results. You can learn more about them in Section IV Part H of this guide.
Go back to the inn where you talked to John for the first time to find him and his wife happy. John will give you the Water Gravestone as thanks for saving his marriage. This quest also seems to trigger the Maragrete’s Confession side quest after the Mental Hospital.
H. Pitfights (London Rats Hideout)
You can participate in a second set of Pitfights after freeing Koudelka by talking to Sharon in the London Rats’ Hideout. These fights are highly optional, but some of the prizes for them are very good. See Section V Part L for details.
I. Magarete’s Confession (Rouen)
Return to Rouen with Yuri and Margarete in the party after finishing Nemeton. Enter the church to hear Magarete’s confession and get a Pearl Ring. This also unlocks Lottery Member No. 2 in the alley by the church.
J. Breaking the Curse of the Masks (Good Ending)
First off, make sure you get the Oath Grail from Joshua in the London Rats Hideout in Castle Street after clearing Calios Mental Hospital and before going to Neameto. In fact, I strongly advise anyone shooting for the good ending to get the Oath Grail sooner rather than later, because I am not sure when the window of opportunity for this item actually closes. Next, you will have to defeat the Four Masks in the following order: Grail, Gold, Staff, then Sword.
Once all of the masks have been defeated (they will turn gray as proof) have Yuri examine the small tombstone on the west end of the Graveyard. He will see Alice’s name on it and realize what is going on. After that, make sure Alice and Yuri have good gear on (Crucifixes and Alice’s best weapon/armor) then pay Roger Bacon a visit after clearing Nemeton. Alice will have to fight Atman after talking to Bacon, but Yuri will join the battle and increase the odds of Alice’s survival greatly. Beat Atman and you will get the good ending.
K. The Secret Books
There are several hidden books in Shadow Hearts that unlock special items, areas, and powers. These can be found near the end of the game in various places that require a bit of backtracking.
1. Emigre Manuscript
Go back to the Orphanage after Nemeton and play hide and seek with Insolent Jean. If you manage to win, check the cauldron Jean was blocking and Macken will give you the Emigre Manuscript.
2. Book of Rituals
This book unlocks the Ancient Ruins. Take Alice and Zhuzhen to the Nemeton Monastery after you beat Albert Simon.
3. Codex of Laurie
Found in the boss room at Nemeton. Give to Roger Bacon to get Yuri’s best weapon. Do not take this to Bacon if you have not saved Alice yet if you want the best ending.
4. Pulse Tract
You will need to complete many of the game’s side quests to get this book, including Breaking the Curse of the Masks, the Cave Temple, and obtaining the Amon Fusion Soul. In addition to all this, you will also need the Erotic Book from Dehaui’s Tower in Asia. Talk to Roger Bacon after completing all of the prerequisites to get the Pulse Tract. With this item in hand you can unlock Yuri’s ultimate Fusion Soul: The Seraphic Radiance.
L. The Dollhouse
This secret dungeon can be unlocked by talking to Owner Gismot in the bar in Prague after Nemeton. This dungeon is home to Alice’s best weapon. See Section V, Part L for a detailed guide on the Dollhouse.
M. The Ancient Ruins
Examine the Book of Rituals found in Nemeton when you visit with Alice and Zhuzhen in your party after defeating Simon. The Ancient Ruins will appear on the map of continental Europe. This dungeon features a puzzle (See Section V, Part G for more information) and some very important items, most notably Yuri’s most powerful Fusion Soul.
N. Cave Temple
This dungeon is revealed on the map of Britain after looking at the Emigre Manuscript found in the Orphanage. It is home to Zhuzhen’s best weapon, Keith strongest armor, and is a prerequisite for unlocking Yuri’s best Fusion. See Section V, Part J for details.
VIII. References
This walkthrough was not easy to write and I often referred to other guides while making it. Hopefully I was able to improve on these older works, but their contributions to this walkthrough cannot be understated as they cover topics I was not aware of. Please check them out if you have questions and to show your support for the hard work of their creators.
Walkthrough:
https://gamefaqs.gamespot.com/ps2/459510-shadow-hearts/faqs/47343
Fusion Souls:
https://gamefaqs.gamespot.com/ps2/459510-shadow-hearts/faqs/47343
General Info:
Thanks for using our Shadow Hearts (PS2) Guide!
RetroMaggedon.com ©2023