
Mega Man X3 (Super Nintendo) Boss Guide
About this Guide
It’s hard to believe it’s been ten years since I began writing guides for the Mega Man series. Back when I started, there was still a lot to discover about the Mega Man games, even though they had been picked apart quite thoroughly even then. Today, most of the Mega Man games have been solved completely or close to it. I admittedly struggled to find anything to add to the knowledge base for Mega Man X3 since it has been analyzed to the same extent as its forerunners. With that in mind, I wrote this to complete the SNES trilogy and for the convenience of my readers. I also added a section for sub-bosses, which is unusual for a Mega Man guide, since they are often an afterthought. In this case it seemed wise to do so, because MMX3 starts out a bit more difficult than the other SNES MM titles. As always, I am always happy to receive feedback and advice, so feel free to share your thoughts in the comments. Thanks for choosing this guide!
~tankMage (March 2026)
Contents
8. Armor Upgrade and Chip Locations
12. References and Acknowledgments
Mega Man X3 allows players to challenge the eight Mavericks in any order, which is part of the beauty of the game and the series at large. At the same time, it can be difficult for new players to get a foothold, especially when there are a lot of powerful enemies between the player and the boss. To make life a bit easier (while still giving the player options) this guide includes two recommended boss orders. The first sequence is centered around weaknesses. The second one is designed to cut backtracking down. While it is quite possible to use either one as a new player, it is probably best to stick with the weakness based sequence, since it makes the Mavericks less deadly.
a. Weakness Based Boss Order
Blizzard Buffalo → Toxic Seahorse → Tunnel Rhino → Volt Catfish → Crush Crawfish → Neon Tiger → Gravity Beetle → Blast Hornet
b. Minimal Backtracking Boss Order
Tunnel Rhino → Blizzard Buffalo → Neon Tiger → Gravity Beetle → Volt Catfish → Tunnel Rhino (Backtrack for items) → Toxic Seahorse → Crush Crawfish
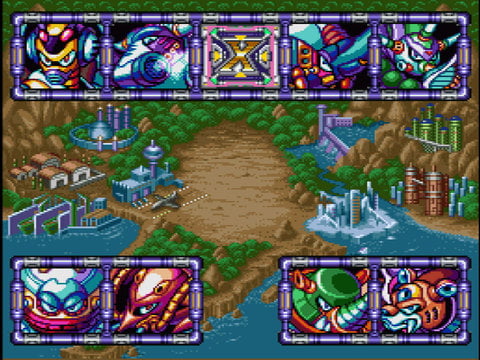
c. Maverick Map
For some reason, the names of the Mavericks are not displayed on the stage select map. This can make choosing a boss a bit annoying if you are not familiar with the game. Here are the Mavericks in order of appearance from top left to bottom right.
There is a lot of missable stuff in Mega Man X3, plus it starts out more challenging than X1 and X2, so take a bit of time to read the tips listed in this segment.
a. Collect some power ups if you are having trouble!
MMX3 feels a lot more difficult than the first two games. Stages are more dangerous and bosses hit harder. New players may find the game frustrating at first since X starts with really low health and little more than his standard weapon to defend himself. Gathering a few Heart Tanks, Sub Tanks, and even armor parts can make the first few bosses a bit easier. Here is a list of easy to reach power ups that can be collected near the start of the game. You will find more info on power ups in Sections 6 through 10 of this guide.
Sub Tank (Tunnel Rhino): The first Sub Tank you will find (assuming you start with Tunnel Rhino) is in plain sight on a small ledge about halfway through Tunnel Rhino’s lair.
Leg Upgrade (Blizzard Buffalo): The leg upgrade allows X to air dash horizontally and vertically, you will find it in the large room with the blizzard machine, far to the right. Dash jump to the far wall to scale it and you will see a small hallway that leads to the capsule.
Sub Tank (Blizzard Buffalo): A Sub Tank is hidden in the big room with the blizzard machine in Blizzard Buffalo’s stage. To get it you will need to grab the Leg Upgrade on the far right side of the room. Do a vertical dash jump from the platform next to the Sub Tank once you have the upgrade.
Heart Tank (Toxic Seahorse): Climb up the sewage waterfall near the beginning of the stage and keep going up when you see a passage to the left. You will reach a small room with the Heart Tank.
X-Buster Upgrade (Neon Tiger): Requires the Tornado Fang from Tunnel Rhino. Look for a cracked wall about halfway through his stage to find it.
b. Practice Air Dashing
X’s ability to dash while airborne plays an important role in MMX3. Vertical air dashes are particularly useful as they are needed to reach high places and evade enemies. A basic left or right air dash can be performed by pressing the A Button while in the air. Vertical dashes are executed by pressing Up and A while jumping. The vertical dash is a bit shorter and takes more time to execute than a basic air dash, so it is important to allow yourself time to perform it if you are trying to dodge an attack. Pressing anything except Up on the D-Pad will cancel the dash. Practice vertical dashing while going through stages to get a feel for how it works.
c. Keep Your Sub Tanks Full
MMX3 features a lot of sub-bosses and dangerous enemies. If you are following the boss orders shown in the first section, you should have at least one Sub Tank before the first boss and two tanks by the time you fight the third boss. Keep these tanks filled up, because you never know when you will have to fight Bit or Byte.
d. DO NOT USE ZERO OR COLLECT UPGRADE CHIPS!!!
Ok, I know typing in all caps is annoying, but this tip is very important if you want to get a special weapon and the best armor, so I had to make it stand out. Zero will give you a special weapon near the end of the game if you use him to fight a certain sub-boss. You cannot get this weapon if Zero dies earlier in the game, because X will not be able to call him in if his systems get damaged.
Dr. Light will give you upgrade chips that enhance armor upgrades. They are scattered around stages like normal upgrade capsules, but X can only take one chip. However, X will find a special Dr. Light capsule near the end of the game if he does not take any of the chips. He will still need all of the Heart and Sub Tanks as well as all of the normal Leg, Helmet, X-Buster, and Armor upgrades as well as the Ride Armors to get the special upgrade.
See Section 10 for detailed information on the secret power ups.
e. Destroy Vile in One of the Maverick Stages
Vile will appear in a cutscene after a few Mavericks have been defeated. X can fight him in Blizzard Buffalo, Volt Castfish, or Crush Crawfish’s stages. If you do not use his weakness to defeat him (Ray Splasher or Spinning Blade) he will appear later in the game. While this is not necessarily a bad thing on its own, it will lock X out of a powerful weapon, so be sure to destroy him early on.
Here is a list of the eight Mavericks with brief descriptions of their weaknesses and abilities.
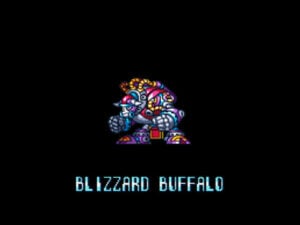
a. Blizzard Buffalo
Weapon: Frost Shield
Weakness: Parasitic Bomb
Blizzard Buffalo is easy to lock into a loop if you move quickly. All you have to do is climb the wall, dash jump away when he gets close to X, then quickly dash to the opposite wall to repeat the process. Turn and fire off a quick shot between jumps. Players who are good at charging the X-Buster while dashing can hit Blizzard with charged shots to end the fight more quickly. Or you can use Blast Hornet’s Parasitic Bomb to annihilate him later in the game. Climb to the ceiling every time you reach the wall when Blizzard is at about half health, because he fires an ice beam that will freeze X if he is close to the floor.
Like many of the Mavericks in Mega Man X3, Blizzard Buffalo’s attack patterns are based on his proximity to X, which is why it is so easy to bait him into a charge loop by staying far away. Here is a list of his attacks:
Long Range Charge: Blizzard Buffalo usually does this when X is far away. He will basically glide towards X and crash into the wall, pausing for a second on impact.
Gore (Mid-Range): If X is is about half a screen away, Blizzard will energize his horns and charge towards X. If he catches X, the boss will slam him into the opposite wall, dealing extra damage. This move seems to have a big hitbox, so take care to avoid the horns.
Ice Gun (Medium to Close Range): When close to X, Blizzard Buffalo will take a second to charge up a cannon that shoots three ice projectiles in an arc. These projectiles turn into icicles that can be destroyed with the X-Buster or by the boss’s charge attack. They can travel very far, but become less accurate over long distances.
Ice Beam: At fifty percent health Blizzard will sometimes fire off a huge burst of cold that travels in a straight line. It takes up about a fourth of the screen, so X will need to climb up to the ceiling to avoid it.
It is worth noting that the vertical dash is very useful for avoiding Blizzard’s charge attack, but it also prompts him to use his ice gun more often.
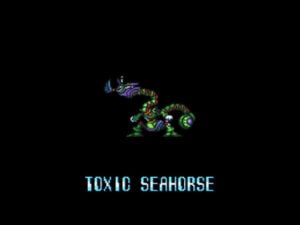
b. Toxic Seahorse
Weapon: Acid Burst
Weakness: Frost Shield
Out of all the Mavericks, Toxic Seahorse moves around the least. It will usually jump, then release a glob of acid upon landing. This acid glob will bounce from wall to wall, releasing smaller drops of acid as it does so. After four bounces, the acid ball will burst, sending several acid drops to the ground. X can destroy the Acid Glob with his weapons, but it is not worth the effort. When its health is reduced to 50%, Toxic will become more aggressive by jumping more frequently and releasing globs that bounce rapidly on the floor, splitting into three pieces as they go.
While Toxic Seahorse can be defeated with the X-Buster, it is best to use Frost Shield on it. A hit from Frost Shield will not only deal a fair amount of damage, but also interrupt Toxic’s actions. X can dash under this boss when it hops, them fire off a Frost Shield to prevent it from spawning an acid glob. Players will have to react more quickly when the boss gets low on health and its pattern changes a bit. Leaping to a wall to escape the acid globs helps. X can also fire the Frost Shield from the wall and hit Toxic Seahorse as it jumps if the shot is timed well. About eleven hits should end this fight.
Note: Toxic Seahorse may rarely use a move where it will turn green, then melt into acid for a few seconds. This move acts as a temporary state of invincibility for Toxic and allows it to surface elsewhere in the chamber.
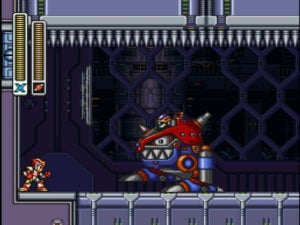
c. Tunnel Rhino
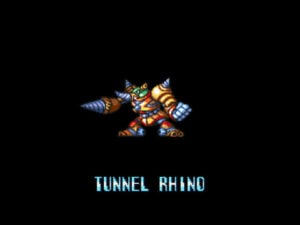
Weakness: Acid Burst
Weapon: Tornado Fang
Get ready for a tough battle if you are new to the game and starting with Tunnel Rhino. This Maverick is very aggressive and dominates the ground. He fires drills from his arm and shoulders and often charges into the walls. The drills fan out in three directions with the smaller ones flying towards the ceiling at forty-five degree angles and the larger drill traveling horizontally in the direction Rhino is facing. Sometimes he will charge without shooting drills or unleash three large drills that trail behind him horizontally as he charges.
Scale the left wall a bit as the fight begins, then dash jump from it as Rhino charges. X will soar over Tunnel Rhino and his drills if you do it right. Try to get a shot in on Rhino after you land, then immediately jump to the opposite wall so you can avoid his next charge. This boss may get stuck in a loop where he charges without launching drills if you move fast enough, but it takes precise timing to do this. Charge shots will hurry the process up as long as you can make the dash jumps while charging.
Rhino will change his behavior when he is down to about thirty percent health. At this point he may flash for a few seconds, becoming a little bit faster and invincible as he charges. He also seems to rely solely on his three big drills as projectiles and will sometimes try to punch X if he gets close during this phase. Continue to dash jump from one side of the room to the other and take pot shots at Rhino when you land. Be sure to hold your fire if for a split second after he stops flashing if you want your shots to connect.
X will have to fight Rhino using the same tactics regardless of the weapon he uses. The Acid Burst deals extra damage to this boss and stuns him, but Rhino will immediately resume his charge pattern upon recovering.
d. Volt Catfish
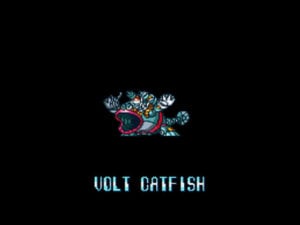
Weapon: Triad Thunder
Weakness: Tornado Fang
Volt Catfish is one of the more dangerous Mavericks, so it is better to fight him using his weakness, the Tornado Fang. He tends to hop, then flop on his belly when he lands, which makes the reach of his hops longer than they may initially appear. Volt tends to spit a spark that travels along the floor and up the wall after landing. He may also spit out three electrodes that stick to the wall, then inhale them. Lightning will shoot vertically out of his back once he swallows the electrodes. This move can be hard to avoid, but you can dodge it by dashing away from Volt. Better yet, use the Tornado Fang on him, because it will stun Volt and destroy the electrodes at the same time.
At low health, Volt Catfish will jump to the center of the room and summon a bolt of electricity that will power him up for a few seconds. While electrified, he will be guarded by a shield and sparks will fly from his back in many directions. It is usually safest to stand a few steps to Volt’s left or right while he is electrified since the sparks tend to arc into the air. Hitting him with Tornado Fang will interrupt this move and he will hop again in an attempt to use it. You can easily catch Volt in a loop where he is interrupted by a Tornado Fang continuously if you wait a second or two between shots.
e. Crush Crawfish
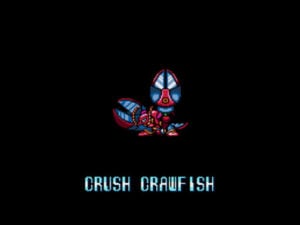
Weapon: Spinning Blade
Weakness: Triad Thunder
Triad Thunder makes the battle with Crush Crawfish a breeze, since it damages him severely and interrupts his actions. Crush will often stand still and send one of his claws towards X. Air dash over the claws or take to the walls to get out of their way. Crush will send out traps that skitter along the floor up up the wall when X scales the walls. Touching one of these traps will not harm X, but they will cause him to freeze for a second. Finally, Crush Crawfish likes to dash from side to side in hopes of catching X in his claw. If he catches X, he will hold him and crush him repeatedly. Each crush does a small amount of damage that can add up to quite a bit if X is unable to escape. Wiggling the D-Pad and jumping seems to free X from Crush’s grip more quickly.
Triad Thunder works well on Crush, but it can be hard to use. Activate the weapon a few steps away from the boss and it should hit. Leap away from him before he can counter. If you time your attack well, you can keep Crush from attacking much, if at all. Oddly, Crush Crawfish does not change its behavior much when low on health, though he seems to become slightly more aggressive and dashes backwards.
f. Neon Tiger

Weapon: Ray Splasher
Weakness: Spinning Blade
Neon Tiger has what is arguably the worst AI in the game. He has two main attacks: One where he will leap from wall to wall, slashing with his claws and one where he stands in the corner shooting sparks from his tail that spread out. Most of the sparks will miss X if he stands still, but he will have to jump over one the of last ones in the pattern, because it is directed at chest level. All the rest will pass over or below X harmlessly as long as he is on the other end of the room.
The player can simply stand across the room from Neon and shoot at him from the start. For the most part, the boss will just use his spark attack. Sometimes Neon will leap on the wall to fire sparks. Dash jump to the opposite wall and hit him with a charged shot when he clings to the wall, then go back to the far right or left when he jumps to the floor again. With luck, this should bait Neon into using his spark attack again. Be careful, Neon may drop down with a slash attack if you are underneath him while he is grappling to the wall.
At about half health, Neon Tiger will occasionally use a new move where he will charge up his claws, then dash across the room. Neon turns bright orange while using his special move and cannot take damage. Dash jump over him to avoid his charge.
Charge shots do not work very well on this Maverick since he can block them with his claws. But you can hit him with charge shots when he is jumping or firing sparks from his tail.
The strategy changes a bit if you use the Spinning Blade on Neon Tiger, because he will jump to a wall after being hit. Using the Spinning Blade carefully will allow you to lock Neon in a loop where he gets hit, then jumps to a wall.
g. Gravity Beetle

Weapon: Gravity Well
Weakness: Ray Splasher
Gravity Beetle is a feeble enemy, especially if you have the Ray Splasher. This Maverick cannot jump very high, so he is relegated to hopping around the room. He often makes himself invincible for a few seconds and slides across the floor. If this slide attack hits X, he will be thrown into the ceiling and damaged badly. This boss may also fire a gravity orb or two that bounce around the chamber at forty-five degree angles. These orbs hurt, so try to slide under them. When low on health, Gravity Beetle will create a huge gravity ball that will damage X moderately if he gets too close to it.
All you need to do to beat this chump is fire the Ray Splasher at him. If you wait for his I-Frames to wear off and fire at the right moment, you can keep Gravity Beetle from performing any significant attacks.
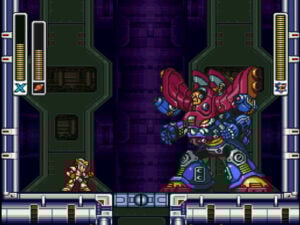
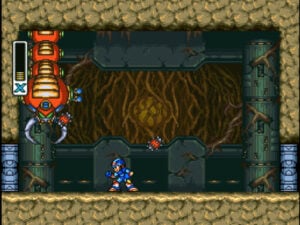
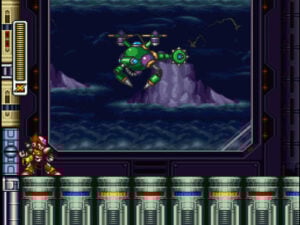
h. Blast Hornet

Weapon: Parasitic Bomb
Weakness: Gravity Well, Spinning Blades
Blast Hornet is possibly the hardest Maverick to beat, but Gravity Well makes him relatively easy and X should have the Body Armor Upgrade by now, which takes the edge off this boss’s attacks. It’s a good thing too, because it can be hard to dodge Blast’s mechanical hornets. Blast flies in a vertical zigzag pattern and often stops to unleash several bees that lock onto X and explode. He also thrusts his stinger at X’s position. When weakened, Blast will use a targeting system to send all of his bees at X.
Running or dashing along the ground is a good way to avoid getting hit, but it is difficult to do so when Blast’s bees are active. It can also be hard to jump out of his way due to his large hitbox. Luckily, the Gravity Well will hit Blast Hornet multiple times and clear out his bees. Do not bother charging the Gravity Well; while it can inflict more damage on this boss, it is very slow to use and Blast is more likely to interrupt the animation than to get hit by it.
Each of the Dr. Doppler stages features a boss at the end. All bosses are weak to at least one of the special weapons X acquires in the first portion of the game. The boss X must overcome at the end of the first two stages varies based on whether or not Bit, Byte, and Vile survived the Maverick stages.
a. Press Disposer (Doppler Stage 1, Appears if Bit and Byte were Destroyed Earlier)

Weakness: Tornado Fang
This boss is no pushover thanks to all of the hazards in its chamber. X will have to contend with falling junk, a claw, and a floor covered in acid while fighting Press Disposer. Watch out for the moving garbage chute at the top of the screen, it often drops junk that can damage X or trip him up. Sometimes it drops a broken robot that will fire shots at X. You should also beware the spiked wall on the right side of the screen and the conveyor belt on the floor that pushes X towards it. Press Disposer itself will stay on the right, moving up and down while spitting acid drops from its nose-like appendage. It will also try to grab X with a claw.
Press Disposer’s claw and lower half deflect weapons, so you will have to aim at its nose and the top of its head. The Tornado Fang deals a lot of damage, but the boss’s tendency to move abruptly makes it difficult to hit its head. Try using the Tornado Fang to destroy its nose first. After losing its nose, this boss will fall to the floor and flood the lower portion of the room with acid. This is a good thing, because it will then rise up to the ceiling and stay there allowing you to fire off Tornado Fangs at its head while sticking to the opposite wall.
b. Godkarmachine O Inari (Doppler Stage 1, Appears if Bit and Byte were not Destroyed Earlier)
Weakness: Ray Splasher, Parasitic Bomb
Godkarmachine O Inari will appear at the end of the first Doppler stage if you did not kill both Bit and Byte using their weaknesses earlier in the game. The lower half of this boss is immune to damage, so X will have to aim for the top half. The Ray Splasher works best on Godkarmachine thanks to its high damage and long duration.
Godkarmachine starts the fight with a beam sword that it will swing every second or two. Each swing produces a wave that travels across the room. Upon hitting a wall, the wave will split in two producing smaller waves that will travel along the wall in opposite directions.
Sometimes the boss will put its sword away and fire its fists at X. If the first fist touches X, it will hold him for a few seconds, while ramming him into the ceiling and hitting him with the other fist. X cannot escape Godkarmachine’s grasp until the attack is over and it does a fair amount of damage even if X has the Gold Armor, so try to avoid it by dashing or jumping. X can still fire the Ray Splasher while being held, so keep up the offensive to end the fight quickly.
c. Volt Kurageil (Doppler Stage 2, Appears if Vile was Destroyed Earlier)

Weakness: Frost Shield, Triad Thunder
Volt Kurageil’s attacks changed based on X’s position. If X is under this boss, it will fire homing torpedoes at him. If X is climbing a wall or jumping, Kurageil will whip him with one of its tentacles. If X is above the water’s surface, the boss will lob bombs at him. Triad Thunder works well in this fight, because you can stay on the floor, use it to shield X from torpedoes, and aim the lightning it shoots at Kurageil. The Z-Sabre works even better, but you will have to jump towards Kurageil while firing it and aim it at its top half. Two Z-Sabre hits will sink this boss.
d. Vile MK-II [Rematch] (Appears if Vile was not Destroyed Earlier)
Vile will show up in Doppler’s second stage if the player does not completely destroy him using his weakness in his hidden level during the Maverick stages. Vile will begin the battle in a greatly improved Ride Armor called Goliath. He will continue to fight after the Ride Armor is destroyed.
Phase 1: Goliath

Weakness: Tornado Fang
Goliath has a fairly fleshed out moveset compared to the DRA-00. It can fire canisters that form barriers, which X will have to dash over or climb. It can also dash punch and fire a charged shot. Unfortunately, for Vile, none of these moves really matter, because they are all easily avoided with a vertical dash. The only real challenge in this fight is timing the slow vertical dashes so X can get out of Goliath’s way unharmed. Dashing upwards just as the Goliath raises its arm to charge forward or when it starts flashing (which indicates a charge shot) is enough to evade it successfully. Wall jumping is also effective, but X will fall from the wall if Goliath strikes it before he can dash jump off. Use the Tornado Fang to put Goliath out of commission.
Phase 2: Vile MK-II

Weakness: Ray Splasher, Spinning Blade
Vile will use his fire bomb attack from before, but it is easier to dodge thanks to the size of the chamber you are fighting in. He will also leap into the air and fire a burst shot that is fairly hard to avoid; dashing away from it usually works if you are not close to a wall.* Sometimes he will use his spread shot from earlier. Vile will also dash at X and grab him, which inflicts a small amount of damage. In general, moving from one end of the room and dash jumping from the wall while firing is enough to stay alive in this match.
The Ray Splasher and Spinning Blade are both effective against Vile. That said, the Ray Splasher’s superior range makes it better suited to this fight. Keep blasting Vile every time you see him and the score will soon be settled.
*The burst shot does not directly damage X. Instead, it will briefly pin X to the ground, leaving him open to attack.
e. Maverick Rematch (Doppler Stage 3)
As always, X will have to re-fight the Mavericks in the final stage. Jump one of the teleporters to battle a Maverick. Their weaknesses are all the same this time around and X should be much more powerful than when he first fought them. If you have the Z-Sabre and Gold Armor (or even just the Z-Sabre) you will be able to tear through the Mavericks without much trouble. The teleporters are not marked, so here is the location of each Maverick going counterclockwise starting at the one just under the entrance door.
Blast Hornet → Volt Catfish → Gravity Beetle → Tunnel Rhino → Crush Crawfish → Neon Tiger → Toxic Seahorse → Blizzard Buffalo
Tips:
– Use Gravity Well on Blast Hornet even if you have the Z-Sabre.
– There is a strange machine in the center of the teleporter room, shoot it to get weapon and health energy. It will break after taking 3-5 hits, but respawns after every battle.
– Stand still for a while to regain health between battles if you have the Energy Chip or the Gold Armor.
f. Dr. Doppler (Doppler Stage 3)

Weakness: Acid Burst
Doppler has a simple moveset. First he will fire three orbs that can be avoided by jumping and/or air dashing. After that, he will surround himself in an orange shield, fly up (or down) to X’s level, then wreath himself in fire and charge at X. Climbing the wall and dropping to the floor before he charges is a good way to get out of the way of this move. Doppler may also surround himself in a green field that heals him for double the amount of inflicted damage if X hits him.
Acid Burst works well on Doppler, but you will have to time your shots carefully to hit him. It is also a good idea to use Acid Burst while Doppler is charging or firing orbs to avoid accidentally healing him. As always, the Z-Sabre will shred Doppler in two hits, but it may end up healing him if he uses his green energy field move. Doppler is not all that tough and you should be able to finish him without much trouble.
g. Sigma (Hangar)
Sigma is the final and most challenging boss. Make sure you go into the battle with full Sub Tanks. It may also help to throw away a few lives practicing the fight with him to save yourself the trouble of refilling the Sub Tanks. This is another multi-phase battle. Sigma’s first form is his most dangerous, but it is smart to save a couple of Sub Tanks for his second and third forms.
Phase 1: Sigma

Weakness: Spinning Blade
Sigma is back again and he has a few new tricks. The shield he wields will block anything X throws at him. He only really has one attack, which is is a volley of six fireballs that track X slightly, but they hurt and are hard to evade. Sigma will either stand on one side of the room and perform his fireball attack or fly across the room while shooting at X. The only way to really avoid them is to climb to the top of the wall and quickly dash jump over the attack once it begins. Alternatively, you can climb the wall and double air dash over Sigma if you have the Gold Armor/Leg Chip. At low health, Sigma will sometimes toss his shield at X if he is standing on the floor.
The main obstacle in this fight is the shield. X can only really hit Sigma from behind or while he lowers the shield to attack. Worse yet, the Spinning Blade does not travel all that quickly nor does it have great range. Spinning Blade works best if you use it on Sigma while he is airborne or blast him in his face with it while he is throwing fireballs on the ground.
It is possible to end this fight very quickly with the Z-Sabre if you have it. Unleash the cross shot first and hope it hits, then either wait for Sigma to jump or slash him up close with the Z-Sabre when he is on the floor. As always with this guy, his shield may block the Z-Sabre if you do not time and aim it properly, but it can take him down quickly with some practice. You will want to conserve Sub Tanks, because Sigma has a second form after this one.
Phase 2: Kaiser Sigma
Weakness: Charged X-Buster
Kaiser Sigma is very easy IF you know how to fight him. Most of his body is completely invulnerable, only the top third can be damaged. A charged X-Buster shot is the only thing that can harm Kaiser, so you will want to use Hyper Crush, if you have it, or keep the X-Buster charged at all times. It is important to make sure X fires from the upper part of the wall, because his body can easily block a shot that is fired from even slightly too low of a position. Also, it is easier to hit Sigma’s head from the front, since the hitbox for his protected portion seems larger on his back. That said, firing a cross shot at Kaiser’s back is a good way to get rid of his missiles.
The Z-Sabre can make short work of Kaiser, but it has to be used precisely or his body will deflect it. Discharge the Cross Shot, then wait until you are in front of Kaiser. Climb the wall as high as possible, jump off, then quickly unleash the sabre. If timed correctly, it will hit Sigma and deal a ton of damage.
For attacks, Kaiser will move from right to left, then back again while firing mines and missiles that home in on X. Dash under Kaiser when he takes off and climb the wall to avoid the homing weapons. If Sigma is on the left side, he will fire a purple spread laser at the top or bottom half of the screen based on X’s location when he lands. It is best to be on the floor when he lands in order to bait the laser into firing low so you can attack Sigma’s upper portion.
Two Z-Sabres or about ten charged shots should finish Kaiser Sigma, but do not relax yet: Sigma has a final trick up his sleeve.
Phase 3: Sigma Virus

It’s a bit of a stretch calling the Sigma Virus a boss, since all the player has to do to win is climb up a shaft before being destroyed by lava. While this may seem like a difficult task, the lava does very little damage, especially if you have the Gold Armor. The Sigma Virus itself will merely watch as the lava rises, though it may occasionally try to push X. Climb the wall carefully with normal jumps and use vertical air dashes to get past the overhangs. Try to dash jump out of the lava if you fall in. After a few moments you will see an opening to the right, follow it to beat the game…
Sub-Bosses are common in MMX3 and often quite dangerous since X will likely lack special weapons and upgrades upon meeting them. Players will also encounter Bit, Byte, and Vile while running through the Maverick stages. Bit and Byte appear randomly in small chambers that are sealed by boss type doors in every stage, while Vile is located in a special teleporter hidden in some stages. Destroying Bit/Byte and Vile will yield positive results later in the game, so be sure to fight them with their weaknesses, which are listed in this section.
a. Intro Stage Bosses (Maverick Hunter Base)
Mega Man X3 is a bit more difficult than the first two games, so I’ve included short guides for the Maverick Hunter Base mini-boss and boss. Neither of the first bosses are very challenging, but it may be helpful to understand how to beat them easily if this is your first time going through the game since you will have to replay the base if you happen to die.
Mac (Intro Sub-Boss)
Mac will capture X after he goes through about a third of the stage. Zero will take over for a while and fight Mac in a boss room. Mac can be dangerous if you mess around with him, because he can fill the room full of bullets that are difficult to dodge. At the same time, he is the easiest boss in the game if you use the Z-Sabre. Simply charge up Zero’s weapon until he turns a green color, then blast Mac with two charged shots. The third part of Zero’s charge combo is the Z-Sabre, which you’ll have to use at point blank range. A charge shot or two, plus a direct hit with the Z-Sabre will annihilate Mac immediately.
Maoh the Giant (Intro Boss)
Maoh will attack X on the roof of the Maverick Hunter Base after he passes through a boss door. This giant attacks with spiked balls attached to his arms. They can extend fairly far and break the floor where they land. Maoh’s only weak spot is his head, which X will have to hit by leaping into the air before firing his X-Buster.
Stay on the far left of the screen and shoot at the boss from afar. Maoh’s spiked balls can hit X from far away, but it is a lot easier to deal with him if you are on the far left since you can see his attacks coming and he can only strike from one direction. A few well placed charged shots will end the battle in a flash.
b. Bit & Byte
Doppler will send his henchmen, Bit and Byte after X once any two of the Mavericks have been defeated. Bit will be the first of the duo the player is likely to meet since Byte does not show up until five Mavericks have been destroyed. Both foes will randomly spawn in sub-boss rooms in Maverick stages. X will have to fight a combined form of Bit and Byte in the first of the Doppler stages as well, but it is possible to permanently destroy Bit & Byte by using certain weapons, which will result in X meeting a different boss in their place.
Bit

Weaknesses: Frost Shield, Triad Thunder
Bit is a fast enemy who can air dash across the room. He tends to dash towards X with a short beam sword drawn and can do a good bit of damage per hit. The sword also deflects projectiles. Bit may shoot a homing weapons at X that will slowly track him. Though Bit’s homing shot is slow, it can be difficult to avoid this weapon while dodging him. Finally, Bit may release an energy ring that can trap X until he takes damage.
Bit is annoying to dodge, but X can avoid most of his charges with a well timed vertical dash. In general, it is best to fill up a Sub Tank or two in the beginning of every stage and use it to power through the fight if you meet Bit. Frost Shield and Triad Thunder work well against this boss, plus you will not have to fight the Bit and Byte conglomeration later in the game if you destroy them early on with their weaknesses.
Byte
Weaknesses: Ray Splasher, Tornado Fang
Byte is a pathetic opponent. He throws a mine that sticks to the wall, then charges towards X. If Byte hits the wall, the mine will explode and X will fall to the floor if he is scaling it. Byte will also perform a heavily damaging punch attack if he catches X with a charge. Simply wall dash from one side of the room to the other as Byte charges at you. Fire off a few Tornado Fangs when you land and repeat the process until Byte is dead.
c. Hell Crusher (Tunnel Rhino Sub-Boss)
Weaknesses: Spinning Blade, Triad Thunder
Hell Crusher is not rally a tough boss, but he is sturdy and does a lot of damage. This can be a problem if you are starting with Tunnel Rhino since X starts with very low health. Hell Crusher uses three attacks that are determined by X’s proximity to it. If X is close, the sub-boss will try to punch him with one of its claw arms. Hell Crusher will ram into the wall if X is far away. Scaling the wall until X is near the ceiling will prompt Crusher to grapple onto the ceiling and disengage itself from its tank treaded lower half. It will then thrust an arm at X while sending its lower half into the wall. The screen will shake, momentarily freezing X whenever Crusher hits the wall.
Out of all its attacks, the second one (where the sub-boss breaks in two) is the most devastating. X will almost certainly take damage from this move since the arm is hard to avoid and the ram attack can knock him into Crusher’s lower half. The close range punch move can also be tough to avoid.
Luckily, it is really easy to control this fight. Scale the wall on the left, but do not climb more than halfway up. This will make Hell Crusher use its basic charge attack. Quickly climb up to the ceiling as the sub-boss charges towards X. If you time it correctly, X will fall to the floor safely just as Crusher backs away. Stay on the left and keep climbing halfway up the wall to repeatedly bait Crusher into charging. Charge the X-Buster and blast the sub-boss when you see an opening. Crusher’s lower half is impervious to the X-Buster, so aim for its head. About eleven charge shots should bring you victory!
Triad Thunder can kill this foe in a hit if charged up and Spinning Blade deals a lot of damage as well. Unfortunately, most boss orders place Tunnel Rhino near the start of the game, so X will not have access to these options.
d. Hotareeca (Toxic Seahorse Sub-Boss)

Weaknesses: Frost Shield, Spinning Blade
Hotareeca is a fairly simple sub-boss. It swims towards X, unleashing homing torpedoes or mines that sink to the floor. X can easy escape this enemy’s attacks by dashing under it or dash jumping from a wall. Hotareeca’s tentacles have a small hitbox, so it is generally safe to pass under it unless it’s very close to the floor.
The X-Buster does not work very well against this marine machine, so it will take a while to defeat it even with charge shots unless you have an upgrade. You can use the Spinning Blade to end the fight more quickly, but you may not have that weapon yet if you are following this guide. The Frost Shield is also effective but it is not worth wasting on this sub-boss since you need it for Toxic Seahorse, so rely on persistence to win.
e. Worm Seeker-R (Neon Tiger Sub-Boss)
Weakness: X-Buster
Worm Seeker-R is another sub-boss that can be difficult if you have to face it early in the game and do not know its patterns, because it may seem unpredictable. The good news is this foe follows a simple pattern where it tunnels into the ground from floor to ceiling or vice versa. Sometimes it may travel laterally from one side of the room to the next, so you may have to dash under Seeker or scale a wall to get to safety. At the same time, Seeker will drop a pair of bouncing objects that damage X on contact.
Stay away from the wall and the center of the room, because Seeker will always emerge from the floor/ceiling in the places. You should be fine if you stay about five paces away from the aforementioned places. Seeker’s body is impervious except for its head. The body also tends to deflect cross charge shots, so stick to normal charge shots. You can also destroy the bouncing objects Seeker drops, but it is more efficient to just step under them.
Worm Seeker-R has poor defense and cannot hold up against more than a few charged X-Buster shots. Just watch the walls and center of the room carefully so you can react to its attacks.
f. Genjibo and Shurikein (Blast Hornet Sub-Boss)
Weakness: Acid Burst
Genjibo and Shurikein guard the door to the second half of Blast Hornet’s stage. Genjibo, the bee-like machine that spawns Shurikein, does not actually fight, so X has only to deal with Shurikein. Players fighting this sub-boss early on will have difficulty, because it moves quickly. Fill up a few Sub Tanks if you are attempting Blast Hornet before you have the Acid Burst and/or the Body Armor Upgrade.
It takes a mere six hits to defeat this foe with Acid Burst, so this fight should end quickly if you have it. Shuriken will either roll back and forth across the room, which is easily dodged by climbing a wall, or spin quickly then roll up the walls. Air dash to avoid its climbing maneuver. Shurikein may also bounce around the room. It is hard to avoid its bouncing attack, but it is possible to dash under or over it.
While Shuriken does quite a bit of damage if you do not have the armor upgrade, it is still easiest to power through it with a few Sub Tanks, which you may not even need if you have Acid Burst. Use Charge Shots if you do not have Acid Burst.
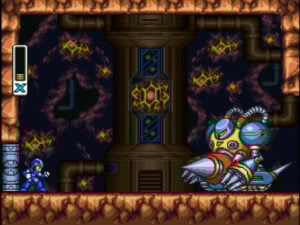
g. Vile (Blizzard Buffalo, Crush Crawfish, or Volt Catfish Sub-Boss)
Vile is a semi-hidden sub-boss in MMX3, but he is nearly impossible to miss. A teleporter that will take X to a small area where he will fight a few small enemies before battling Vile can be found in Crush Crawfish, Blizzard Buffalo, and Volt Ctafish’s levels. Take some time to fill your Sub Tanks by destroying the smaller robots in this place before confronting Vile. Defeating Vile will change the boss that appears in the second Doppler stage, but you MUST use Neon Tiger or Crush Crawfish’s weapons to finish him for this to happen. Using Neon Tiger’s Ray Splasher or the Spinning Blade will completely destroy Vile, which prevents him from appearing in the second Doppler stage. Destroying Vile BEFORE meeting him Doppler’s stage is a prerequisite for obtaining the Z-Sabre. I strongly recommend saving this fight for when you have at least one of Vile’s weaknesses and the Body Armor Upgrade.
Here are the locations of Vile’s lair:
Blizzard Buffalo Stage: About two thirds through the stage you will see a pit with a ladder above it. Slide down the wall near the pit to make the screen scroll down, revealing the teleporter.
Crush Crawfish Stage: This one is located just after the first sub-boss room. You will see a life refill under a ledge that has a robot walking on it. If drop down to get the power up, X will fall through the floor to a room with a teleporter that leads to Vile’s hideout. Be sure to avoid falling in here if you do not have the Ray Splasher or Spinning Blade, because it is difficult to escape this area.
Volt Catfish Stage: X will encounter a lift not far from the entrance to the level. Ride it down to a hallway that leads to Vile’s teleporter.
Note: Vile will not appear until X has defeated three of the Mavericks. The teleporter will spawn even if you defeated the stage boss and it spawns in all three stages, so it is safe to wait a while to fight him as long as at least one Maverick remains.
Phase 1: Ride Armor DRA-00

Weakness: Ray Splasher, Spinning Blade
Vile begins the battle in a Ride Armor suit known as the DR-00. Don’t let this thing intimidate you, because it is very easy to defeat. Climb up a wall and dash jump over its head when he charges at the wall, then shoot him when you land. Next, dash to the opposite wall and do the same thing when he charges at you. If you repeat the process, you will lock Vile into a loop and destroy his Ride Armor without much effort. Try to pull this off without getting hit and do not waste weapon energy on this phase, because you will need all the health and Sub Tanks you can spare for the real fight with Vile MK-II.
Phase 2 (Vile MK-II)

Weakness: Ray Splasher, Spinning Blade
Vile will exit his Ride Armor and fight X directly in the second phase of the battle. Vile will dash across the room at high speeds and often stop to hover in the air. While hovering he will fire a series of bullets at X. He also likes to leap across the room and drop a grenade that sends flames along the floor in X’s direction.
Vile is a tough opponent due to his speed and relentless attacks. Brute force is the best way to deal with him, which is why I suggest getting the Body Armor Upgrade and the Ray Splasher/Spinning Blade before fighting him. Just hammer him with the Ray Splasher/Spinning Blade and use a Sub Tank to heal. It is also necessary to defeat him with the Ray Splasher or Spinning Blade to get the Z-Sabre, so you are better off taking the easy route.
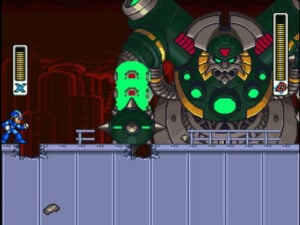
h. Rex-2000 (Doppler Stage 1)
Weakness: Spinning Blade
Technically, Rex-2000 does not have a weakness, but the Spinning Blade’s ability to hit it twice in a single shot may as well count as one. Rex will walk back and forth slowly. Sometimes he will stop to fire bullets from his mouth and missiles from his back. Rex himself isn’t really a threat, since just four Spinning Blades will kill him; the real problem is the spiked ceiling that collapses as the battle progresses.
If Zero is still able to fight (and he should be as long as you did not use him) he will teleport in and slow the spikes. Interestingly, the spiked ceiling will destroy Rex’s operator if you allow it to get low enough. This will result in the machine becoming inactive, but X will have to destroy it to move forward before the ceiling crushes him.
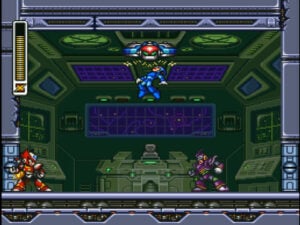
I. Mosquitus (Doppler Stage 2 Sub-Boss)
Weakness: Spinning Blade, Z-Sabre
It is very important to save Zero for this fight and call him in when you see the the first boss door in Doppler’s second level. If you defeat Mosquitus with Zero, you will get his Beam Sword (AKA Z-Sabre) as a reward.
Mosquitus is an annoying enemy as its name implies. It will fly around, trying to crash into you and may also use an attack where is grips and drains X or Zero for a short time. It can also draw from the tanks on the ground and use them to spew flames or steam.
The best way to deal with this boss as Zero is to jump dash from the wall or dash under it while charging your weapon. Once Zero is fully charged, hit Mosquitus with everything you have. Remember: The Z-Sabre will stay charged even if you do not use it right away, so aim it carefully. Two hits from the Z-Sabre is enough to defeat this sub-boss. Mosquitus is particularly vulnerable while drawing liquid from the tanks on the floor.
Note: This sub-boss only appears if Vile was completely destroyed earlier in the game.
Heart Tanks will boost X’s life energy capacity by a couple of bars with each tank collected. While this may not seem like much, all eight tanks add up to quite a bit of energy. Players will find one Heart Tank hidden in every Maverick stage.
a. Blizzard Buffalo Stage
Look for a stack of ice blocks near the beginning of the stage. Use the Tornado Fang from Tunnel Rhino to destroy the blocks. Hop over the spikes to the right when you reach the bottom and you will find the Heart Tank.

b. Toxic Seahorse Stage
X will have to climb up a shaft with flowing sewage near the start of the stage. You will see a hallway off to the left when you get near the top of the shaft, keep climbing and you will see a small alcove guarded by a robot on the left. The Heart Tank is just behind the robot.
c. Neon Tiger Stage
This Heart Tank is on a high ledge near the end of the stage above the door to the boss room. You can either ride a nearby dragonfly to reach the ledge or use a vertical dash to get to it if you have the leg upgrade.
d. Volt Catfish Stage
The Leg Upgrade is required for this item. About a third of the way through the stage you will ride a lift that goes up through a shaft lined with spikes. Stay on the lift when you come to a path to the left and it will take you to a small hallway on the right. Be sure to hop into the hallway before the lift pushes X into the spikes. There is a Heart Tank at the end of the passage. Watch out for the spikes and use the air dash to reach the wall next to the tank. Slide down to collect it. You can perform another air dash to get back to the hall safely if you are careful.
e. Tunnel Rhino Stage
Triad Thunder and the X-Buster Upgrade are required for this Heart Tank. Look for a small room to the right shortly after entering the cave in Tunnel Rhino’s level. You will see a boulder suspended in the air near the Heart Tank. Charge up Triad Thunder, then unleash it to make the boulder drop, granting access to the tank in the process.
f. Blast Hornet Stage
You will need the Leg Upgrade to get this Heart Tank. Go past the hangars and you will see a wall above a narrow passage. Use the vertical air dash to grab onto the overhang above X. Climb up and you will see the Heart Tank on your left at the end of the screen.

g. Crush Crawfish
You must have access to a Ride Armor to get this Heart Tank. Use the Ride Armor base near the start of the stage to equip whichever one you have or like, then go right. A red robot falls and breaks through the floor in an area not far from the entrance to the stage. Jump as far to the right as you can and push forward so you land on one of the broken ledges. The second ledge down should have a cracked wall adjacent to it. Hit it with your Ride Armor’s weapon to break it and collect the Heart Tank from the small room on the right.
h. Gravity Beetle
You will need to defeat Blast Hornet to get this Heart Tank. After entering the big room near the start of the stage, climb up and to the right. You should see a Heart Tank in the upper right hand corner. It is usually blocked by boxes, but these vanish after Blast Hornet is beaten.
Sub Tanks can be used to refill X’s life energy. They are reusable and can be refilled by collecting energy power ups when at full health. There are four to collect in total.
a. Tunnel Rhino Stage
This Sub Tank is nearly impossible to miss. It is located about halfway through the stage, just after the conveyor belt section, near a shaft that leads down on the right hand wall. Scale the wall, then dash jump from it to get the Sub Tank.
b. Blizzard Buffalo
A Sub Tank can be found in the large room near the end of Blizzard Buffalo’s stage. Players will likely see it as soon as they enter the room, since it is on a ledge in the upper left corner. The Leg Upgrade (which is on the far right side of this room) is required to grab the Sub Tank. Once you have the Leg Upgrade, jump off the ledge right of the Sub Tank, then use a vertical dash to get a boost in the air. X should land on the shelf that holds the tank without much trouble.
c. Neon Tiger
Go through a short hallway near the start of the level and you will enter a large area with platforms. Run to the left wall and climb up the wall past a spike ball robot. You will see the Sub Tank on a ledge right above X. Use a vertical dash or ride the nearby dragonfly to get it.
d. Volt Catfish
A Ride Armor (any will do) is required to get this Sub Tank. The final portion of Volt Catfish’s stage is filled with orange cylinders and sparks that travel along the walls. Head right upon entering this area and climb up the shaft. Walk left a bit and you will see a Ride Armor pad. Equip any Ride Armor then fall down the shaft. The floor below you should break when you land. Walk left a bit more to find the Sub Tank and a few health/weapon refills.
8. Armor Upgrade and Chip Locations
X will find Armor Upgrades in four of the Maverick stages. Mega Man X3 also features Chips that further improve X’s abilities, but to acquire them he will need the corresponding upgrade. X can only have one Chip equipped at a time. All of these upgrades are hidden in the Maverick stages.
Note: It is best to leave the Chips alone, because X can acquire the Gold Armor later in the game if he does not have any Chips.
a. Leg Upgrade (Blizzard Buffalo Stage)
X will enter an open area where a blizzard is raging near the end of the stage. Head right while staying on the upper platforms, then perform a dash jump to the right when you reach the end of the road. X should hit a narrow ledge that he can scale if you jump far enough. Climb the ledge and go through the passage to the right to find the Dr. Light Capsule that contains the boots. This upgrade allows X to dash both horizontally and vertically in the air.

b. X-Buster Upgrade (Neon Tiger Stage)
Go through the large room where you found the Sub Tank near the opening of the stage and head left. There should be a ladder leading down at the end of the hall. Look for a cracked wall just left of the ladder. Use the Tornado Fang to break the cracked wall. Dash jump or air dash over the spike pit to find the X-Buster upgrade. X will be able to charge his X-Buster more to fire a Cross Shot and charge up special weapons after receiving this enhancement.
c. Helmet Upgrade (Tunnel Rhino Stage)
The X-Buster and Triad Thunder from Volt Catfish are needed to get the Helmet Upgrade. Go through the stage and you will encounter falling boulders. Travel through this area and look for a boulder suspended by cords in the upper left. Charge up Triad Thunder and fire it to make the boulder fall, then climb up the newly opened shaft to find the Helmet Upgrade. It will allow X to see a map of each stage with power up locations marked on it upon entering the level. Power ups are also shown on the stage select screen, with uncollected ones colored a reddish pink.
d. Body Armor Upgrade (Volt Catfish Stage)
You will need the X-Buster Upgrade and Gravity Beetle’s Gravity Well to get this power up. Go through Volt Catfish’s stage and ride the second lift that travels upwards past a hall to the right. Jump from the lift when you see a passage to the left. There is a circular object flanked by spiked walls at the end of this short passage. Hop on the object, select the Gravity Well, then charge it up to make the object rise. Hop off of it to find the Dr. Light Capsule that contains the Armor Upgrade, which will halve the damage X takes. It also creates a shield that further reduces damage after X takes a hit.

e. Leg Chip (Toxic Seahorse Stage)
This chip requires the Chimera and Frog Ride Armor. Look for a Ride Armor pad near the middle of the stage, just above the underwater section. Select the Frog Ride Armor and go underwater. Use the Frog Armor’s torpedoes to destroy the propellers on the far right side of the underwater area, then press the A Button to make the armor swim to the surface above the propellers or climb to the top with X. Head right once you emerge from the water and you will find a capsule that contains the Leg Chip, which allows X to air dash twice. It is better to skip this and all of the chips in favor of the Gold Armor later on.
f. Body Armor Chip (Crush Crawfish Stage)
Use the Ride Armor pad near the start of the level to equip any of the Ride Armors, then head right until you see a robot fall and break the platform. Fall down, walk right a few steps, then drop into the pit. Use the Ride Armor to break the wall to the left and you will see a Light Capsule. This chip will further reduce incoming damage, but as usual, it is better to leave it alone and get the Gold Armor instead.
g. Energy Chip (Blast Hornet Stage)
The Hawk Ride Armor is necessary to acquire this item. You will see an opening in the ceiling near the beginning of Blast Hornet’s stage. Climb up the wall near it to find a Ride Armor station, then equip the Hawk Armor. Return to the passage and walk right. You will need to dash jump over the pit, then hold the B Button to activate the Hawk Armor’s jets as you leap to the right. If done properly, this move will make X land above some spikes. Enter the area to the right to find the capsule that contains the energy chip. This chip slowly replenishes X’s health and can even fill Sub Tanks, but it is not worth getting, because there is a better upgrade later on.
h. X-Buster Chip (Gravity Beetle Stage)
Ride Armor required. There is a room with bombs that form platforms near the end of the level. Look for a hole in the ceiling near the door that leads to this area and climb up it to find a Ride Armor pad. Equip the Chimers, Hawk, or Kangaroo Armor, then head right, over the bombs. Continue along and climb up a chute with ledges on its sides, then go through a narrow hall. You should see a few boxes blocking a passage at the end of the hall. Use your ride armor to break them, then cross the spikes in the room beyond. Hop out of the armor and climb the wall to find a Dr. Light Capsule.
This chip will convert damage into weapon energy, which allows X to spam charged shots for a short time. As with all chips, there is no point in getting it since the Gold Armor is better.
X can get into a Ride Armor when he locates a circular green pad in some stages. Unlike other MMX games, players will need to find special items called “ Change F, Change K, Etc.” to use a Ride Armor. These items are hidden in Maverick stages like most other things and vaguely resemble Sub Tanks with a letter on them. Each Ride Armor has specific powers and uses. Additionally, you will need to unlock the basic Ride Armor (Change-N) in Blast Hornet’s stage to use any of them, so take a moment to visit his stage and grab it after you get Tornado Fang from Tunnel Rhino.
a. Chimera [Change-N] Blast Hornet Stage
Tornado Fang is required for this Ride Armor. Look for a section of hangars after defeating the sub-boss in Blast Hornet’s level. You will find a bunch of crates that can be destroyed with a few X-Buster shots sitting on a cracked bridge. Destroy them and drop down between the hangars. Use the Tornado Fang to break the wall on the left and enter the hangar. Shoot the box to blow it up and fall down the newly opened hole. The Chimera Armor is to the left, free it by shooting the small robot that is holding it.

b. Kangaroo [Change-K] (Toxic Seahorse Stage)
You will need the Frost Shield and X-Buster Upgrade to get this item. Go to the underwater section of Toxic Seahorse’s stage and stand near the first pit. Use the Gravity Well to destroy any turtles you see if you have it. Charge up the Frost Shield. It will create a big block of ice that will float to the top of the water when you release the Y Button. Quickly hop on the chunk of ice and you will see a ledge with the Change-K on it.
c. Frog [Change-F] (Gravity Beetle Stage)
Leg Upgrade required to get this item. Climb the ladder after the Byte/Bit room and you will see a wall to the left. Scale it and jump to the right (normal jump, not dash) then dash upwards to get the Frog Ride Armor.
d. Hawk [Change-H] (Crush Crawfish Stage)
Required: X-Buster Upgrade and Triad Thunder. Drop down from the cranes near the entrance to the stage and look for a small circular block. Stand on it, charge up Triad Thunder, then release it to destroy the block. You will see the Change-H on your right after going down the newly opened hole.

There are two super powerful upgrades X can acquire near the end of the game. Both can easily be missed and require certain prerequisites to unlock, but they are well worth the effort.
a. Gold Armor (Doppler Stage 1)
The Gold Armor gives X the power of all of the upgrade chips, which is great since he can usually only equip one of the four chips. To get it, you will need all eight Heart Tanks, four Sub Tanks, all four Armor Upgrades, and all four Ride Armors. You will also need to be at full health when you get near the capsule. You cannot equip any of the Chips hidden in the Maverick stages. The Dr. Light Capsule with the Gold Armor will not spawn if you do not meet all of the requirements.
To find the capsule, go through the first Doppler stage and fight the sub-boss (Rex-2000) then head right. You will come to a large area that leads downwards. Robots that fire two shots at forty-five degree angles climb the walls in this area. Travels downwards and keep to the left. You can get extra life energy pretty easily from the robots here if you take damage.
Eventually, you will reach the bottom and you should see a pit. Slide down the left hand wall of the pit and X should go through a hidden passage about halfway down. The capsule will be in this passage.
b. Z-Sabre (Doppler Stage 2)
To get the Z-Sabre, you will need to keep Zero from “dying” over the course of the game so you can use him to fight the Mosquitos sub-boss in Doppler Stage 2. The best way to keep Zero in commission is to simply not call him. Go through Doppler’s second stage, then call Zero when you reach a boss door after passing through a water area. Use Zero’s sabre to destroy Mosquitus (See the Sub-Boss section for more info on this fight) and X will receive the Z-Sabre after the fight.
X can unleash a beam from the Z-Sabre by charging his X-Buster for an extended period. This weapon is powerful enough to destroy any boss in a mere two hits. It is worth noting that it works even if X does not have full health, unlike secret weapons from the previous MMX games.
Here is a breakdown of all the Maverick weapons, along with a brief analysis of each one.
a. Acid Burst: This weapon lobs a ball of acid that splatters on the ground, producing drops that can damage nearby targets. Charging Acid Burst will cause it to fire several blobs at a time for extra corrosion.
b. Frost Shield: Creates an ice spike that flies toward enemies. The spike will break on impact with a foe or hard surface and the bottom half will fall to the ground, creating a stationary spike that can further damage enemies. When charged, it generates an icy shield that can damage foes and absorb some projectiles. When used underwater, the Frost Shield creates bigger spikes. If charged underwater, it will produce a chunk of ice that X can hop onto and ride to the surface.
c. Gravity Well: Fires an orb that damages everything nearby for a few seconds. Many enemies, particularly larger foes, resist this weapon, but it is very good for clearing out smaller machines. When charged, Gravity Well effects the entire screen and does significant damage.
d. Parasitic Bomb: X shoots a bomb that latches onto enemies, rendering them immobile. After a few seconds, the bomb will blow up, destroying its victim. In some cases, it will carry the enemy off, and ram it into another foe. When charged, this weapon shoots bees that home in on targets. The charge attack lasts until X runs out of energy or when the player releases the button.
e. Ray Splasher: X is the life of the party when he has Ray Splasher equipped. More importantly, the rapid shots fired by this weapon can take out multiple foes and even hit bosses more than once. Charged, the Ray Splasher creates a ball that fires bolts in a circular pattern for a few seconds.
f. Spinning Blade: Shoots two sharp disks that fly parallel to each other. These disks will travel a few body lengths in front of X before turning around to fly off at obtuse angles behind X. Despite its short range, this weapon is very powerful. Charge the Spinning Blade up to launch a huge saw that X can move using the D-Pad. Sadly, the charged form of this weapon is not very practical and it is better to rely on its regular form.
g. Tornado fang: X will shoot drills that travel slowly with this weapon equipped. The drills can stick on enemies and damage them several times. Pressing the Y Button several times will make X shoot a trio of drills. If the player charges this weapon, a drill will form on X’s arm, allowing him to attack at close range, though it is not very practical compared to the basic drill shot.
h. Triad Thunder: Electrodes surround X in a triangle pattern, then generate bolt of electricity between each other before firing lighting off in three directions. When powered up, X will slam the ground and send out two orbs of electricity that go off in opposite directions.
12. References and Acknowledgments
Here are the sources I used to help write this guide. I must emphasize that much of the info found above is taken directly from my own experience as always. Most of these sources were used to check my own findings or get me out of binds when I was unable to figure something out. That said, Bwylie (who is mentioned below) helped tremendously with the boss orders. At any rate, I highly recommend the links below if you need more help or want a different perspective.
Special thanks to Bwylie for advice and hints concerning the Mavericks and a few of the game’s secrets!
Info on enemies:
https://megaman.fandom.com/wiki/List_of_Mega_Man_X3_enemies#Mid-bosses
General Guide:
https://gamefaqs.gamespot.com/snes/588481-mega-man-x3/faqs/18506
Thanks for reading my Mega Man X3 Boss Guide!
RetroMaggedon.com ©2026