
Mega Man 1: The New Lands Boss Guide (NES) [ROM Hack]
~by tankMage (May 2023)
About this Guide
This guide was created for the Remastered version of Mega Man: The New Lands, which has a few improvements and bug fixes, so some facts may differ from the original version of the ROM Hack. I also go into greater detail about the stages compared to other Mega Man boss guides I have written, but this is not a walkthrough and the stages are not fully covered.
Contents
1. Boss Order
The following boss/stage order is what I consider to be the best for a number of reasons. First off, it gives players Hunt and Pyroman’s weapons relatively early on. Both weapons are really useful for navigating the other stages. It also allows players to start off on an easier boss. That said, Huntman is not the easiest boss and some players may prefer to take on Pyroman first.
Huntman -> Dynaman -> Pyroman -> Tintman -> Zapman -> Caveman
2. Weapons and Tips
A. Weapons
Many of the weapons in Mega Man 1: The New Lands have special properties that are worth learning and sometimes a necessity for clearing sections of stages that appear later in the game. Be sure to read up on each weapon and practice with it a bit. Also, the icons used in this game are somewhat vague, so they have been listed alongside the name of each weapon.
| Weapon/Boss Name | Icon | Cost | Notes |
| Health Container | 4 | Recovers 3 Health bars when used. | |
Heat Hover (Pyroman) | 3 | Fires in a straight line and makes Mega Man rise. Grants about 2 seconds of invincibility. | |
Round Cutter (Huntman) | 1-2 | Can be used to perform a double jump if the A Button is held while Round Cutter is activated. | |
Spark Splicer (Zapman) | 2 | Fire a spark that travels horizontally. Pressing Up or Down will cause the spark to fire in that direction. The spark will split in two if the player presses the B Button again while it is on screen. | |
Spread Boulder (Caveman) | 1 | Fires several rocks that fan out. | |
Tint Gun (Tintman) | 0.5 | The Tint Gun travels horizontally in a slight arc. It costs very little to use and is good for hitting long range targets. | |
Wild Dynamite (Dynaman) | 3 | Creates shrapnel that spreads out in eight directions. |
B. Tips
Here are a few useful tips that can make some of the more challenging aspects of this game less frustrating.
Learn to use the Round Cutter and Heat Hover.
The weapons awarded by Pyroman and Huntman have special properties that are not immediately obvious. They are also required to complete the final stage of the game, so learn to use them well.
Huntman’s Round Cutter can be used to perform a double jump if the player activates it in mid air while holding down the A Button. This can make clearing difficult leaps a lot less risky. It takes a bit of practice to use the double jump, but once the player gets the timing down, Mega Man can stay in the air until the weapon runs out of energy.
Heat Hover allows Mega Man to rise slightly when fired and makes him immune to damage for a few seconds. Being invincible without taking damage is extremely helpful in almost any situation, it also makes Heat Hover a necessity for crossing spikes and getting over obstacles that are too high for Mega Man to jump.
Do not miss the Health Container in Pyroman’s stage.
The Health Container can be found sitting out in the open about halfway through Pyroman’s level. It is blocked by a tall wall, but Mega Man can double jump over it if he has the Round Cutter. This item can heal some health when used, which makes it good to have later in the game.
Practice makes perfect.
Mega Man 1: The New Lands is slightly more difficult than the average Mega Man title, but it is far from impossible. Many of the stages can be cleared without having to continue if the player is a veteran of the series. Some of the later stages get tough, so it takes a little practice to complete them. This also goes for the Robot Masters, which are generally more difficult than those in a regular Mega Man game.
3. Boss Guide
This section is split into two parts, one for the Robot Masters and another for the bosses in Dr. Wily’s stages. For the Robot Masters, recommended boss order is followed, but they can be challenged in any order. The Wily stages are linear, so players will always encounter the final bosses in the same order.
A. The Robot Masters
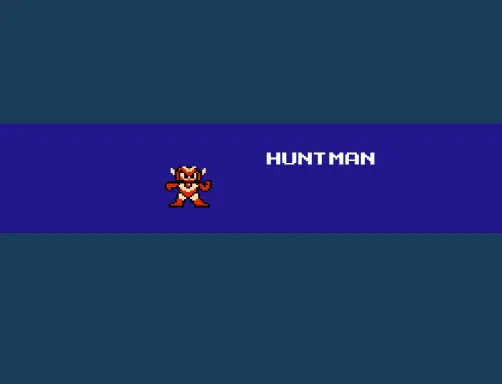
Huntman
Weakness: Spread Boulder
Reward: Round Cutter
Huntman is one of the “easy” bosses in this ROM Hack, though he is tougher than most of the Robot Masters from normal Mega Man games. Additionally, his weapon can be used to jump higher as well as clear enemies, which makes it useful for the trials ahead. He is not weak against the Mega Buster, but defeating him with it is feasible and his stage is one of the less difficult ones, so he is a good choice for beginners.
Huntman has three attacks in his arsenal; the most deadly of which being when he spins his boomerang blade around himself and rushes towards the player. It may seem intuitive to try to jump over Huntman when he is approaching, but this will result in the boss hopping reactively and colliding with Mega Man. To counter this, perform a short hop as Huntman comes close, then run under him as he leaps or C jump away from him. This can take practice, since the blade will hit Mega Man if he is too close.
Hunt can also throw a blade like a boomerang that flies horizontally before returning; simply jump over it once, then again to avoid it. This is also a good time to counter with a shot.
Huntman’s super attack involves him throwing his blade upwards, running to the left side of the screen, then hovering in the air. The blade will zigzag its way down to the ground. Wait for it to get low then hop over it. Huntman will then touchdown, but be ready to jump a second later as the blade returns to him from the right.
Play defensively and focus on getting out of Huntman’s way. His attack patterns are complicated, but there are openings after he attacks and when he performs his super move. All of the Robot Masters will fall into place once this boss is cracked.
Dynaman

Weakness: Round Cutter
Reward: Wild Dynamite
Dynaman throws sticks of dynamite that send shrapnel in four directions. By themselves, Dynaman’s weapons are easy to dodge, but he tends to chuck them rapidly, filling the screen with shrapnel in the process. The good news is he only has three attacks and the Round Cutter from Huntman destroys him.
His most basic attack is a stick of dynamite that he throws at the opposite wall. The stick will explode when it hits the wall, sending shrapnel everywhere. Avoid it by moving in the opposite direction and hopping over the shrapnel. His second move involves him placing a stick of dynamite near the ceiling. This one will explode after a second, sending shrapnel in eight directions. Sidestep the shrapnel. Finally, Dynaman likes to throw two pieces of dynamite at once, followed by a third. They explode in a short of triangle pattern, but only send shrapnel in the four cardinal directions. Stay to the left or right when he executes this attack and simply jump over the shrapnel.
Dynaman is not easy to fight, because he moves around a lot and tosses dynamite constantly. That said, the Round Cutter rips him apart. A single shot from it can hit Dynaman twice and there is little need to worry about evasion in this fight since about six hits should defeat this boss. Stick close to Dynaman and avoid damage as much as possible while using the Round Cutter and you should be able to take him out on your first or second attempt.
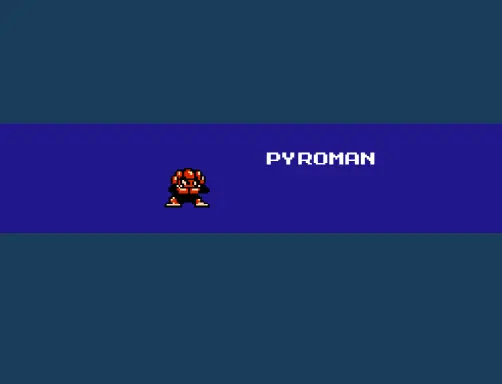
Pyroman
Weakness: Wild Dynamite
Reward: Heat Hover
Pyroman can be taken out fairly reliably with the Mega Buster and his move set is easy to learn. However, it’s best to come here after defeating Huntman and Dynaman, because an item hidden in this boss’s stage must be acquired with the Round Cutter. Furthermore, Pyroman is very weak against Dynaman’s Wild Dynamite.
Pyroman will often bounce around the screen three times, leaving a pair of flames on the ground that spread left and right whenever he touches the ground. He will also surround himself in fire, then charge across the screen. Step away from the flames he leaves on the ground and jump over him when he charges. Finally, Pyro has a super move where he engulfs himself in flame, then charges forward, leaving behind a flame wave that travels more slowly across the screen. While performing this move, Pyro will jump into the air and fire a flame wave in the opposite direction when he reaches the wall.
Patient players can learn Pyroman’s moveset and defeat him with the Mega Buster, but it’s a lot faster to just use Wild Dynamite on him. With Wild Dynamite, Mega Man can afford to take a few hits, since he will almost certainly out-damage Pyro. Getting the Health Container makes this fight even less difficult as it makes it possible to heal mid-battle.
Tintman

Weakness: Heat Hover
Reward: Tint Gun
Tintman’s stage is tricky, but the boss at the end is a pushover. Tint will run around the chamber firing balls that are easy to jump over. He also leaps across the room while firing balls down at Mega Man. This move is easy to sidestep, just be ready to jump if the balls cross each other.
Tintman is weak against Pyroman’s Heat Hover. The invincibility frames from Heat Hover will also protect Mega Man from Tintman’s attacks. Sadly, Heat Hover requires a lot of energy to use and it is likely the weapon’s energy will run out before the boss is dead unless every shot connects. On the bright side, Mega Man will probably be near full health when that happens thanks to Heat Hover’s I-Frames and the Mega Buster works well enough to finish Tintman off.
Zapman

Weakness: Tint Gun
Reward: Spark Splicer
Zap is a difficult Robot Master and is best fought with the Tint Gun. He often surrounds himself in electricity and flies from one side of the room to the other while shooting lightning bolts. He will also fire a wave of electricity when on the ground as well as a large spark the strikes the ceiling, then splits into three sparks that rain to the floor.
Do not shoot at Zapman when he is surrounded by electric; Mega Man’s weapons will have no effect. Wait for him to land and the shield to drop, then fire. The Tint Gun works best on Zapman, though it cannot damage him while his spark shield is active.
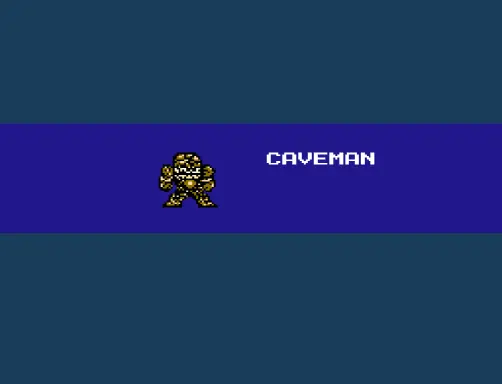
Caveman
Weakness: Spark Splicer
Reward: Spread Boulder
Caveman is one of the more difficult Robot Masters. Players familiar with the original Mega Man will almost certainly recognize many of Caveman’s traits from Gutsman, but Caveman is far more deadly. Like his counterpart, Caveman causes boulders to fall from the ceiling and the ground to shake when he touches down after jumping. Mega Man will bounce uncontrollably on the floor if he is on the ground when Caveman lands. Worse yet, the falling boulder patterns can be difficult to predict. Caveman also throws rocks that spread out towards the player.
Zapman’s Spark Splicer works well against Caveman. Remember, the Spark Splicer can be aimed up or down as well as straight ahead. Pushing the B Button after firing Spark Splicer will also cause it to split, making it possible to hit Caveman more than once with it.
Try to jump just as Caveman lands, because being able to step or jump away from the rocks is half the battle when it comes to reducing the amount of damage Mega Man takes in this fight. It can also be helpful to whittle Caveman down a bit with Heat Hover, since the invulnerability it provides helps considerably.
B. Wily Stage Bosses
Please note that I made up the names of the Wily Stage bosses, so they may be called something entirely different. Luckily, this should not lead to confusion since the stages are linear and the same boss will always appear at the end of each stage.
Wily Stage Boss 1: Eye Block

Weakness: Tint Gun/Round Cutter
This boss is a small block with an eye in its center that tends to skate around the walls of the room. It is fast and often drops from a high point in the room, causing Mega Man to stumble if he is standing on the floor. It also fires bullets in arcs or horizontally.
The Eye Block’s move set is not very relevant as long as the player can bring the Round Cutter to bear and jump over the boss as it rushes towards him or her. While the boss is resistant to most attacks (it takes several Mega Buster shots just to shave one bar off its health meter) the Round Cutter will damage it for several bars. The Tint Gun also works, but is more difficult to use since it must be aimed.
Wily Stage Boss 2: Mega Man Clone

Weakness: Tint Gun
The Mega Man Clone can use all of the weapons the player owns aside from the Health Container. Unlike in the original game, the clone can switch weapons at will, so pay attention to its color to get an idea of what weapon it will use. Blast away at this boss with the Tint Gun, which does a good bit of damage to it. The Mega Man Clone is tough to predict thanks to its versatility, but players that keep their distance should be safe.
Wily Stage Boss 3: Rock Bots
Weakness: Wild Dynamite
The Rock Bots are tough customers. They spawn one at a time and circle the perimeter of the chamber while shooting slow moving bullets at Mega Man. It takes careful timing and practice to jump over the bots and the bullets since they speed up as the fight progresses.
Wild Dynamite works on the Rock Bots, but it will run out if the player tries to destroy all of the Rock Bots with it. Start out with the Tint Gun or Mega Buster to clear away the slower Rock Bots, then switch to Wild Dynamite for the last few.
Dr. Wily (Phase 1)

Weakness: Wild Dynamite
Use Wild Dynamite to take out Wily’s first vehicle. This thing fires spread bullets and energy balls that split off in several directions. It will also attempt to ram Mega Man. Focus on avoiding damage as much as possible since it is not necessary to aim Wild Dynamite at Wily. Try to save the Health Container for Wily’s second phase.
Dr. Wily (Phase 2)

Weakness: Tint Gun/Round Cutter
Wily will fire orbs that split in multiple directions as well as small bullets. He also tends to hover outside of Mega Man’s normal reach, though sometimes he lands and charges from side to side or bounces around the room. The Round Cutter is good for hitting Wily when he is airborne, while the Tint Gun works when when he is on the ground.
Mega Man will likely take a lot of damage in this battle, because Wily will fill the air with projectiles. It can also be difficult to get out of this boss’s way due to his speed. Heat Hover can help mitigate damage somewhat and is also good for using the Health Container.
4. Stage Tips
This guide is not a full walkthrough, so the stages are only described briefly. Aside from a few problem areas and a secret, Mega Man 1: The New Lands is very straightforward. Players who have completed more difficult ROM Hacks or are familiar with the series should not have too much trouble navigating much of this game.
A. The Robot Master Stages
Consider the Robot Master Stages practice for the end of the game which gets fairly tough. Most of these stages vary from easy to moderately tough and few of them have any secrets, so this section of the guide is safe to skip.
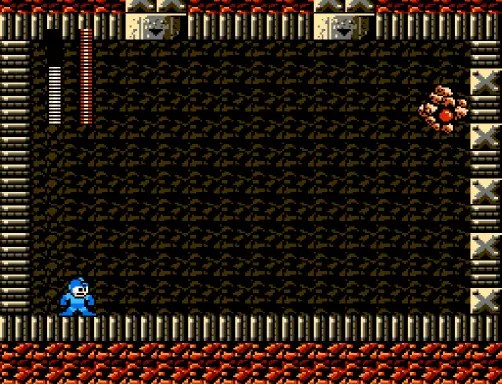
Huntman’s Stage
There is not much to say about this level. While being moderately difficult for a Mega Man title, it is relatively easy by the standards of this ROM Hack. Use it as an opportunity to get accustomed to the enemies. Patience goes a long way in Huntman’s stage, since a lot of the danger comes from cleverly placed foes and floating platforms.
Dynaman’s Stage
Out of all the Robot Master stages, Dynaman’s is arguably the easiest. That said, it is best to do Huntman first, because there are explosive blocks that are impossible to hit with the Mega Buster in a few parts of Dyna’s realm. Without a weapon that can hit things below Mega Man, players will have to take contact damage to pass through these blocks. Aside from that, players need only worry about a few pits, enemies, and exploding sticks of dynamite that rise out of the pits. Proceed cautiously and this stage will be a piece of cake.
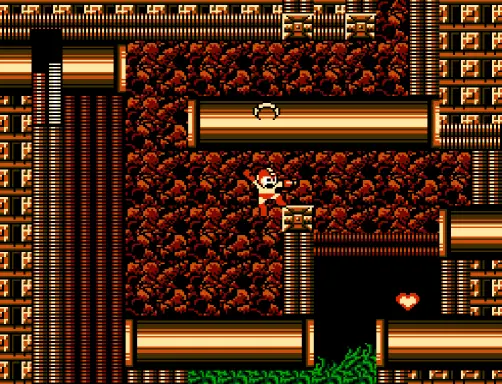
Pyroman’s Stage
While not particularly difficult, Pyroman’s stage is very long, which increases the likelihood that the player will make a mistake. With this in mind it’s a good idea to come here with the Round Cutter, which can give Mega Man a boost over some tricky jumps.
Huntman’s weapon is also needed to get the Health Container. The Health Container uses a Heart icon and is placed behind a wall about halfway through the stage. The Round Cutter is needed to boost over the wall to get Heart.
Tintman’s Stage
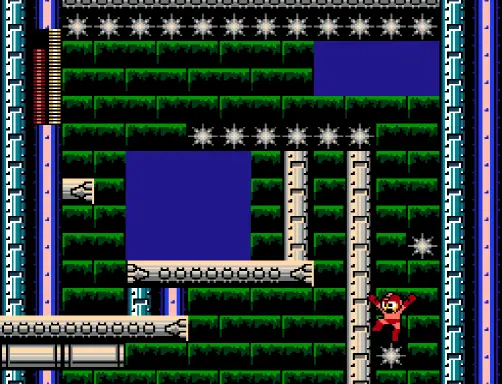
Tintman’s stage is one of the most difficult thanks to well placed turrets, a puzzle room, and spikes that disappear then reappear. Visit this stage after you have cleared a few of the others (especially Huntman and Pyroman) so you have some tools to clear the stage with. The turrets are weak against Wild Dynamite and Huntman’s Round Cutter can make jumping over the spikes a lot safer.
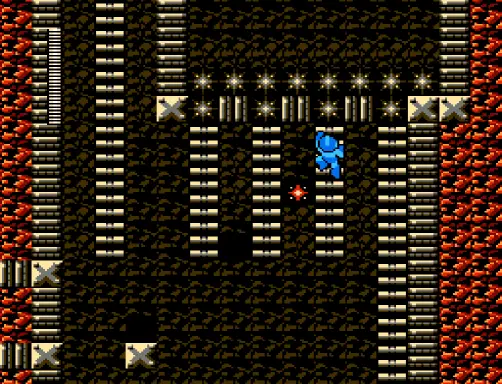
A hallway with a check mark and X at its entrance is located near the middle of Tintman’s domain. The bottom half of the screen beyond it is black. Despite being totally black, there are still spikes and hazards here. Refer to the top of the screen and compare it to where Mega Man is standing to get an idea of what the terrain is like.
screen shows what is hidden by darkness on the bottom half.
The second half of Tintman’s stage is filled with deadly spikes that fade in and out. Mega Man will have to negotiate these spikes while jumping from one moving platform to another. Huntman’s weapon is helpful for getting around the spikes.
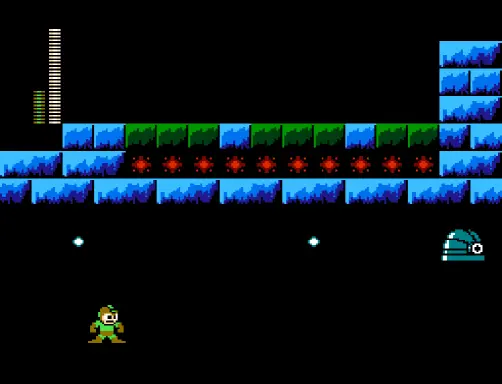
Zapman’s Stage
This level starts out simple and gets fairly challenging about halfway through, so it’s smart to save this stage for later. Moving spikes that can kill Mega Man instantly are the primary threat. Luckily they can be destroyed; Heat Hover is particularly suited to the task. A windy area that blows Mega Man to the left side of the screen comes just before the boss. Pits make this sequence dangerous along with more spike balls that blows towards Mega Man. Pay attention to the signs and jump or use Heat Hover to get through this section safely.
Caveman’s Stage
Aside from a few tricky jumps with moving platforms, this stage is quite easy. That said, it should probably be the last stage the player visits, because the boss is one of the toughest in the game. Watch out for flat bots that strike the ground and cause tremors that knock Mega Man on his butt. Wild Dynamite works well against the tremor bots. Besides that, the Round Cutter can be helpful for clearing the moving platforms, but it is not really necessary.
B. Wily Stages
Wily Stage 1
The first Wily stage is a breeze. In fact, it’s easier than most Robot Master stages. Use weapons when necessary, but be careful about filling them up, because Mega Man does not get recharged between the final stages. Watch out for the usual spikes and hordes of robots.
Wily Stage 2
The second stage in Dr. Wily’s fortress is a bit more difficult than the first. The first section of the stage features electric beams from Zapman’s level. Watch the pattern of the beams and time Mega Man’s movements to get past them. Huntman makes a second appearance just after the beams. This fight should be less difficult than the first since Mega Man has the Spread Boulder, Huntman’s weakness.
After defeating Huntman, Mega Man will have to clear an area with some spikes, pits, and more enemies from Zapman’s stage. This section can be rough, but well timed Wild Dynamite blasts can take care to the bots. Zapman will attack Mega Man after the pit area. Once again, the Tint Gun comes in handy here. Be sure to fall to the right after beating Zap to get a large health power up.
The next area has a few tricky floating platform and spike sequences, but Heat Hover makes them trivial. Do not miss the extra life and weapon energy refill near the end of the area. The boss of the stage is just beyond a few health refills.
Wily Stage 3
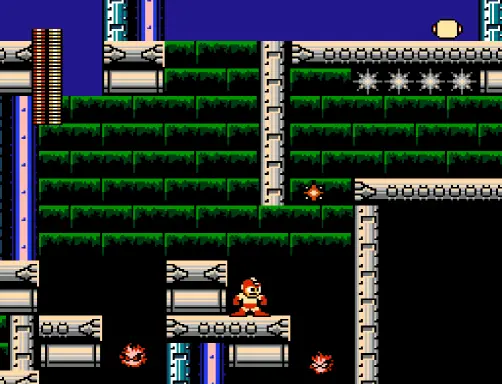
Things heat up in the third Wily Stage thanks to a series of ladders and spikes near the beginning. Climb the ladder carefully or Mega Man may meet his end at the tip of one of the spikes positioned at the top of the ladders. Disappearing spikes also come into play here, but Heat Hover and Round Cutter can help as usual.
on these ladders or the spikes at the top will destroy Mega Man.
A difficult area with winds that can blow Mega Man into chasms and turrets that constantly fire on him is just after the ladders. Use Heat Hover and Round Cutter to boost over tough jumps. Wild Dynamite is good for clearing away the turrets and explosives in this area.
Beyond the windy chasm there is a moving platform that takes Mega Man across an abyss. Watch out for dynamite that comes up from the pit and a few sticks that explode in eight directions. Stay near the middle of the platform and watch the area in front of and behind Mega Man carefully for dynamite.
Wily Stage 4
Stage 4 is the final level in the game. The difficulty really amps up here. Players will need to use Heat Hover and Round Cutter to traverse otherwise impassable rows of spikes. To make the situation worse, these weapons need to be used conservatively or the player may find himself unable to proceed.
The first major challenge is a narrow passage lined with spikes followed by a shaft leading down. Jump over to the passage and use Heat Hover just before landing to get over the spikes. Use it a second time to drop down the passage without getting killed.
Next, Mega Man will find himself in a room with ladders and more spikes on the floor. Grab the weapon energy even if Heat Hover is mostly full (or fill up Round Cutter) then climb down the ladders. Be sure to equip Heat Hover and use it just as Mega Man lets go of the ladder above the spikes, then run left. Jump up to the higher section of floor and activate Heat Hover again to get across the spikes here. Stand against the left hand wall, quickly equip Round Cutter, then use it to jump over the wall. It is very important to time these moves and conserve weapon energy as much as possible, because more difficult rooms are ahead.

Flames that jump out of a pair of chasms inhabit the next area. Use Round Cutter to jump over the first flame and up to the top of the pillar to the right. Two flames come out of the pit to the right of the pillar. Leap off the side to the right wall and activate Heat Hover, then hold Right on the D-Pad as Mega Man drops to get past the flames and onto the solid ground below. Simply use Heat Hover to cross the spike lined gaps beyond the flames.
Mega Man will come to yet another deadly trap with a moving spike over a pit that is also occupied by a flame that jumps up and down. Use the Mega Buster to destroy the spike by shooting through the wall, then use Round Cutter to jump over the flame and up to the hallway on the right.
One final dangerous hallway stands between Mega Man and the final set of battles. Spikes line the ceiling of this hallway and the enemies here are deviously placed on the pillars coming up from pits. Try to use careful timing to get through this area and fall back on Heat Hover only when absolutely necessary, because a final boss rush is up ahead.
After jumping into the teleporter at the end of the spike lined hallway, Mega Man will have to fight the remaining Robot Masters, which are listed below with their weaknesses.
Dynaman – Round Cutter
Pyroman – Wild Dynamite
Tintman – Heat Hover
Caveman – Spark Splicer
Do not be shy about using weapon energy in these fights, because Mega Man will get a full recharge before the final boss. He will also get some of his life refilled every time he enters a teleport pad, so save the Health Container’s energy for emergencies.
Be sure to grab the pinwheel (which fully replenishes Mega Man’s weapons and health) in the next room after beating Caveman. After getting the pinwheel, Mega Man will enter a dark room. Head right to pass through the darkness and battle Dr. Wily.
5. References
I usually put links to other guides that I used as references in this section, but I am not sure if there are guides for this ROM Hack. If there are any, let me know and I’ll link them, because I think it is good to have a variety of opinions. At any rate, here’s the link to the home page for Mega Man: The New Lands.
https://www.romhacking.net/hacks/7666/
Thank you for using our Mega Man 1: The New Lands Boss Guide for the Nintendo Entertainment System.
RetroMaggedon.com ©2023