
Final Fantasy Tactics Solo Guide (PlayStation)
About this Guide and Solo Runs in General
To put it briefly, a solo run involves completing the game using only Ramza and any NPCs that are forced into the party for story reasons. Right now there are two versions of Final Fantasy Tactics, the original PS1 release and the Lion Wars port for PSP. Out of the two, the original is slightly more challenging, since many of the enemies were nerfed in Lion Wars. That said, the two games are similar enough that this guide can be used for either version, just keep in mind it was written using the original (low quality) translation, so names will differ. If there’s any demand, I will add the Lion Wars translation to this guide in the future.
This guide started out as a sort of mental exercise. As a life long fan of Final Fantasy Tactics, I did just about everything you can do, except beat it using only Ramza. After many failed attempts at winning the first battle, I was able to get into the main story and really start experimenting. Eventually I found a reliable strategy and was able to complete the entire game using Ramza and the occasional mandatory NPC. That said, I can’t take full credit for the idea itself, because a lot of people beat me to it.
Contents
Any given part of a solo run of this game can be extremely difficult or very easy depending on the situation. Some battles can be won with almost no effort, while others require specific setups or just plain luck. Having a good strategy laid out from the start is the key to success if you want a successful solo run. The advice given in this section comes from years of experience with this game as well as some old fashioned trial and error.
a. Save often and make backup saves.
I know, seeing “save your game” is old hat when it comes to RPG guides, but trust me, you’ll want to save a lot in a solo run. It also pays to have two or three backup saves at earlier points in the game. It is extremely easy to run into a difficult or unbeatable random battle when moving around, which can result in hours of lost progress if you didn’t save often. There are also a few battles where players can get softlocked. In fact I was almost softlocked in the fight with Draclau and only won because I leveled Monk up a bit before fighting him.
b. Unlock Teleport and Learn how to use it.
Teleport is a movement ability that can be learned from the Time Mage job relatively quickly. It’s arguably the best movement ability in the game, because it allows the player to pass through enemies, objects, and ignore height/depth. In a solo run, the ability to Teleport onto a wall or through a gang of enemies is invaluable.
As good as Teleport may be, it requires a little knowledge to be used correctly. Teleport has a failure rate that increases as a character moves beyond his normal movement range. Attempting to Teleport within a character’s base movement range has 100% success rate regardless of height, depth, and other terrain considerations. Moving beyond a character’s base movement decreases the success rate by 10% per space. For example, Ramza tries to teleport to a tile 4 spaces away and his base movement is 3. He’ll have a 90% chance of succeeding. If he tries to Teleport 6 spaces away with a base move of 3, he will only have a 70% chance of succeeding.
Remember to count any diagonal movement as a space when attempting to Teleport. You will also have to count walls and other normally impassable barriers as a space. Wearing Battle Boots or other items that increase move will count towards Teleport. For example, if Ramza’s base move is 3 and he wears Battle Boots to get a move of 4, Teleport will not incur a success penalty unless Ramza tries to move 5 or more spaces.
Finally, it is worth noting that Teleport always has at least a 10% chance of working, so Ramza can Teleport across any map with enough tries. It usually pays to try to Teleport 1 or 2 spaces beyond normal range, but it could be a bad idea in some situations. Always remember Teleporting even a space past base move is a gamble, because it may be better to just move a little bit to get out of a bad situation rather than get stuck and die.
c. Fight a few random battles.
Random battles can be very dangerous for Ramza, but they also provide opportunities to level up a bit and earn some gil. For the most part, you can get through the first chapter without grinding at all. In later chapters you may want to fight in Mandalia Plains or some other location close to a town in order unlock a new ability or make money for potions. Unfortunately, anyone who wants to use the Samurai skill, Draw Out, will have to fight quite a bit due to the high cost of Katanas. Saving before getting into a random battle is a good idea, because it is very easy to find yourself in a situation where you can’t win if you are trying to build up a weak job. While grinding is sometimes necessary, I do not recommend exploiting random battles, because doing so can undermine the challenge of a solo run. Ramza will already be a very high level most of the time anyway, as he is the only one in the party. That said, it’s your game and you are free to play it any way you like.
d. Use Yell, Accumulate, and Scream.
Ramza’s Guts skill features a few special and very powerful abilities as well as useful standard ones. Yell is extremely useful in many situations and a necessity for some battles where Ramza has to be fast enough to get multiple consecutive turns. Accumulate is also powerful for boosting damage with most melee weapons. Scream is an ultimate version of Ramza’s stat buffing abilities, though it is only available late in the game when it is more difficult to get a speed advantage over enemies. As useful as these abilities may be, it is wise not to become over reliant on them. There are many situations where players will need to be able to strike a target and disable it immediately. Needless to say, Yell and Scream are not helpful in such battles.
e. Build the Monk job up ASAP.
Monk is one of the most powerful Jobs Ramza can use, especially when coupled with Guts. Skills like Chakra and Wave Fist allow Ramza to heal himself as well as strike foes from a distance. The Monk job also has decent innate stats and can achieve high HP with Equip Armor. Charge also works well with Monk and even Charge +1 or +2 can inflict tones of damage. After unlocking the Ninja job, Ramza can learn Two Swords, giving him the ability to strike enemies twice with his powerful fists as a Monk.
As great as the Monk job is, it is not well suited for every type of battle. This is largely due to the job’s middling Speed stat and mediocre Move. Encounters where the player has to quickly defeat a boss can go very well or badly for Monk Ramza depending on the boss’s Speed. For example, Monk Ramza does well in the final confrontation with Wiegraf, but he may not be fast enough to deal with Elmdor, Celia, and Lede. In the end, Monk is a great fall back job as long as you keep in mind that it cannot always be relied upon.
g. Don’t bother with the secret items.
There’s a lot of pieces of equipment that can only be obtained by stealing them from certain enemies or using the Move-Find-Item skill. While things like the Blood Sword and Vanish Mantle can be useful, getting them probably isn’t worth the effort. Thief is a fairly weak class and it takes multiple attempts to steal items even under the best conditions. Move-Find-Item requires low Brave to actually work, which means anyone that wants to use it will have to purposely reduce Ramza’s Brave to 20 or even lower. In turn this makes important reaction abilities like Aut-Potion nearly useless. It’s probably best to just rely on stuff that can be bought in shops or acquired via the Poach skill.
h. Zodiac Compatibility
The amount of damage Ramza inflicts and sustains is partially influenced by his zodiac compatibility with the enemy. High compatibility will result in high damage, while low compatibility will end in low damage. Zodiac signs are often randomly assigned, but story battles are an exception. This makes it possible to pick a sign that performs well or very poorly in a solo run. While I am not sure which sign is best, I used Capricorn and had no problems in the difficult battles where a few points of extra damage matter. Just be careful not to pick a sign that makes it difficult to slay Draclau or one of the more dangerous Lucavi.
Here’s a list of good builds for soloing. It’s split into early/mid game jobs and late game builds, which require quite a bit of work to unlock. Have these builds in mind as you play through the game, because it helps to start working on them from the start.
a. Good Early to Mid Game Jobs
Ramza will need a good selection of jobs if he wants to defeat the Lucavi all by himself. The Early and middle portions of the game are arguably the toughest, because Ramaza’s “Uber Squire” job has not reached its full potential and really powerful abilities like Math Skill take a lot of training to unlock. Here are a few jobs that can be unlocked fairly early in the game (or right away) that are really helpful.
Chemist – The humble Chemist may not seem like a great job at first. After all, knives aren’t exactly power weapons and guns are not available in the first chapter, but the Chemist has a lot going for it. First off, Auto Potion is top tier as far as reaction abilities go for much of the game. Chemists can also heal whenever needed as well as toss Potions and Holy Water at Undead foes. Even better, knives scale with PA and Speed, so using Ramza’s Yell ability (Guts) will increase is attack power with knives in addition to allowing him to take turns more frequently.
Monk – If there’s an ultimate job in Final Fantasy Tactics, it’s probably Orlandu’s Holy Swordsman job, but Monk isn’t bad at all. As a Monk, Ramza has good HP, deals great damage (assuming he has high Brave), and can strike opponents from afar. He can also heal with Chakra and cancel some negative status with Stigma Magic. Couple Monk with Guts and Auto Potion to get a really powerful build for the first few chapters. Monk Ramza retains his usefulness throughout the game if you learn skills like Two Swords and Blade Grasp.
Priest – This class may not be able to do much damage, but it’s important to level for Holy if you plan on using Math Skill, which you should. Priest Ramza is really good at healing and buffing himself, which combos well with Guts. Use Yell and Accumulate to really boost this job up.
Wizard – Magic can be very powerful in FFT and Ramza has a good MA score combined with decent Faith. This makes him well suited to the Wizard job. Spells like Fire 3 and Flare are devastating with Math Skill, so this job is great for late game builds as well. Once again, Wizard combos well with Guts. Using Yell to increase Ramza’s Speed will also decrease the amount of time it takes to charge spells, so you can (in theory) cast really powerful spells like Ice 4 in a single turn.
Time Mage – It’s easy to write this job off as useless (I almost did) due to its lack of offensive magic. However, Time Mage offers a lot of really powerful abilities and spells. Don’t Move, Stop, and Slow are all amazing for locking enemies down. In fact Don’t Move is basically essential in some late game battles. Haste is really nice for buffing Ramza and some players may even want to consider learning Meteor, which can be cast relatively quickly if used with Yell. Finally, Teleport is an amazing move ability that can carry Ramza through the game if used properly.
Thief – I’ll be honest, I did not use this job at all when I did my solo run. That said, there are reasons why some players may like this job. First of all, being able to steal rare items is great and even normal gear can be sold. Secondly, Steal Heart can be useful and Move +2 is nice if you don’t have (or don’t like) Teleport. As a base job, Thief has great Speed and high evade along with good movement, so there’s a lot going for it.
b. Late Game Builds
Aim for the following builds as you progress in the game. A lot of these jobs must be unlocked by fulfilling prerequisites, but Ramza can get JP very quickly since he has to do most of the fighting in a solo run. Keep in mind that I used Math Skill to beat a lot of the end game bosses and I’m fairly certain it’s a necessity. The same goes for the Ninja job, because there are some fights where its speed and mobility are vital.
Math Skill Uber Squire
| Job | Squire |
| Support Skill | Math Skill |
| Reaction Ability | Blade grasp/Auto Potion/Damage Split |
| Support Ability | Magic Attack Up |
| Movement | Teleport |
| Weapon | Excalibur |
| Shield | Aegis Shield |
| Helm | Flash Hat |
| Armor | Chameleon Robe or Reflect Mail |
This is arguably the most powerful build in the game. As a Squire, Ramza has a strong mix of Speed, PA, MA, Move, HP, and MP. This allows him to nuke enemies from orbit using Math Skill to cast spells like Holy and Flare. The Chameleon Robe is optional for this build and you can wear something that adds more HP if you wish. However, you can use the robe to absorb Holy spells that hit Ramza, which is a good way to heal him and defeat enemies in the process. The Flash Hat is fairly important to this build, because taking turns before enemies is often the difference between life and death. Excalibur and the Aegis Shield are also key to this build for the Haste status granted by Excalibur and the shield’s excellent magic defense as well as its bonus to MA. Accessories that suit the battle should be worn, though the Magic Gauntlet is a good default option.
Math Skill Wizard
| Job | Wizard |
| Support Skill | Math Skill |
| Reaction Ability | Blade grasp/Auto Potion/Damage Split |
| Support Ability | Magic Attack Up |
| Movement | Teleport |
| Weapon | Wizard Rod |
| Shield | None |
| Helm | Flash Hat |
| Armor | Wizard or Chameleon Robe |
This is a power oriented build that is similar to the Math Skill Uber Squire, except it has more damage potential while being fragile. As a Wizard, Ramza has very high MA and can deal massive damage to just about any enemy with a normal Faith score. He’ll also have a high likelihood of getting powerful status effects like Stop and Petrify to work. All of this comes at the cost of survivability. This build will have very low HP even if you wear the best light armors and it will not have the benefit of Excalibur. Consequently, it’s only really good in situations where you know you will be able to eliminate any imminent threats right away.
Guts Ninja
| Job | Ninja |
| Support Skill | Guts |
| Reaction Ability | Blade grasp or Auto Potion |
| Support Ability | Attack Up |
| Movement | Teleport/Move +3 |
| Weapon | Spell Edge x2 |
| Shield | None |
| Helm | Thief Hat |
| Armor | Black Costume |
Ninja is an often overlooked, yet very good job for Ramza. The innate speed of this job allows Ramza to get that vital first strike and the Throw skill is not to be underestimated. Ninja’s high move rate also works well with Teleport or Move +3. This job is best suited to situations where Ramza need only defeat a specific foe or where he can avoid enemies in order to build up his PA/MA/Speed with Scream. The Spell Edge is a really nice weapon since it can slap enemies with the Don’t Act status. The only real issue with the Ninja job is its lack of HP and means of healing, which makes it somewhat squishy.
Draw Out Uber Squire
| Job | Squire |
| Support Skill | Draw Out |
| Reaction Ability | Blade grasp/Auto Potion/Damage Split |
| Support Ability | Magic Attack Up |
| Movement | Teleport |
| Weapon | Excalibur |
| Shield | Excalibur |
| Helm | Flash Hat |
| Armor | Reflect Mail |
Draw Out is a powerful ability in Final Fantasy Tactics, but the Samurai job is trash, so it works best with a powerful base job. Luckily, Ramaza’s “Uber Squire” is a powerful base job that can truly unlock the potential of Draw Out. With high Speed, Excalibur, and good MA, Ramza should be able to strike first or quickly build up his stats with Scream. Powerful swords like Muramasa and Heaven’s Cloud can render enemies defenseless if you are lucky. Murasame can be used to heal Ramza if he gets in trouble. Unfortunately, this build has a few major drawbacks that I have not been able to completely solve. First off, Draw Out is expensive to use, because katanas have a 15% chance of breaking when Draw Out is activated. On top of that Ramza needs to use Scream a few times to power up Draw Out if he wants to beat powerful enemies, so it’s not terribly useful in fights where Ramza does not have time to power up.
On a side note, this build is fairly powerful with Damage Split thanks to its high HP. You can also use Murasame to heal up, which addresses Damage Split’s primary flaw, since enemies can’t just whittle Ramza’s HP down to zero. The Magic Gauntlet also works great with this build if you don’t have to wear a different accessory.
This walkthrough is probably the most subjective one I have made to date, because Final Fantasy Tactics gives players so much freedom when it comes to setting up their characters. This makes it difficult to say what the “absolute best way” to do something is even in a solo run where only Ramza is available. In the end, the following walkthrough is more of a report showcasing how I cleared the game. It should be useful, but I’m not going to claim that it’s perfect since there are likely better ways to win some of the battles.
The choices you make in this chapter are vital. Be sure to use easy battles as an opportunity to build up important jobs or unlock skills you will need down the line.
Battle: Orbonne Monastery
Very simple battle hard to lose, just finish it quickly and don’t worry.
Battle: Magic City Gariland
| Enemies | Squire x4 | Chemist |
This battle is extremely difficult to solo, because there is nothing you can do to prepare for it. Consequently, the outcome of this encounter is largely based on luck. It may take several tries to win this battle, so be patient.
On the deployment screen, position Ramza near the center of the blocks as shown in the image below.
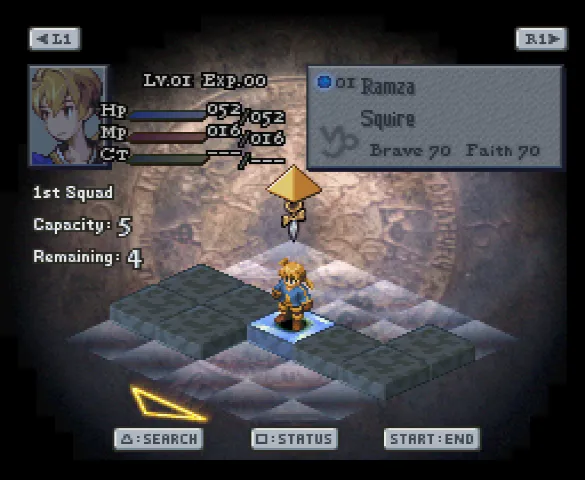
Your success is largely based on the enemy’s zodiac signs and what weapons/skills they have equipped. All of this stuff is random. Delita’s actions are also pivotal and largely out of your control.
Your first goal should be to kill the squire who moves up to Delita. If all goes well, Delita and one of the squires near the chemist will approach each each other. Next, Ramza should walk up to the squire near Delita and attack him. Delita will attack the squire next and hopefully finish him off, then fall back.
After that, you should have Ramza attack the female squire who approaches from the rooftops. Ramza will have to do enough damage to force her to retreat, allowing him and Delita to focus on the other foes.
The battle becomes a bit less predictable after the first few turns. It’s best to have Ramza work with Delita and attack targets of opportunity if possible. The best outcome is to defeat the chemist next in order to prevent him from healing people, but you may have to focus on the other squires near him.
Stay near fallen foes if possible so Ramza or Delita can collect crystals if they drop them. This also prevents the enemies from healing themselves.
Once the chemist and a couple of the squires are gone you are almost assured victory. Here’s a few tips for this fight:
– Reload if you fail to defeat the first squire.
– Pay attention to the turn order.
– Ramza and Delita can heal each other with Wish.
Preparing for the next Battle
After the first encounter you will be free to make some adjustments to Ramza’s job, change his gear, and do some shopping. For starters, strip all of the generic units of their equipment. You can also strip Delita if you wish.
Teach Ramza Yell (a Squire skill) if possible and change his job to Chemist. Be sure to learn the Potion skill, but save the rest of your JP for Auto Potion, which will become extremely important. Make sure Ramza also has his Guts skill equipped. After getting Ramza set up, go to the shops in town and sell your junk. Buy about 30 Potions. Save your game, then head over to Mandalia Plains.
Battle: Mandalia Plains
| Enemies | Red Panther | Squire x4 | Thief |
It’s extremely important to choose the choose the first dialog option “Our duty is to destroy the Death Corps.” at the start of the battle. Otherwise you will have to defend Algus which is a pain in the ass.
Try to kill the Red Panther first, but watch out for its dangerous counter attack. Use Potions whenever you need them.
This battle shouldn’t be too difficult once the Red Panther is out of the equation. Delita and Algus should be able to clean up a lot of the enemies. Having Potions also helps a lot.
Random Battles and getting ready for Sweegy Woods
Ramza should be able to learn Yell (Squire) and should be well on his way to learning Auto Potion (Chemist) after Mandalia Plains. Keep the Chemist job and make sure you have Guts so you can use Yell. Algus has some decent gear, so he does not need anything. Head over to Igros Castle when you are ready.
Once you are done at Igros the party will have to go through Sweegy Woods to Dorter. Be sure to save. There’s a chance of a random battle on Mandalia Plains. If this happens you are either screwed or have a great chance to level up a bit before fighting in Sweegy. While the composition of these battles varies, you can expect to meet Chocobos, Goblins, Red Panthers, and even human NPCs.
It’s unlikely you will win if there’s a Chocobo or two in the fight. Their great movement range and ability to heal make them almost impossible to manage at this point in the game.
If you do get into a random battle, you’ll have a good opportunity to gain some JP that can go towards important skills. Using Yell and keeping Ramza away from enemies until he starts getting double turns is your best bet for victory.
Buy a Feather Hat and Leather Outfit for Ramza at Gariland. You can also get Delita and Algus some armor, but it isn’t necessary. Grab a bunch of Potions while you’re at it.
Battle: Sweegy Woods
| Enemies | Black Goblin | Goblin x2 | Bomb x2 | Red Panther |
Where you place Ramza in this battle isn’t terribly important now that you have Yell and a means of healing. Have Ramza retreat and let your guests duke it out with the enemies. Use Yell to build up Speed for a few turns. This will also boost Ramza’s damage with the Mythril Knife, assuming he is still a Chemist.
Delita and Algus should keep the monsters busy for a few turns. Once Ramza is fast enough to get two consecutive turns, you can start attacking the remaining monsters. Try to stay away from the enemy until then. Use hit and run tactics to take out the monsters. Bombs are very dangerous and can kill you with their Self Destruct ability, so do not engage them until you are sure you can slay them before they can act.
Getting Ready for the Main Game
You should be out of the woods (so to speak) after the battle in Sweegy, for a while at least. Ramza should have enough JP to unlock Auto Potion, Hi Potion, and X Potion, which means he can abandon the Chemist job.
This is where things get interesting, because Ramza should be able to survive fairly well using Yell and can take just about any job. While it’s best to level up jobs like Priest and Wizard in preparation for Calculator, it’s possible to use other classes as long as you build them well. Here’s a few options, though you can feel free to experiment:
Squire – This class still has some useful skills like Accumulate and Move +1.
Monk – Easily one of the best jobs Ramza can take, Monk can carry you through much of the game.
Chemist – This job’s ability to use items is really helpful and you may want to master it more if you don’t like having Auto Potion as a reaction ability.
Priest- You’ll need a few levels in this job to unlock Calculator, plus healing spells can be useful. Holy is also amazing, especially after you get Chameleon Robes later in the game. With that in mind, Priest Ramza isn’t much of a fighter, so you may want to learn Equip Sword or something before taking this job.
Archer – Players who are not interested in magical jobs may want to try the Archer out. While the first chapter isn’t great for Archers due to a lack of bows, the bowgun is still good for kiting enemies as well as hit and run tactics. The Charge skill also synergizes well with Ramza’s Yell ability, so be sure to equip Guts as your secondary skill.
Knight – I’m not a huge fan of this job for solo runs, because its ability to break equipment isn’t all that useful. That said, Knights are tough and can learn some great support abilities. It’s also a prerequisite for Monk.
Tip: The Squire’s Gained JP Up ability is a great investment, so try to unlock it early.
Battle: Slums in Dorter
| Enemies | Knight | Archer x3 | Wizard x2 |
This battle is very dangerous thanks to the Wizards and Archers. Take advantage of Delita and Algus by letting them engage the enemy as usual. They make good bait. Using magic or Potions to heal them is also a smart move.
The Wizards should be a priority. If you’re spamming Yell you can generally keep away from them, but this map is small and spells have unlimited vertical range. Keep Ramza’s HP topped off if possible, though I was able to scrape by with Auto Potion. Try to focus on one wiz, then the other to take them out efficiently. It also helps to keep some distance between Ramza and his guest allies to prevent the Wizards from hitting more than one of you.
Anecdotally, I did this battle as a Wizard with Fire and Guts. Spamming Yell, then casting Fire worked out well, though Ramza’s MP ran out near the end of the fight. Other classes should be able to manage and Archers should work especially well if you can use the tall building to your advantage.
Battle: Cellar of Sand Mouse
| Enemies | Knight x3 | Monk x2 | Archer |
Dorter may have been tricky thanks to the Wizards, but this battle is a piece of cake. You shouldn’t even need to use Yell. The enemy is essentially trapped in a building with only two exits. Work with Algus and Delita to keep the bad guys in. If you have Black Magic you can hit multiple foes at once. If you are relying on physical attacks, you can simply stay in a doorway and hack up the enemies. The Monks and Knights can dish out a lot of damage, but Auto Potion should cancel it out.
You may win a Blind Knife in this fight, be sure to use it if your job can equip it.
Returning to Igros
New weapons, armor, and items will be available in the shops after the battle in Zeklaus Desert. Grab up everything you can on the way back to Igros in case you want to change jobs. You should be able to afford a copy of every item since you don’t have to equip an entire party.
The Small Mantle is a good investment if you have Move +1 as it gives Ramza a 10% chance to evade physical and magical attacks even from behind. Use any random battles that may occur on the way to Igros to build up your jobs.
Battle: Thieves Fort
| Enemies | Thief x3 | Priest x2 | Miluda (Knight) |
Miluda, Thieves with high evade, and Priests that can heal everyone make this battle tough to solo. However, there’s a simple trick that can increase your odds of success. Walk over to the small island in the corner near where the party starts as shown below.

The deep water on the side will prevent enemies from attacking Ramza here and he will be free to use Yell. The Priests are still a threat in this fight thanks to their ability to cast black magic, so make sure you have some means of healing.
This fight will likely take a while unless you are able to take the healers out fast. Miluda has high HP, good defensive skills, and the ability to use Potions, so it may take a lot of effort to defeat her depending on your job/skill set. Magic works well on her and the battle ends immediately if you can manage to KO her early on.
Preparing for Chapter 2
Ramza still has several battles to finish before the second chapter, but it’s not a bad idea to start planning ahead. Be sure to get the Monk job at some point and unlock some of its abilities like Chakra and Wave Fist. The Monk job is powerful in general and works really well with Guts. Unlocking Time Mage can also pay off in a big way if you can get enough JP for Teleport, which is arguably the best movement ability if used correctly.
Tip: Equip the Chemist ability, Maintenance, before going to Lenalia Plateau.
Battle: Lenalia Plateau
| Enemies | Knight x2 | Wizard x2 | Time Mage | Miluda (Knight) |
This battle is dangerous thanks to the Knights who can break Ramza’s equipment, Wizards, and a Time Mage that can Haste her friends or inflict Slow on Ramza. As usual, Yell works wonders in this fight, but the magic users are still a big threat. The Time Mage is especially dangerous with her Slow spell. Use the mages’ spells against the enemy by moving near them if they target Ramza with a spell. That way they will also take damage or suffer status effects.
This is another battle where having ranged capabilities like Black Magic or a bow is really helpful, because you can use it to take out the Time Mage before she can wreak havoc. Delita makes for good cannon fodder as always, so let him distract the enemy.
This is another fight where defeating Miluda will end the engagement, so focus on her if you want a quick win. Alternately, defeating everyone except Miluda, then waiting for the bodies to turn into crystals or chests is a good way to learn some new abilities and get free stuff.
Rest Stop
I strongly recommend stopping at Gariland after beating Miluda and stocking up on Hi Potions. You may also want to buy a Mage Masher if you are planning on using a job that wields knives.
Note: The upcoming fight with Wiegraf is very dangerous. Be sure to use a job that has high HP like Knight or Monk and equip Guts as a secondary skill. Or you can use a ranged job like Archer or Wizard and play keep away with your foes.
Battle: Windmill Shed
| Enemies | Monk x2 | Knight | Chocobo | Wiegraf (White Knight) |
Wiegraf is a huge threat in this battle. His Stasis Sword deals a lot of damage and can inflict Stop on Ramza, which will leave him completely vulnerable. As an added threat, Boco the Chocobo can heal enemies. Luckily, there’s a safe chokepoint where Ramza can force Wiegraf and his goons into fighting him one by one.
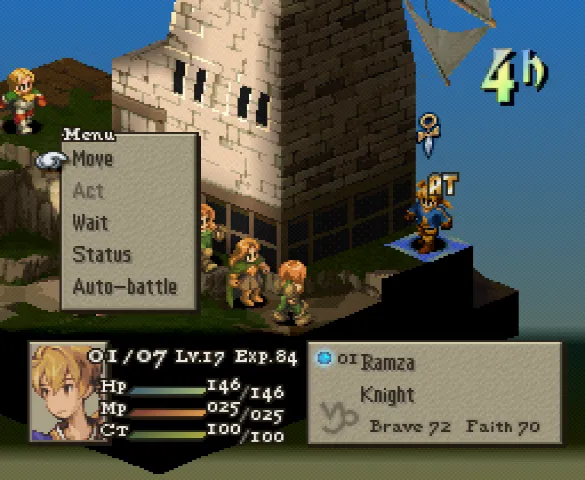
If you stand in the spot shown above, enemies will have to fight Ramza one at a time, though Wiegraf may still be able to use his sword skills. If you have a bow or the Monk job, you should be able to hit Wiegraf from afar. Archer or Wizard is best for this fight, since you can just kill or ignore whoever is in front of Ramza and focus on damaging Wiegraf.
Battle: Fort Zeakden
| Enemies | Knight x3 | Wizard x3 | Algus (Knight) |
I found this battle more difficult than the Windmill Shed with Wiegraf. Algus is not much of a threat, but the Knights and Wizards that accompany him can do some serious damage. The Wizards in particular will cast Haste in addition to Black Magic spells.
While Algus uses a weak weapon in terms of damage, it has a range of four tiles and can Blind Ramza, so watch out. Algus also has good defense, which means you’ll likely have to get behind him to deal damage consistently.
Choose a job that can hit really hard like Monk or Wizard. It may be best to focus on Algus, but you may also have to knock out a few of his cohorts quickly. Yell can work in this fight, but Ramza is outnumbered and the enemy is spread out, so out maneuvering them can be difficult.
The second chapter starts out fairly easy and stays that way for a while, but it ends with a difficult boss fight. Preparation is key if you want to make it through Chapter 2. Build up Monk, increase Ramza’s Brave, and learn a few of the Archer’s Charge abilties.
Boosting Brave
Ramza will have a new ability for his Squire job: Cheer Up. This ability raises Brave by five points temporarily and adds a permanent point. Brave determines how often reaction abilities like Auto Potion and Blade Grasp work and also impacts damage from certain weapons. It’s a good idea to learn Cheer Up right away and use it to get Ramza’s permanent Brave up a bit. The battles Dorter and Araguay Woods are a good opportunity to learn Cheer Up, then increase Ramza’s Brave in preparation for more dangerous encounters.
Battle: Dorter Trade City
| Enemies | Thief x2 | Wizard x2 | Archer x2 |
Gafgarion and Agrias will make mince meat of the enemies in this fight, so it’s basically impossible to lose. While it may be difficult to lose, the Theives in the enemy party will try to steal your stuff. Help Gafgarion and Agrias slay the Theives quickly in order to save yourself the trouble of replacing stolen goods.
Battle: Araguay Woods
| Enemies | Goblin x5 | Black Goblin |
Another cakewalk as long as you help Agrias and Gafgarion. Choosing to save Boco the Chocobo will make saving him the object of the battle, but he is generally capable of defending himself with only minimal assistance. Ultimately, this is an easy way to build up JP. That said, this battle can be ended very quickly by equipping Black Magic or using the Wizard job since Goblins are weak against Ice.
Time Out for the Time Mage
Time Mage is a pretty awful job for a solo run BUT it has some extremely helpful abilities, most notably Teleport, which allows Ramza to avoid just about any foe if used properly. Don’t Act and Don’t Move are also really important later in the game. The next battle is another easy one, which makes it a good opportunity to get some Time Mage JP. Just be sure to learn Haste and Slow (if you have enough JP) so you can help your allies. You can also do a random battle or two to gain JP for this job.
Battle: Zirekile Falls
| Enemies | Knight x5 | Gafgarion (Dark Knight) |
This battle can be very easy or a bit tricky depending on Ramza’s setup. If he is a job that can dish out heavy damage, he can just barrel through the enemy. If Ramza is a weaker job like Time Mage he’ll have to use spells like Haste and Slow to support Agrias and Delita. Either way, focus on debuffing or damaging Gafgarion, because he is the primary threat. You can also use Wish from the Squire job to keep Agrias and Delita on their feet, so they can assist Ramza.
Preparing for Zaland
Zaland Fort City is surprisingly tough battle assuming you don’t out level the enemy by 30 levels. Give Ramza a job that has good offensive capabilities like Monk or Wizard. Summoner is really great if you managed to unlock Shiva, Ifrit, or another good attack summon.
Battle: Zaland Fort City
| Enemies | Knight x2 | Wizard x2 | Archer x2 |
Ramza can choose whether or not to make saving Mustadio the objective of this mission. It’s a lot easier to choose the “Don’t want to get involved.” option, because the Archers and Wizards really gang up on Mustadio, making him extremely difficult to rescue unless you’ve been grinding or have a good damage job. The Wizards in this fight pose a major threat as usual. They often have spells like Fire 2 and Bolt 2, so watch out. Try to make killing them a priority.
Battle: Bariaus Hill
| Enemies | Knight x2 | Archer x2 | Summoner x2 |
You should not have a hard time with this battle. Get rid of the Summoners first, because they tend to be the highest damage dealers. After the Summoners are done for, the Knights and Archers are easy pickings. You may also want to wait for the Summoners to drop crystals after they are defeated, since they have some pretty good abilities.
Lionel Castle Shopping Spree
There’s a lot of good weapons, armor, and accessories for sale at Lionel Castle. The Wizard Mantle, Defense Ring, and Defense Armlet are wise purchases in addition to any equipment you may need. Stock up on Hi Potions while you are at it.
Tip: Have Mustadio learn Seal Evil in preparation for the next fight.
Battle: Zigolis Swamp
| Enemies | Ghoul x2 | Flotiball | Skeleton x2 | Bone Snatch |
The Skeletons and Ghouls on this map can be a problem due to their ability to resurrect. On top of that the terrain is difficult to navigate and standing in the swamp water will poison Ramza. Teaching Mustadio Seal Evil will allow him to eliminate some of the undead for Ramza, assuming he decides to use it.
The Priest and Chemist jobs do well in this battle. Holy Water is basically a one hit kill for the undead enemies, so use it if you have it. Aside from that, ranged attacks and bows are good, because the Skeletons can counterattack Ramza.
Battle: Slums in Goug
| Enemies | Summoner x2 | Thief x2 | Archer x2 |
The Thieves can be a major nuisance as they can steal equipment. To make things worse, it’s likely the Summoners will be able to heal and buff their allies as well as attack Ramza. Check everyone’s abilities and take the healers out first, then deal with the Thieves.
This is a good place to use the Lancer job if you have been able to unlock and level it up, since being airborne makes it difficult for enemies to steal from Ramza. The Thieves and Summoners may have some learnable skills if you are willing to wait for their crystals to drop after downing them. Aside from being potentially annoying, this fight is unremarkable.
Weapons in Warjilis
Ramza will have access to Warjilis Trade City after saving Mustadio for a second time. Be sure to buy a katana or two for when you unlock the Samurai job. The Green Beret and Wizard Outfit are also worth buying.
Tip: Make sure Ramza has some means of healing other units before entering Bariaus Valley. Item, White Magic, and even the Squire ability Wish will work.
Battle: Bariaus Valley
| Enemies | Knight x2 | Wizard x2 | Archer x2 |
Unfortunately, the game will force you to include a second party member in the deployment screen at the start of this fight unless you’ve kicked everyone out of the party. You can always just put a filler unit in and keep it out of combat.
Agrias must be kept alive in this battle, so it’s smart to have some kind of healing skill to keep her alive. The old Monk with Guts build is a good choice, since it gives Ramza Chakra, Wave Fist, and Wish. Summoner, Priest, and even the Item ability also work. Agrias is a capable fighter, so the battle should go smoothly granted you can keep her on her feet.
Preparing for the Battle at Golgorand
The next battle is fairly difficult, so make sure you have a good damage job like Monk and set Guts as your secondary skill. Hi Potions are a must if you use Auto Potion. Buy about 30 or 40 of them for the next two fights.
Battle: Golgorand Execution Site
| Enemies | Time Mage x2 | Knight x3 | Archer x2 | Gafgarion (Dark Knight) |
Don’t underestimate Gafgarion and his cronies. This fight can end badly if you’re not careful. Oddly, Gafgarion is not the primary threat, it’s actually the Time Mages which can Haste allies and Slow or even Stop Ramza. The Knights sometimes have Elemental, which can also inflict Stop. It probably goes without saying that getting hit with Stop can result in an almost immediate Game Over.
Make sure you have good movement. Teleport or Move +2 should suffice. Yell does not help much in this fight at first, because the Time Mages spam Haste on the other enemy units. That said, using Yell will at least keep enemies from getting double turns on Ramza.
It’s best to use Accumulate (and maybe Yell here and there) to boost Ramza’s PA for a few turns, then start mowing down the opposition. Monk (as usual) works well with this technique. Make sure you stay away from the Time Mages for as long as possible as shown below.

If you have good movement, you should be able to reach the Time Mages and slay them while they are charging spells. Remember, units that are charging an ability take extra damage. Another trick that may help is to use the Oracle spell Innocent to make Ramza immune to magic.
It’s worth noting that Gafgarion has a Blood Sword, which can be very useful if you can manage to steal it. If you want the Blood Sword, make sure you have Move +2 so you can take advantage of the Thief job’s mobility. It also helps to have Guts, since Yell boosts the likelihood of stealing the weapon as well as Knife damage.
Getting Ready for the Difficult Battle Ahead
The end of Chapter 2 features an extremely difficult battle that requires careful preparation and perhaps a lot of luck to win. As always, stock up on those Hi Potions.
Make sure you have Monk with the Charge +3 or +4 skill before entering Lionel. You also need high Brave (using Cheer Up permanently boosts Brave), and Attack Up. Finally, I strongly recommend making a backup save before entering Lionel Castle in case things do not pan out.
Tip: Teleport is extremely helpful in the next battle.
!!Warning!!
It’s possible to get softlocked in an unbeatable battle in Lionel Castle if you are not prepared, so save your game in a different slot before attempting the next fight.
Battle: At the Gate of Lionel Castle
| Enemies | Archer x2 | Knight x3 | Summoner | Gafgarion (Dark Knight) |
Don’t let Gafgarion scare you, he still doesn’t do much damage. Just about any job can win this battle as long as Ramza has Guts and can Yell. Teleport also works great. Beware the Archers, Knights, and Summoner on the other side of the gate. The have some nasty abilities like Power Break and the Summoner is fairly powerful. He can also target Ramza through the gate.
Play keep away with Gaf and try to build up Speed with Yell, then defeat the Summoner to keep him from attacking Ramza or healing Gaf. After that you can pick off enemies as you like. Geomancer works really well on this map thanks to the stone paving. If you use Elemental while on the Stone there’s a good chance you can Petrify enemies. In fact you can turn several foes to stone at once, since they tend to bunch up at the gate.
Preparing for Queklain
You should be familiar with the next foe, but fighting him with just Ramza is extremely difficult. I used Monk with the Charge ability and Attack Up to beat him, though it felt more like luck than strategy. The Diamond Armlet is a must in this fight. In theory you could use Ninja with the Oracle’s Doubt Faith spell (to nullify Queklain’s magic), but I did not test this method.
Battle: Inside Lionel Castle
| Enemies | Queklain (Tainted King) |
Welcome to the nearly impossible battle. Queklain can inflict Ramza with Sleep and Death Sentence, Slow him, Petrify him, and keep him from defending himself with Don’t Act. Oh and he can turn Ramza Undead. I probably missed something, but it suffices to say getting any of these status effects are basically a Game Over. Even worse, Queklain has high move and can hit Ramza from anywhere. This means you can’t cheese this battle with Yell.
Use Monk with Charge and Attack Up in this fight. If your Brave is above 80 and your around level 40 you should be able to kill Queklain in a few turns. Next, you have to hope he uses Nightmare on Ramza. Death Sentence is bad, but it’s not an instant Game Over. You’ll have a few turns to Teleport over to Queklain and hit him with Charge +3 or 4. Be sure to use a Charge that activates in 1 turn or you will likely lose. About 500 damage should kill this boss.
Like I said, Luck plays a huge role in this fight unless you are level 99 or something. Even then, you may lose if Queklain hits Ramza with Bio 2. Be ready to make several attempts before winning this fight.
Ramza’s Squire job will change once again in the third chapter. Now he can equip heavy armor and Knight swords, though the latter will not be available until later. Be sure to stock up at Dorter after the ordeal that was Lionel Castle.
Tip: Change Ramza to a good “damage” job and give him an N-Kai Armlet before going to Goland.
Battle: Goland Coal City
| Enemies | Mediator | Chemist x2 | Thief x3 |
This encounter can be very easy or somewhat difficult depending on your preparation and Olan’s actions. A high damage job like Monk, Samurai, or Ninja is a good choice. You should also put an N-Kai Armlet on Ramza to keep the female Thieves from using Steal Heart on him. Finally, it may be a good idea to have Item or Guts equipped so you can heal Olan.
If you are lucky, Olan will use Galaxy Stop right off the bat and freeze most of the enemies. If not, he’ll use his weapon or dash. If you’re really unlucky, all the enemies will resist Galaxy Stop. Either way, it’s wise to take out the Chemists first, because they will heal other units. I found that Draw Out Kotetsu works well if you have Samurai. Otherwise, simply smashing their faces will suffice.
After that, you may want to go for the Mediator, since he has a strong weapon. The Theives on this map are a real nuisance, but they can’t do much aside from steal stuff if you have the N-Kai Armlet…just hope they don’t steal that.
Don’t bother with the old Yell trick in this battle. The enemies are fast and will likely kill Olan before you can get Ramza into double turn territory. Just try to burn the bad guys down as fast as possible.
Tip: Equip Teleport and Guts, then change to one of Ramza’s weaker jobs for the next fight.
Battle: Back Gate of Lesalia Castle
| Enemies | Knight x3 | Monk x2 | Zalmo (Holy Priest) |
This is good opportunity to level up a neglected job (assuming you have neglected a job) since this battle is fairly easy. All you have to do is defeat Zalmo, who isn’t what I would call a competent fighter.
Teleport up to the wall so the Knights can’t reach Ramza, then start using Yell and Accumulate to buff up.
Overall, Zalmo and his goons should not be much of a problem. That said, the Monks can Wave Fist Ramza and the Knights can break his stuff, which is never good. Be sure to have some means of dealing damage if you are using a job that lacks offense. Martial Arts, Equip Sword, Two Swords, Equip Axe, and even Equip Crossbow are all good choices.
Fund Raiser!
You may have noticed a lot of shiny (and expensive) new items in the shop. You may also have noticed Hi Potions don’t do a great job of healing Ramza at this point and it’s time to switch over to X Potions assuming you’re not using Blade Grasp. Unfortunately, you’re going to need a lot of cash to fund the rest of the adventure, which means you may have to fight a few random battles.
There are a few ways to win battles quickly. Monk Ramza should be able to pummel entire parties into the ground with little effort. The same goes for jobs like Wizard, Samurai, and Summoner if you’ve built them up.
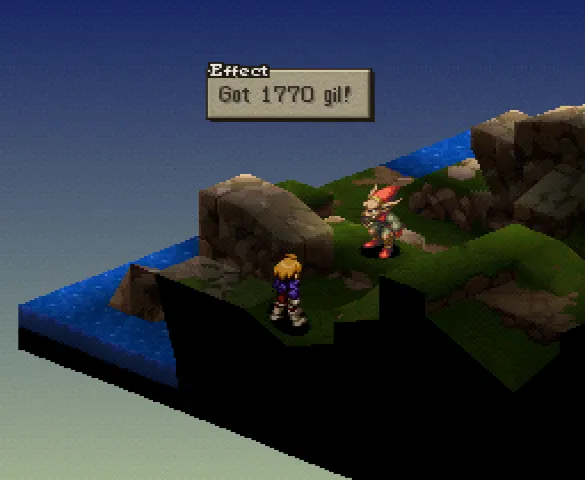
Another way to make money is to use the Mediator job with Guts. Learn Negotiate, then get into a battle and start using Yell. Kill every enemy except for one, then start spamming Negotiate at it. Depending on factors like Speed and Ramza’s level, you can get upwards of 2,000 Gil every time you Negotiate. That should buy a few Katanas and X Potions!
Finally, it’s wise to learn a few important “Endgame” skills before moving forward. You can do this while fighting to earn cash, just be careful not to level up too much or you will find yourself getting wrecked by monsters in random battles. Here’s a brief list of jobs/skills you will want to unlock…
Monk – Learn things like Wave Fist, Chakra, and Martial Arts if you haven’t already done so.
Samurai – Draw Out is a great secondary ability for magical jobs and Ramza’s Squire job. Blade Grasp is also an excellent reaction ability.
Calculator – This job is difficult to unlock and train, but Math Skill is extremely powerful.
Tip: Equip the Elven Mantle and Aegis Shield for the upcoming battle.
Battle: Orbonne Monastery Underground Book Storage Second Floor
| Enemies | Lancer x3 | Time Mage x2 | Chemist |
Despite featuring Lancers, this battle is not difficult. Try to take the Chemist out first and hit the Lancers from behind. The Time Mages tend to cast Haste and Slow, which can be annoying. Ramza can cancel out Slow by using the Aegis Shield and Elven Mantle.
Tip: Equip the Teleport ability to make the next battle really easy.
Battle: Orbonne Monastery Underground Book Storage Third Floor
| Enemies | Summoner | Knight x2 | Archer x2 | Izlude (Knight Blade) |
Go right for Izlude (Teleport makes reaching him easy) and attack him immediately. The Archers, Knights, and Summoner can be a real pain, so end the battle quickly. Watch out for Izlude’s break skills if you do not have Blade Grasp.
Battle: Orbonne Monastery Underground Book Storage First Floor
| Enemies | Knight x2 | Archer x2 | Wizard | Wiegraf (White Knight) |
Good old Wiegraf is back and he’s the primary target in this battle. As usual, he’s a major threat thanks to Crush Punch, which can be lethal. This is another fight where Teleport helps a lot. Hit and run tactics work well, but your best bet is to burn Wiegraf down quickly with powerful spells or melee attacks. Draw Out also works really well in this area since the enemies tend to bunch up.
Battle: Grog Hill
| Enemies | Squire x2 | Chemist x2 | Thief | Archer |
This battle is a breeze. Use the opportunity to build up one of your weaker jobs like Calculator if your working on it. As for the fight itself, things should go smoothly, just take out the Chemists first.
Tip: Use a strong job combo that can deal damage and heal on the next fight. Squire with Draw Out, Summoner, Squire with Math Skill, or Monk are all great choices.
Battle: Yardow Fort City
| Enemies | Ninja x3 | Summoner x2 | Malek (Hell Knight) |
Saving Rafa can make this map rather difficult depending on your luck. Samurai or a magical job with Math Skill can really clean up in this fight since you can just blow away the enemies and heal Rafa. Monk works well too, especially if your have Chakra.
Your best bet is to try to get in between Rafa and the enemy as soon as possible. Malek can do a lot of damage with his Hell Knight skill, but it hits randomly and may miss a lot. The Ninjas are a big threat since they can hit Rafa from a distance, so try to kill them quickly. Unfortunately, this is easier said than done thanks to the Summoners, which is why Draw Out, Math Skill, or even summons are so good in this fight.
Battle: Yuguo Woods
| Enemies | Gust | Ghoul | Revenant | Ghost (Time Mage) x2 | Ghost (Wizard) x2 |
Equip the Reflect Ring before this battle if you have one. It will make the mages trivial. This is also one of the last battles where Auto Potion is super useful, so equip that too. You may also want to build up one of Ramza’s less developed jobs.
The various ghosts in this area are all weak to healing magic, potions, fire, and Holy Water so they should be pushovers. The Reflect Ring will protect Ramza from their annoying spells and Auto Potion can heal and damage from Drain Touch/Throw Spirit.
A Word of Warning
The upcoming set of battles can be really challenging. It’s likely you have most of the important jobs built up by now and are somewhere between level 50 and 70. If not, you may want to fight a few random battles to level up and earn some cash.
Battle: At the Gate of Riovanes Castle
| Enemies | Knight x3 | Archer x3 | Malek (Hell Knight) |
Another easy battle and a good one for building up JP. Any job should be able to handle this fight, but I advise against relying solely on a bow, because one of the enemies has Arrow Guard.
Battle: Inside of Riovanes Castle
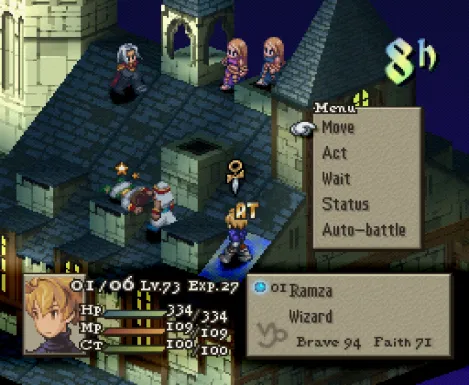
| Enemies | Wiegraf (White Knight) | Archaic Demon x3 | Velius |
Unfortunately, the most reliable way to win this fight is to cheese it with Guts and Yell unless you have a really good setup. Use Yell to get a speed advantage while battling Wiegraf. About 30 Speed should be more than enough. After that, try to defeat Wiegraf before he can hurt Ramza.
Velius will come out once Wiegraf is defeated. He and his three Archaic Demons are formidable. Velius’ “Clops” summon will kill Ramza, so don’t allow him to cast it. The Demons are also deadly and able to kill Ramza with their spells.
Luckily, effects from the first part of the fight carry over, so Ramza should be more than quick enough to defeat Velius. It’s smart to just go for Velius himself and hit him as fast and hard as possible. Monk should be able to do this easily. Powerful Lightning magic and Holy also work.
You can also beat Velius without using Yell if you have a good setup. With the Wizard job, Draw Out, Magic Attack Up, and dual Wizard Rods I was able to kill Velius in three turns with Heaven’s Cloud at level 73. That said, some luck was involved, because Slow procced on Velius the first turn.
Battle: Roof of Riovanes Castle
| Enemies | Lede (Assassin) | Celia (Assassin) | Elmdor (Arc Knight) |
It really pays to have a Speed of 10 or greater in this battle. You’ll have to protect Rafa and it’s basically Game Over if Celia, Lede, or Elmdor get a chance to act. On the bright side, you need only injure one of the bad guys enough to make them retreat. A couple hundred HP should do.
The old reliable jobs like Monk and Samurai work well on this fight as long as you are fast enough to get the first turn. It’s also smart to put Ramza in the forward most spot before the battle to ensure he is as close to the enemy as possible as shown below.
Once again I used Wizard with Draw Out to quickly end this fight.
This is the home stretch. Level up Calculator, horde money, and learn any White or Black Magic spells you think you will need in preparation for the end of the game.
Battle: Doguola Pass
| Enemies | Wizard x2 | Archer | Lancer x2 | Knight |
There’s really not a lot to say about this match. If you were able to beat Velius, you’re more than capable of defeating the enemies here. If anything, this is another good fight for earning JP. That said, the Wizards know some powerful spells, so something like the Aegis Shield can help if you’re having trouble.
Battle: Bervenia Free City
| Enemies | Summoner x2 | Ninja | Archer x2 | Meliadoul (Divine Knight) |
OK, this battle can be annoying thanks to Meliadoul who can and will break Ramza’s equipment. I wouldn’t wear anything irreplaceable to this battle just in case things go wrong. It’s also wise to choose a job with high base Speed so you can get away from Meliadoul and her Shellbust Stab.
If Meliadoul isn’t enough of a headache, the two Summoners can strike Ramza from a distance and there’s little you can do to guard against their magic. There’s also a Ninja with Geomancy who can inflict Stop with Hell Ivy if you’re not careful.
Unless you are super powerful and can take Meliadoul out before she can act, I recommend keeping away from her and using Scream for a few turns. In the end it’s best to go for Meliadoul once you’ve powered up a bit and end the battle before the enemies pin Ramza down.
Battle: Finath River
| Enemies | Chocobos (Red, Black, or Yellow) ×5 |
Ho boi, this battle is BRUTAL. Or maybe I should say this battle can be brutal depending on your luck and level. Red, Black, and/or Yellow Chocobos will attack Ramza. The composition of the group is random. If you’re lucky they’ll all be Yellow or there will be just one Black Chocobo. If you’re not lucky you’ll have to fight a bunch of Red and Black Chocos, which will likely end horribly.
Ramza can’t do much to avoid Choco Ball and Meteor, so he’s basically at their mercy. Shields and mantles can block Choco Ball, but don’t rely on it. Being below level 60 is probably beneficial here since Auto Potion will likely out-heal damage if you use X Potions. Otherwise, you’ll need Speed and luck…lot’s of it.
I was able to beat this battle by switching to Ninja, equipping the Sprint Shoes and a Green Beret for Speed, and using Blade Grasp to fend off the Yellow Chocos. Guts was set as a secondary ability. When the fight began I moved to the back of the map and used Scream until the strongest choco (a Black Chocobo in this case) closed with Ramza. When my turn came up I was able to drop the Black Choco with two swords. Of course, this was after several tries where Red Chocos were in involved in the battle. If anyone finds a way to reliably solo Red Chocobos, please let me know and I’ll add it to this guide.
Note: Math Skill is likely the easiest way to win this fight. Just zap the strongest Chocobos with Fire 3 or something.
Battle: Church Outside the Town
| Enemies | Knight x3 | Oracle x2 | Zalmo (Holy Priest) |
This fight is hardly worth mentioning. Delita will most likely use Lightning Stab on Zalmo, killing him before you can really do anything.
Battle: Bed Desert
| Enemies | Knight x2 | Archer x2 | Wizard | Balk (Engineer) |
First off, equip Ramza with a Defense Armlet to keep Balk from hitting him with Don’t Act. It’s wise to have some means of healing, because Ramza starts out poisoned. Monk is great choice for removing the poison and fighting. Blade Grasp really shines here, since most of the enemies rely on weapons.
If you’re set up properly, this battle should be very easy. Alternatively, you can train any jobs that need JP, but you should have all the important stuff by now.
Battle: Bethla Garison South or North Wall
Players are given the option of attacking the north or south wall of Bethla. Pick what you like, both fights are really easy. I’m not going to bother going into detail about either option. If you beat stuff like Draclau and Meliadoul, you’ll have no problem here.
Battle: In Front of Bethla Sluice
| Enemies | Wizard x2 | Knight x4 | Archer x2 |
To win this battle, you will need to move to the tiles shown below to open the sluice. The enemies shouldn’t pose a threat and you can farm JP/Exp from them if you wish.

Recruiting Orlandu
This may be a solo run, but you absolutely must recruit Orlandu after opening the sluice at Bethla. Of course, we’re just recruiting him so we can take Excalibur, which basically turns Ramza’s Squire job into a solo machine when coupled with Draw Out or Math Skill.
Preparing for Limberry
The upcoming battle with Elmdor is nearly impossible. I had to use a specific setup to beat him and I’m not sure if there is another way. You’ll need to get the Calculator job and unlock Height and the various numbers. In fact, just learn all the Calc skills…trust me. You will also need Holy or Flare, which can be learned from Priest and Wizard respectively. In the case of my playthrough, I used Holy. That said I’m fairly sure Flare works on Elmdor.
You will also want Magic Attack Up and equipment that boosts the MA stat, such as the Flash Hat (which also boosts Speed) and the Magic Gauntlet. Hopefully you took Excalibur from Orlandu, because you will want that as well.
Battle: Germinas Peak
| Enemies | Ninja | Thief x2 | Archer x3 |
These enemies will be short work. Once again, this is another battle you can use to build Ramza up a bit with if he still needs some skills.
Battle: Poeskas Lake
| Enemies | Revnant x2 | (Ghost) Summoner | (Ghost) Oracle | (Ghost) Archer x2 |
Yet another easy battle. If you have Squire, Excalibur, and a good secondary skill you’ll blow these enemies away. This is also another undead battle, so Priest works well here.
Battle: At the Gate of Limberry Castle
| Enemies | Apanda x5 | Celia (Assassin) | Lede (Assassin) |
If you’ve been looking for a challenge, you’re about to get one. Before going to Limberry, make sure Ramza is a Squire with Excalibur and a powerful secondary skill. Equip an Angel Ring as well.
The Apandas, Lede, and Celia can end Ramza in a turn. Even with the Angel Ring, Ramza will still be vulnerable to Bio spells and stuff like Shadow Stitch. Luckily, it’s possible to win in a single turn by damaging Celia or Lede enough to get one of them down to low HP. Just Teleport to whoever happens to be closest and hit them with your best attack. With Excalibur equipped you should be guaranteed to go first.
If you have Math Skill set up for this battle, you can use Height > Prime Number > Holy to blast both Celia and Lede. With 15 MA Ramza was able to do 500-700 damage to both of them in my run.
!!!Warning!!!
Do not save your game in the same slot after beating Celia and Lede. If you’re not a high enough level, lack certain skills, or do not have the right gear there’s a good chance you’ll get softlocked into a battle you cannot win and no one wants that.
Battle: Inside of Limberry Castle
| Enemies | Celia (Assassin) | Lede (Assassin) | Elmdor (Arc Knight) |
I really hope you took my advice and unlocked Calculator, Holy (or Flare), kept Excalibur, and got some MA buffing gear. Before the battle, make Ramza a Squire, give him Math Skill, Magic Attack Up, and anything else you think will help. Make sure he has Excalibur as well. You absolutely need to go first if you hope to win.
You should be able to get Elmdor down in a single turn using the skills and equipment listed above. Just use Math Skill > Level > Prime Number > Holy to target Elmdor. Bear in mind that you may need to wear a Chameleon Robe to absorb Holy if Ramza’s level is prime. It’s also possible that Elmdor’s level can vary, so be prepared to use CT, Exp, or some other factor. If you have about 70 Faith and 15 MA you should be able to one shot Elmdor.
Battle: Underground Cemetery of Limberry Castle
| Enemies | Knight x2 | Skeleton | Bone Snatch | Living Bone | Zelera (Angel of Death) |
Keep the setup you used for Elmdor going into this boss battle. When your turn comes come, Teleport back a few paces. Hopefully you can get far enough to avoid Zelara’s Nightmare spell. If not, it’s not the end of the world.
Zelara floats, so he is easy to hit with Math Skill > Height > 5 > Holy. That said, he has a lot of HP and it will likely take two turns to slay him. The Skeletons behind Ramza may pose a threat, so it might be wise to target them first. However, Meliadoul joins Ramza for this battle, so you may be able to rely on her. Either way, you should be able to defeat Zelera without much adieu.
Battle: Inside of Igros Castle
| Enemies | Knight x5 | Dycedarg (Lune Knight) | Adramelk (Ghost of Fury) |
You’re best off using the same setup you used to beat Elmdor in this battle. In the first part of this battle you need only defeat Dycedarg. After the fight with Elmdor this should be a breeze. Just nuke him with Holy or Flare like everything else.
Adramelk is another story. He can Petrify Ramza and has a ton of HP. Luckily he’s really slow, so you can hit him enough to end him before he can do much. Move Ramza into the position shown below and it should take Adramelk several turns to reach Ramza. This should give you enough time to blow him away with Holy, which is super effective, though it took three turns of Holy to beat him.
The Final Stretch
We’re near the end of the game, so this is a good time to level up and buy anything you may need. This guide skips over extra content like Beowulph’s quest and the Deep Dungeon, but you’re free to do these things assuming you haven’t missed the window of opportunity. It may also be a good idea to be about level 90 to 95 before attempting the final string of battles, because you’re going to need a high Speed score if you hope to survive.
Battle:St. Murond Temple
| Enemies | Priest | Summoner | Mediator x2 | Geomancer x2 |
Take care, this battle is more dangerous than it seems. The Geomancers can inflict ailments like Petrify, the Mediators can use Threaten on Ramza to reduce his Brave, and the Summoner may know some powerful spells. That said, you should be more than capable of wiping them out, just don’t do anything reckless.
Battle: Hall of St. Murond Temple
| Enemies | Rofel (Divine Knight) | Kletian (Sorceror) | Vormav (Divine Knight) |
This is another battle where all you have to do is drop a specific target. This time it’s Vormav. I don’t recommend fooling around, because these guys will kick Ramza’s butt if they get a chance. This is yet another situation where I used Math Skill and Holy to nuke everything.
Battle: Chapel of St. Murond Temple
| Enemies | Archaic Demon x2 | Ultima Demon | Zalbag (Arc Knight) |
Poor Zalbag, not only did he have the misfortune of growing up with an awful name, but he also got zombified by Lucavi. Zalbag is undead, so (you guessed it) Holy works great on him. Just to compound his bad luck, he spawns on a tile with a Height of 3, making him a good target for Math Skill. It may take more than one zap with Holy to finish Zalbag, so be sure to back away after casting it. His level is also a Prime Number, so you can use that to hit him as well.
!!!Warning!!!
Orbonne Monastery is a point of no return that takes Ramza to the end of the game. Do not enter Orbonne if you are not ready to finish Final Fantasy Tactics.
Battle: Underground Book Storage Fourth Floor
| Enemies | Archer | Monk x2 | Knight x3 |
There is not much to say about this encounter. If you’re using Math Skill, you’ll be able to end it in a few turns. Watch out for the Monks, since they can be fairly strong.
Battle: Underground Book Storage Fifth Floor
| Enemies | Wizard x2 | Summoner x2 | Time Mage, Rofel (Divine Knight) |
Another battle that you can end in a turn. Rofel’s Exp should end in 5, so you can target him with a powerful spell like Holy. Otherwise you’ll need to stay away from him and his Mighty Sword skills. The mages are also pretty dangerous, so it’s best to target Rofel right away.
Battle: Murond Death City
| Enemies | Time Mage x2 | Samurai x2 | Ninja x2 | Kletian (Sorcerer) |
It goes without saying that the Ninjas, Samurai, Time Mages, and Kletian all pose a major threat. Luck is in your side, because all you have to do is defeat Kletian and he is positioned at a Height of 3. Just zap him with Holy and the battle will be over right away.
Battle: Lost Sacred Precincts
| Enemies | Chemist | Dark Behemoth | Tiamat | Hydra | Balk (Engineer) |
Yep it’s another encounter where you have to eliminate a single target to win. This time it’s Balk…again. With Excalibur and Math Skill you should be able to win without any fuss. That said, it took me two turns to kill Balk and he has a Chemist to heal him, so take care in this battle. Keep away from the monsters too.
Battle: Graveyard of Airships (Round 1)
| Enemies | Hashmalum (Regulator) |
Hashmalum is a really dangerous foe. It may be a good idea to equip a Jade Armlet for this fight to block Stop. He also uses powerful spells like Meteor, so watch out. Hashmalum is weak to Don’t Move and (when I played) his Exp is divisible by 3. You can hit him with Don’t Move, move to the farthest spot away from him, then hit him with Holy a few times to beat him.
Battle: Graveyard of Airships (Round 2)
| Enemies | Ultima Demon x4 | Altima (Holy Angel) | Altima (Arch Angel) |
I wish I had more to say about this fight. Once again, you should use the same Squire/Math Skill/Excalibur setup. Altima is fairly weak to Holy and you’ll want to concentrate on her. Math Skill with Exp or CT should work. Altima will most likely cast Ultima or use her melee attack on Ramza if she lives long enough to get a turn. At level 93 with Excalibur, a Flash Hat, and the Aegis Shield I was able to get double turns on her, so this part battle should not be much of a problem.
On a side note, you may be able to hit Altima with Slow or Don’t Act. This can make the last battle really easy if you can stay out of her spell range.
After taking enough damage, she’ll turn into her Arch Angel job. Luck plays a role in this part of the fight, because Altima can hit Ramza with Petrify and other deadly status effects. If she uses her melee attack, you should be able to hit her with Holy a few times before she can cast her spell. Alma may be able to help a bit too if she survived the first part of the battle, but don’t expect much. Keep Ramza away from Alma and she may distract Altima if you are lucky. About two or three blasts from Holy should end the battle and win the game!
I wrote this guide over the course of a few months using my own knowledge of the game and by experimenting a bit. There were a few questions I had regarding mechanics, which are answered fairly thoroughly in the link below.
https://gamefaqs.gamespot.com/psp/937312-final-fantasy-tactics-the-war-of-the-lions/faqs/3876
Congratulations on beating Final Fantasy Tactics with Ramza! I hope you enjoyed this solo run as much as I did. Thanks for using my guide!
RetroMaggedon.com ©2024