

Demon Sword (NES) Walkthrough
~By tankMage (March 2023)
Introduction
Demon Sword has few counterparts on the NES. While it’s a platformer with a few light RPG mechanics at heart, its floaty “wire-fu” jump mechanics separate it quite a bit from other titles. Additionally, the hero starts out really weak with a stubby sword, which makes the first stage daunting if you are not familiar with the game. This guide attempts to explain a few of the mechanics of the game and provide players with strategies that make it easier to succeed.
1. Basics
a. Controls
Demon Sword uses a control scheme that is not commonly seen on the NES. Moving Victar around and attacking can feel awkward due to the control layout as well as the “floaty” gravity mechanics. Leaving how to precisely control the hero is one of the main keys to success, so let’s take a look at what Victar can do and what buttons need to be pushed to get him to perform these actions.
Run Left/Right – The Left and Right Buttons on the Directional Pad make Victar run in the corresponding direction.
Jump – Pushing Up on the D-Pad will make Victar jump. This is one of the less intuitive systems in Demon Sword, because the hero can jump extremely high and he tends to float slowly to the ground rather than fall. Tapping Up briefly will cause him to make a short jump, while holding it down will make him jump high. Pressing Left or Right on the D-Pad in conjunction with Up will cause him to leap in that direction. Victar can also shift to the Left or Right while ascending, but momentum plays a role in this and he can only move slightly in either direction. His lateral mobility is even more limited while descending.
Climbing – Victar can climb trees and pillars if the player presses Up on the D-Pad. He can even attack and shift left or right while climbing.
Dropping – Press Down while standing on a branch, block, or other type of platform to drop down from it. This can be useful for escaping an enemy or moving downwards quickly.
Attacking – The A Button will make Victar swing his sword, while the B Button makes him throw a shuriken. It is possible to throw shurikens up, down (while jumping), or at an angle by pressing the corresponding directions on the D-Pad.
Ducking – Victar will crouch if you press Down. This only works on certain surfaces, because Down also makes the player drop from branches and platforms.
Pausing the Game/Selecting Spells – Pressing Start pauses the game and allows the player to select spells using the D-Pad. To equip a spell, press the A Button. Pressing Start a second time unpauses the game.
Casting Spells – Press Select to activate an equipped spell.
b. Items
An item will occasionally appear after you defeat an enemy or trigger an event. These items often grant Victar temporary powers or are used under certain conditions. If you see an item you want or need, pick it up right away, because it will vanish if too much time passes or if you scroll it off of the screen. Items also vanish if you make another one appear by killing more enemies. Here’s a short list of items and their effects.
Red Sphere – Heals Victar when he runs out of life. A single Red Sphere restores 1 bar of health. Collect as many of these as possible.
Black Sphere – Increases Victar’s health by 1 bar. Only works when Victar runs out of life and if he has at least 1 Red Sphere. The life meter maxes out at 8 bars. It is possible to miss Black Spheres if they despawn or if you do not kill enough monsters in a stage. Black Spheres are more or less optional, see Section 2f for more information.
Key – Used to unlock Mystic Gates.
Arrow – Increases shuriken throwing speed. I am not certain if this is a temporary or permanent bonus, though I think it is temporary.
Dart Wheel – Temporarily gives Victar the power to throw four shurikens in four directions at the same time.
Arrow Beam – Creates three clones of Victar and makes him invincible for a short time. Does not become available until Stage 1-2. Resembles an arrow with a shadow behind it.
Phoenix – Rescues Victar from death if he falls into a chasm. You can guide the Phoenix with the D-Pad after it saves Victar. It releases Victar after a few seconds. Only available and usable in Stage 1-1.
Power Dart – This item can only be found in a Mystic Gate and may be in the hands of a Buddha Statue or dropped by a mid-boss. Collecting a Power Dart will make Victar’s shurikens more deadly. The power level of the dart can be found on the bottom of the screen and maxes out at 8.
Extra Life – These rare items can be acquired in empty Mystic Gates and when you get a certain amount of points. Extra lives from points are awarded automatically, while those found in Mystic Gates look like a small Buddha statue.
c. Mystic Gates
These doors can be found in every stage and play an important role in Demon Sword. They may either have a Buddha Statue that holds a free spell/Power Dart or a mid-boss that will give you a spell/Power Dart if you manage to defeat it. Keys dropped by monsters are required to open Mystic Gates. Mystic Gates can be entered multiple times for more spells, see Section 2b for details.
d. Spells
Spells acquired in Mystic Gates can be cast by pressing the Select Button. Picking up a spell will grant Victar charges that are consumed when the spell is cast. Each casting consumes 1 charge regardless of the spell type. Victar needs at least 1 charge to cast a spell. To equip a spell, hit Start, highlight the spell you want with the D-Pad, then press the A Button.
Fire Spheres – Balls of flame surround Victor for a few moments while this spell is active. Ineffective against bosses, but useful as a means of defense against regular monsters.
Power Beam – A powerful wave of energy that is about the same height as Victar. Flies in a straight line, dealing heavy damage to its victims. While powerful, this spell can be difficult to use on moving targets.
Lightning – Hits everything on the screen, dealing moderate damage. While not as strong as the Power Beam, Lightning is arguably the best spell, because it is easy to use. Victar is also invincible for a few moments while he casts Lightning, though he is vulnerable for a moment after it is cast.
e. Skeleton Dogs
Demon Sword has a hidden timer of sorts. Hang around an area too long and dangerous skeletal canines begin to spawn in place of normal enemies. These dogs deal a lot of damage, are fast, and take a few hits to kill. Move to a new spot or go into a Mystic Door every now and then when farming to keep the skeleton dogs from hunting Victar down.
2. Tips and Tricks
a. Stock Up on Red and Black Spheres
Farming items is a big part of Demon Sword unless you happen to be really good at the game. Red and Black Spheres are very important since they refill/increase Victar’s life bar after he runs out of health. The amount of Black Spheres that can be collected in a stage seems to be limited to 1 (2 in the first stage) and they stop appearing once Victar has 8 bars. Red Spheres always drop and players can hold up to 99 of them. Get as many Red Spheres as possible and you may be able to beat the game on your first try without dying. Black Spheres can be skipped, especially if you are trying to take advantage of the 1 health bar trick, which is covered at the end of this section.
b. Mystic Gate 1-Up and Farming Trick
Generally, you can only get two items from a Mystic Gate before an empty room with a Buddha statue appears. While this makes it seem like the gate has nothing more to offer, it is possible to get an extra life in the Buddha Statue room if you jump on top of the door, then strike the wall with your sword 5 or 6 times. A small statue that represents a 1-Up will appear in the Buddha statue’s hand. Grab it quickly before you are forced out of the room. After getting the 1-Up, you can enter the Mystic Gate and fight a mid-boss for a magic spell as many times as you like as long as you have keys.
c. The Dart is Mightier than the Sword
The Dart (or shuriken as most players call it) is actually a more powerful weapon than the sword. It becomes especially strong when it gets to about 6 bars and overpowered at 8 bars. Most bosses and even regular monsters are best dealt with using the shuriken. That said, the sword is still a powerful tool and is good for quickly killing enemies that get too close or for destroying projectiles.
d. Take Care When Jumping
It is very tempting to just fly through stages with Victar’s impressive acrobatic skills. However, there are all sorts of unseen dangers that can pop up at a moment’s notice. Try to master jumping before you attempt to fly through the game. Players can control Victar’s jump height by holding the Up Button down. A simple tap and he will only jump a bit. Hold the button down and he will fly high into the air. Victar is also easiest to control in the air when he is ascending.
e. This Game is Unpredictable
I have owned Demon Sword for a long time and it still surprises me. Drops from enemies are very random as are spell drops from Mystic Gates. Power Darts are especially sneaky, because I have often gotten them from the first gate in a stage only to find that they are not there in other runs. Then there’s enemy spawns, which are really erratic. Be ready for surprises at all times and try to prepare for later stages as you go.
f. The 1 Life Bar Method (Advanced)
While this guide recommends collecting Black Spheres for new players and completionists, it is technically more efficient to keep the life meter limited to 1 bar. Taking enough damage to kill Victar will trigger any Red Spheres you have in your possession to heal Victar. If you have 10 Red Spheres and 5 bars of health, 5 of the spheres will be used for healing. However, if you have just 1 bar of health, only 1 Red Sphere will be used to heal Victar no matter how much damage he takes.
Many of the higher level bosses do up to 3 bars of damage, which can gobble up your Red Sphere supply rapidly if you have a fully upgraded health meter. After all, those 10 spheres will only save Victar twice if he has 5 health bars. Those same 10 spheres can save him 10 times if he has just 1 bar!
While this method can be really good near the end game, it’s not necessarily the best technique for someone playing for the first time. It is easy to accidentally pick up a Black Sphere and ruin the trick. Farming enough Red Spheres to survive can also be tricky if you get hit a lot by normal enemies. With this in mind, it’s best to try this method if you are having trouble or if you have played the game before and want to cut down on grinding.
g. Fighting Bosses with the Arrow Beam
It is possible to collect an Arrow Beam (invincibility power up) just before fighting a boss. This trick is kind of cheesy, since it makes boss fights extremely easy. Stop when you get near the end of the stage and fight enemies until an Arrow Beam appears. Quickly run over to the boss after getting the Arrow Beam and you can fight it for a few seconds without worrying about getting hurt. Listen carefully to the music, because it changes to the boss music even with the Arrow Beam active. You’ll know the Arrow Beam has worn off when the boss music suddenly resets.
3. Walkthrough
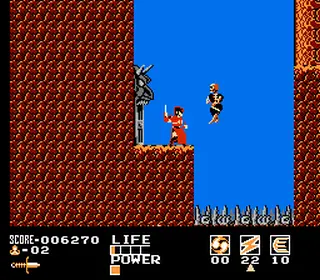
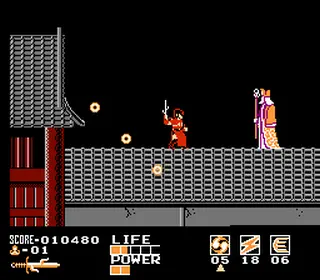
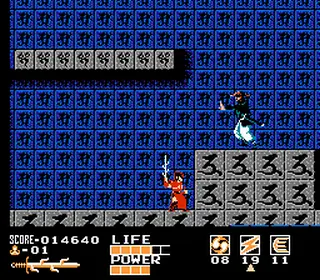
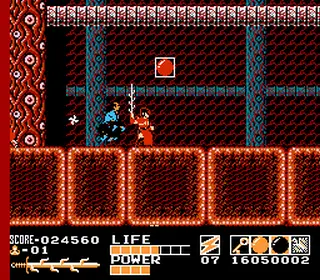
a. Stage 1-1
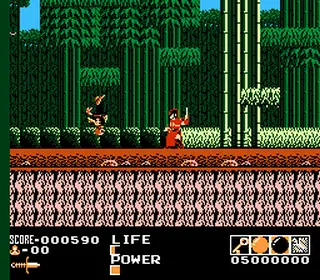
This is the toughest stage in some ways even though it’s the first. You will not have good weapons and your range of attack is very limited at this point, so get used to stunning enemies with a shuriken, then finishing them off with the sword. If you are good with the sword you can defeat enemies fairly safely with it. You can climb the bamboo trees in this stage by pushing up while standing under them or jump up into the branches. This is a good way to get to safety.
Luckily, the skeletons in this stage can only hit Victar with their swords and they die in one or two hits. The black skeletons should die from a couple of shurikens, while the red ones take about four shuriken hits or two sword hits.
Stick around the starting screen and kill the skeletons that attack until you have a couple of Keys, a couple of Red Spheres, and Black Spheres. A Phoenix may also pop up; do not bother grabbing more than a few of these, because they only activate when Victar falls into a pit and the only stage that has pits is 1-1.
Do not dawdle too long or extremely dangerous skeleton dogs will start attacking. Start heading right when you are ready and you will find the first Mystic Gate, which looks like a door with a demon face over it. The Keys you collected will open Mystic Gates in this and every other stage. You will either have to fight a mid-boss on the other side of these doors or you will find a magic item held by a Buddha statue. Either way, it’s worth entering these gates to get powerful spells and shuriken upgrades.
If you end up fighting the mid-boss, keep your distance and hit him with shurikens to finish him off. He can do a lot of damage, so do not try to attack him with Victar’s sword. The mid-boss likes to jump around a lot and can block shurikens with his sword, so be patient when fighting him.
Be sure to collect the spell dropped by the mid-boss. You can enter this door to find a boss or power up twice before it will no longer spawn anything.
Several more Mystic Gates can be found in this stage, so be sure to collect more Keys as you explore. You will find the second door in an area with a series of pits around it and there are several others in similar pits or plain sight.
Tip: You can collect as much magic as you want from Mystic Gates as long as you have Keys. Simply re-enter the gate and fight the mid-boss again. An empty room with a Buddha Statue will appear the third time you enter the same gate, stand on top of the door and hit the left hand wall with the sword five times to get an extra life. This will also reset the Mystic Gate so you can continue to collect magic.
Head far to the right to find a big tree where you will fight the first boss.
Stage 1-1 Boss: Demonic Samurai
This boss looks like a demonic samurai and is very weak. In fact, he is easier to beat than the guys in the Mystic Gates. Keep your distance and hit him with shurikens. Leap over him when he gets close. Do not waste any magic on this guy unless absolutely necessary.
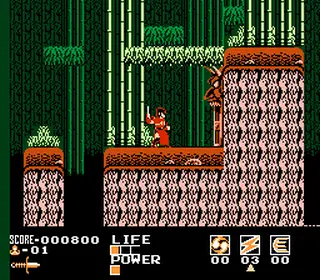
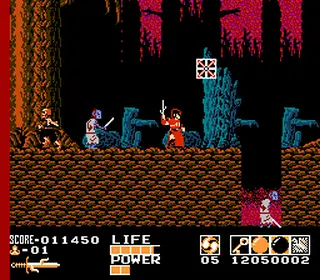
b. Stage 1-2
Let the grinding begin! This stage is a great place to collect Keys and Red/Black Spheres. This is thanks to the Arrow Beam power up, which looks like an arrow with a shadow behind it and makes Victar invincible when picked up. This item does not appear in Stage 1-1. Needless to say, the Arrow Beam makes collecting items really safe, though it will not always appear.
More red and black skeletons attack Victar throughout the stage. The skeleton dogs may still attack if you hang around an area too long, but staying near a Mystic Gate and hopping into it will allow you to escape them.
Speaking of Mystic Gates, there are several scattered throughout the stage. They tend to be at the bottom of steep cliffs. Do not drop straight off the cliffs, because there are often spikes right next to them. Instead, long jump to a tree, then climb down to check the left side of the screen for a Mystic Gate.
Check every Mystic Gate you find, because the one just before the boss usually has a Power Dart upgrade, though the Power Dart may appear in a different gate. It’s smart to collect every Power Dart you can find; they increase the damage and range of Victar’s shurikens. If you happen to run into the boss without getting the first Power Dart, let him kill you so you can backtrack to the last Mystic Gate.
Stage 1-2 Boss: Tengu
This wind demon is almost as laughably easy as the first boss, but he can also be very dangerous if you do not take him seriously. The Tengu will usually jump upwards and slowly flap back down to the ground, though he will sometimes jump over or towards Victar. When jumping and landing, Tengu will shoot something that resembles an insect that flies in a straight line. Avoid touching Tengu or the insect, because both can do about one health bar of damage.
Simply crouch and fire shurikens at the Tengu to kill it. It will block many of your shots, but a few will get through. Step aside if the Tengu jumps towards you. The Lightning and Power Beam spells can make short work of this boss, but I recommend saving them unless you have a lot of magic.
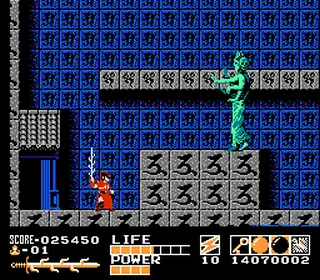
c. Stage 2-1
Stage 2 is basically the real start of this game. Victar’s sword improves as he completes stages and it should be a lot longer now. At this point it is a viable weapon. That said, the shuriken is still more powerful and will get more upgrades as you search Mystic Gates.
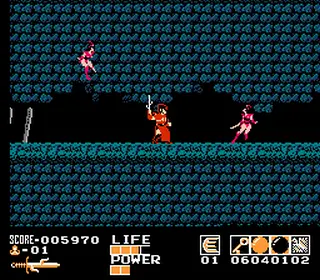
This stage is vertical and you will have to jump up a long series of ledges to get to the end. Running to the left or right will cause the screen to loop. More of the same old skeletons will appear, but you will also have to fight some new foes. The first is a sword wielding zombie that moves slowly. The zombies are not much of a threat, but they have a habit of spawning near Victar. The second new enemy is a female ninja clad in pink that runs very quickly. She also wields a sword with a fair bit of reach and throws darts. Jump out of the way when you see these female ninjas.
It is very important to jump upwards as soon as you can when the stage starts, because there is a Mystic Door with a Power Dart inside just above the start point. This third upgrade will make your shurikens travel across the screen!
The Mystic Gates in 2-1 often contain a monk mid-boss who uses a flail, which sometimes extends as he swings it. He is also more aggressive than the first type of mid-boss, so keep your distance and leap away when he jumps towards you.
Shurikens work best against the monk mid-boss. It’s also smart to stay on the upper platforms and knock him down by hitting him with shurikens. The monk tends to drop Power Beam and Fire Sphere magic, so it is worth your time to farm these Mystic Gates if you are able to beat him easily.
Keep climbing and long jump to the left or right when you do not see a way upwards. Eventually, you will reach a gray wall. Jump up this wall to get to the next boss.
Stage 2-1 Boss: Wizard
The wizard will jump around the area and fire beams at Victar. These beams travel in a downward 45 degree angle, so it is easy to avoid them by standing right next to or in the wizard’s sprite. Don’t worry, there’s no contact damage from touching this boss.
Slash this boss as fast as possible with the sword to get rid of him. He cannot damage Victar as long as you stick close to him, so move when the wizard moves and keep attacking.
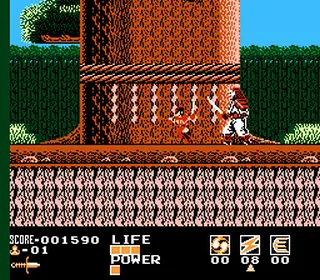
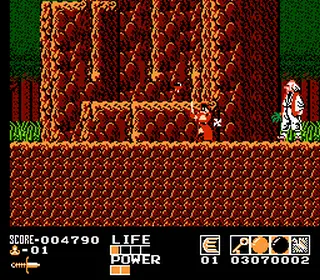
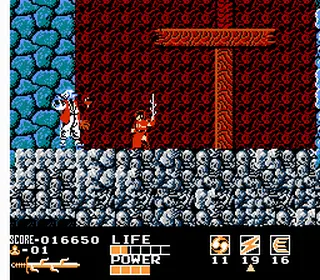
d. Stage 2-2
2-2 is notable for its hellish appearance, complete with dead trees and lava pits that will damage Victar should he fall into them. The same monsters from 2-1 populate this level and the same tactics can be used to dispatch them. Look for a Mystic Gate near the first lava pit to find a Power Dart upgrade that will increase the shuriken’s damage, assuming you found the upgrade in the previous stage.
The Mystic Gates in 2-2 are all in plain sight, often located adjacent to lava pits. You will have to battle monks in these gates. It is worth farming spells at this point, because the monks drop every type of magic.
Be sure to collect more Red and Black Spheres and head east to battle the boss.
Stage 2-2 Boss: Oni
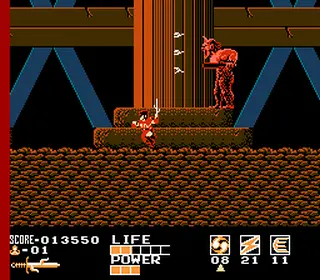
All of the bosses have been pushovers so far, but the Oni is a different story. His club can damage Victar for about three bars of health and he can spit three bolts of lightning that fan out. The lightning is dangerous despite the fact that it deals less damage, so leap upwards or duck to avoid it. While you likely have a bunch of Red Spheres, Oni can drain your health very quickly, so it is best to fight him cautiously.
Oni is rather slow and not great at jumping. Hang back and blast him with shurikens. Magic also works well, just cast it from afar or the boss may get a hit or two in on you while Victar is rooted to the ground after casting the spell.
Another easy way to deal with this boss is to stop moving when you see a wooden pillar and kill regular enemies until you get an Arrow Beam, then run to the boss area to the right. Use the invincibility from the Arrow Beam to get a lot of free hits on Oni with the sword. You will need to listen to the boss music carefully for it to reset when Arrow Beam wears off or you may take damage from the boss.
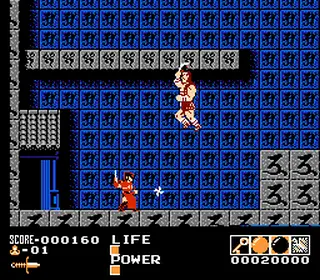
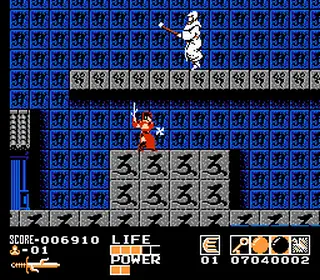
e. Stage 3-1
Victar’s sword will get another upgrade after you defeat Oni. With this upgrade it will become very useful for slaying enemies and blocking projectiles. It’s a good thing the sword is now an effective weapon, because the enemies get tougher in this stage. Regular skeletons now throw shurikens of their own. Hunched creatures that throw darts also appear in this stage.
As usual, get a Black Sphere early on if you are going for all the life upgrades, then start going right. You will have to jump up a mine shaft. Be on the lookout for a Mystic Gate on a cliff side with some branches sticking out of it. Another Power Dart upgrade that increases damage should be in this gate or one of the others in this level.
You may have to fight a swordsman that shoots magic orbs in the Mystic Gates. Oddly enough, the swordsman is easy to defeat. Crouch while throwing shurikens and his magic will fly over your head, just move out of the way when the swordsman gets too close.
It can be difficult to scale the cliffs, because of overhangs that cannot be jumped on in the usual manner. You will have to master jumping upwards, then moving slightly to the right to get on the overhangs.
You’ll have to go up another mine shaft after clearing the cliff side. After getting to the top of the shaft you can find a “secret” Mystic Gate by going left and dropping down the branches on the cliff. This gate does not have anything special in it, sadly.
Continue upwards until you get to a blue area with some small blocks. You will have to jump from one block to the next to get to a giant skull (there’s another unremarkable Mystic Gate down and to the left of the skull) which marks the boss area of this stage.
Stage 3-1 Boss: Blue Tengu
Aside from looking like he held his breath too long or maybe put a plastic bag over his head, the Blue Tengu is no different from the boss you fought back in 1-2. He will use the same jump ‘n shoot strategy as before and is just as easy to kill if you duck and throw shurikens at him.
The only real difference of note in this fight is the terrain, which favors the Blue Tengu a bit, since it allows him to perch on ledges out of Victar’s reach.* Carefully jump upwards and shoot this boss if he jumps into a difficult to reach area.
*The Blue Tengu also does more damage than the one you fought in 1-2.
f. Stage 3-2
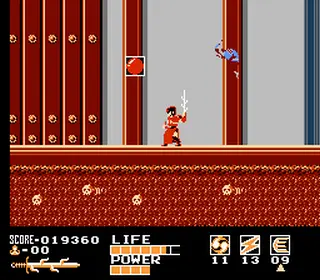
This castle may seem confusing at first glance, but it is laid out in a simple and logical manner. Several floors divide this castle and walls often block off sections of the building. The boss is on the rooftop, which is fairly easy to reach if you head straight up from the start. Mystic gates tend to appear on the walls scattered around the stage. Enemies from Stage 3-1 make another appearance here, so you should feel comfortable fighting them..
Tip: This is the last good place to farm Red Spheres and Magic in the game. Try to get about 20-30 Red Spheres and 20-40 copies of your favorite spells. Lightning is particularly useful against the final boss and about 40 charges should be enough to finish him off.
Search the Mystic Gates in this stage for the next to last Power Dart, which is important for defeating the last boss. You may have to fight a swordsman mid-boss for this upgrade or it may just appear in the hands of a Buddha statue. Unfortunately, I cannot give an exact location for this upgrade, because it seems to be random.
Make your way upwards when you have everything you need and you will see the rooftop after going up a few floors. Finding the steps to the roof can be tricky if you deviate from the center of the stage at all. The best advice I can give is to head right or left and you should find them. You probably overshot the stairs if you hit a dead end. Once on the roof, you will find the boss to the right.
Stage 3-2 Boss: Tiger Sorceress
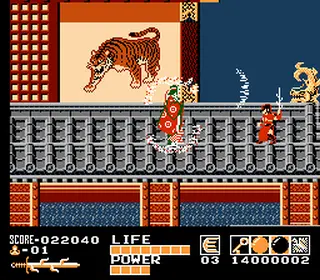
For lack of a better name, I call this boss the Tiger Sorceress due to the tiger painting in her lair and her magical prowess. She can surround herself with a shield that blocks shurikens and deals quite a bit of damage with a wave beam. Touching the shield will also hurt Victar, so maintain a safe distance. Tiger Sorceress is fairly easy to beat if you crouch and throw shurikens at her. Just be ready to move if she jumps.
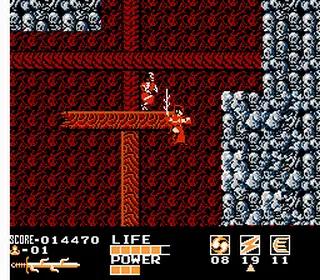
g. Stage 4
The final stage is a dangerous maze of bones. Archers that can take a big chunk of health often harass Victar. You will also encounter more of the same old skeletons and a relatively weak swordsman type enemy. Try to move through this area quickly to preserve health and items.
The Power Dart in this stage will max out the shuriken, but it is highly optional. Mystic gates in this stage are often located near dangerous pools of boiling liquid and you may have to fight a difficult mid-boss that looks a bit like a Hindu deity with several arms.
Only the head of the mid-boss is vulnerable and jumping up to hit it will put Victar right in the path of the fireballs this creature shoots. The Lightning spell can kill the mid-boss easily, but it takes about ten of them to do the trick. The other option is to try to get behind the mid-boss and slash it to death. Either way, getting this Power Dart is risky and not 100% necessary, so consider saving your resources for the final boss.
To get to the final boss, head up and right through the scaffolds of bones and eye pillars. Try to stay high, because jumping over the pools near the bottom of the stage is difficult and leaves Victar open to attacks. Eventually you will hit a wall. Drop down, then head left until you reach another wall. Drop down at this wall, then look for some dragon skulls, which mark the boss area to the right.
Stage 4 Boss: Dark Lord’s Servant

The final battle is the most dangerous in the game. The Dark Lord’s Servant can jump from tier to tier in this room and fires a powerful wave that is about twice the height of Victar. This wave is unblockable and does about 3 bars of damage, so try to stay under the boss or jump over the wave.
The boss will disappear and reappear in another part of the room when hit. Coupled with his wave attack, this disappearing act makes the Dark Lord’s Servant very deadly since you cannot predict where he will pop up. He may materialize off screen, far above Victar, or right next to him. Be ready to jump to safety at a moment’s notice.
I find the Lightning spell to be very effective against this enemy. It can hit him from anywhere as long as he is on the screen and does a fair amount of damage. In fact, you may be able to kill him with Lightning alone if you have 40 charges of the spell. One drawback to Lightning is it leaves Victar open to the Servant’s wave spell. Try to cast Lightning when you are in a safe spot or just after the Servant uses his wave magic. It is also wise to make sure he is visible on the screen when using Lightning, because I am not sure if it damages off screen enemies.
Power Beam does a ton of damage to this boss, but it is more difficult to use since you need to be aligned with him. However, it can be an effective weapon if you are good at timing it between his wave magic attacks.
Finally, you can use the shuriken on the Servant. A level 6 or 8 shuriken is actually very effective against this boss. In fact, you can kill him with about 25 shurikens depending on their power level. It can be difficult to hit this boss with a shuriken since you need to be on the same plane as him. The best way to do it is to hit him just as he appears or after he uses his magic. In cases where you have to seek the Servant out, it is smart to try to draw him to a spot that is convenient for you.
Do not use the sword on the Servant unless he is just above you and you can get some easy hits on him. The sword does not do much damage to bosses in general and it takes so many hits to finish this battle with the sword alone you will likely die before winning.
While this boss is tricky, he is not as tough as he seems if you are patient. Defeat him and you will win the game.
4. References
Sadly, there are few guides for this game and most are very sparse on info or incomplete. While I did refer to these guides, there was not much I took away from them aside from the hidden 1-Up trick and a few names. I learned the 1 life bar trick after watching a speedrun, but I could not find the source the speedrunner referenced nor can I remember the speedrunner’s name (sorry, it was a long time ago) so I had to leave it out of this reference list. If anyone knows where the life bar trick came from, I would be happy to post the link to the original source. Here are a few decent resources fore this game:
This guide covers a lot of basic stuff fairly well. I referred to it here and there to check my own findings:
https://gamefaqs.gamespot.com/nes/587225-demon-sword/faqs/17685
I did not use this guide, but it has some useful information:
https://strategywiki.org/wiki/Demon_Sword/Walkthrough
Thanks for using our Demon Sword (Nintendo Entertainment System) Walkthrough!
RetroMaggedon.com ©2023