
AshGuine: Densetsu no Seisenshi (MSX2) Walkthrough
About this Walkthrough
AshGuine is the first MSX game I have played, it’s also very obscure and I had a difficult time finding information for it while working on this project. The only guide I was able to find was a very brief Japanese walkthrough that I had to convert to English using an automated translator. Video playthroughs of this game are also just about nonexistent as well, so it was very exciting to be able to explore a game world that is largely unknown. At the same time, the information below can likely be improved and expanded on. I doubt that I figured out the easiest way to do things and there are a lot of game mechanics that I did not understand, even after hours of testing.
I hope that someone else will pick up AshGuine and create a better guide in the future or perhaps I will revisit this game and look at it again with fresh eyes. At any rate, I hope you are able to enjoy this unusual game with the help of this walkthrough. Thanks for reading it!
~tankMage (May 2026)
1. About AshGuine: Densetsu no Seisenshi
Before we start, let’s take a look at this game’s background and premise, because it differs from other action games of its kind in a number of ways. You will be thrown into a dangerous and often confusing open world that requires players to do things that are not always intuitive. Taking a bit of time to read this section may help you understand the game a bit better and avoid a few headaches down the road.
A. Who is AshGuine?
The identity of the hero is a bit confusing in itself. NPCs will often refer to the character controlled by the player as Ashguine, but many of the Japanese sources familiar with the game assert that Ashguine is also an ancient hero from the backstory and the player’s character is actually named Lyle (or Ryle in Django’s translation) plus the game sometimes refers to the hero as Lyle. Consequently, Ashguine seems to be a title rather than a name. This guide will always refer to the player’s character as Ashguine in order to avoid conflicting with statements made by NPCs and causing confusion.
B. What is the goal of this game?
Your task, as Ashguine, is to defeat the evil Banutracus. In order to do so, you must raise your stats, collect powerful artifacts, and find your way to Banutracus. The items needed to complete the game are scattered around the map in a manner similar to Metroid, so exploration is very important.
C. Gameplay and Stats
AshGuine is fairly simple at heart, though many aspects of it are a mystery. Players can walk, jump, and attack. They can also find and use a variety of powerful items. Ashguine starts with the ability to punch, which quickly evolves into a tail swipe after the player defeats about ten enemies. Defeating monsters will grant the player with stat boosts, which seem to be prerequisites for using certain items. The stats are as follows:
Life: How much damage Ashguine can suffer before perishing.
Power: Contrary to what its name suggests, this stat does not seem to increase Ashguine’s damage. Instead, it is a requirement for items like the Lightning.
Defend (Defense): Appears to reduce the amount of damage Ashguine suffers. However, its mechanics are a mystery. It seems to be a rating used to adjust how much damage the player takes at certain break points. That said, it is also possible this stat does not actually do anything.
Exper (Experience): Ashguine’s experience. Many items require a certain amount of experience to use. Experience does not seem to serve a purpose outside of being a requisite for various items.
Knife: How many uses remain for the Sword, which is acquired near the start of the game.
The stats appear in the order shown above. Each enemy raises a specific stat and killing enemies to make Ashguine more powerful is a big part of the game. Hanging around an area and defeating too many enemies will cause the monsters to change colors, which indicates that they no longer yield stat bonuses upon dying.
D. This Guide is Full of Spoilers
AshGuine is an exclusively Japanese franchise that never saw the light of day in the English speaking world. Django’s English patch allows players who do not speak Japanese to enjoy this game, but it is rare, so I decided to include NPC text in the body of the walkthrough in case the translation becomes unavailable. Most of the dialogue is innocuous and will not ruin the game if you read ahead, but I did include translated text from the ending, so be careful when you get towards the end of the guide if you do not want the story spoiled.
E. Django’s English Translation
Much of AshGuine uses Japanese writing, which I am not able to read, so Django’s English patch was used to create this walkthrough. The dialogue will likely vary from what is in this guide if you are able to speak/read Japanese or if you are playing using different translation. You can find a link to Django’s patch all the way at the bottom of this guide under Resources.
Space Bar: Start Game or Attack
Arrow Up: Interact
Arrow Left/Right: Walk left or right
Left Alt: Jump, hold the Left or Right Arrow to jump left/right
F1: View the Status Screen
AshGuine may seem cryptic and unforgiving, but it is quite easy once you learn where things are located and what the game expects from players. This is easier said than done, so I have included a series of tips that players can follow to avoid a lot of headaches.
A. You Will Need 1000 Power and 2000 Experience to Beat the Game
Ashguine will need a weapon called Lightning to defeat the final boss. It can only be obtained if he has 1000 Power and 2000 Exp. The best way to obtain Power is to go to the Cellar (see Walkthrough Part 1) and fight the large green aliens until you have roughly 1000 points. Each dead alien will yield 3 Power, so you will need to slay about 333 aliens to hit your goal.
Experience is far more difficult to obtain. The game seems to award Exp when Ashguine travels to certain places, talks to particular NPCs, and when he defeats certain enemies. However, the game is extremely stingy when it comes to Exp. In one of my early runs, I talked to just about everyone, found a variety of items, and visited almost every location. I only had about 380 Exp at that point, which was not even enough to get the Eye of Light (another necessary item) let alone the Lightning. Consequently, players must either farm Exp from certain monsters (which is quite risky) or repeatedly talk to NPCs until they have at least 1700 Exp.
A good way to hit Exp requirements is to repeatedly talk to the monk in Anode, because there are no monsters in the area and it is found early on. You will have to visit Anode twice, so you can split your Exp farming up to make it less tedious. Unfortunately, you will have to talk to the monk about 1700 times, because interacting with NPCs only gives you 1 Exp. Just keep in mind that farming the few monsters who award Exp is a lot riskier than standing around talking to a monk.
B. You Only Get One Sword
Players will receive a Sword from a monk not far from the start of the game. The weapon is very useful for eliminating enemies that cannot be hurt with the punch/tail swipe attacks. It is best used when traveling through the more advanced areas of the game like the Desert. However, it only has 300 shots and will no longer be available once used up. Returning to the monk who gives it to you will not replace the Sword, so take care when using it. It is generally best to hop over enemies while traveling with the Sword, because you cannot switch weapons.
C. The Herb Heals Ashguine
Players can get an Herb by talking to a monk (a guy in a hooded robe) in the town of Tara after getting the Sword. The Herb heals Ashguine for about 100 Life points. It triggers automatically when Ashguine’s Life drops below 100 or the first time he suffers damage while having less than 100 Life. You can visit the monk for Herbs as many times as you like, but you can only carry one at a time.
D. A Word on Saving
AshGuine 1 does not allow players to save their game or continue with a password. Consequently, you must collect all the Power, Exp, and Items you need to beat the game in a single session. Dying will send you back to the very beginning with nothing.
It takes about 30 minutes just to get enough Power to wield the ultimate weapon. Factor in Exp along with the other things you need to beat the game and it will likely take the player two or three hours to meet the last boss on their first playthrough assuming all goes well.
While I usually urge players to play games as they were meant to be played in my guides, I will make a slight exception for this game by advising players to use save states if they are playing on an emulator due to the shear tedium of grinding the stats needed to win. As someone who does not like to cheat, I merely used the save state feature to mark my spot, which I think is a fair way to take breaks. While save states allow you to continue after dying, you do not really need to “save scum” to avoid losing, because the game gets very easy once you find the Herb.
Unfortunately, people playing on an actual MSX will have to complete the game in one go since I do not think it is possible to save state on actual hardware. If you are playing on an MSX, I recommend pausing and taking a break every now and then to stay focused. You don’t want to die and lose an hour’s worth of grinding…trust me.
4. Walkthrough Part 1: Finding the Control Sphere
The game starts with Ashguine finding his fallen parents and swearing to avenge them in a short scene. You can bypass this scene using the Space Bar. Your first order of business is to build your stats up by defeating monsters and to find the Control Sphere, which is prerequisite for one of the artifacts Ashguine needs to defeat his nemesis, Banutracus.
A. Temple
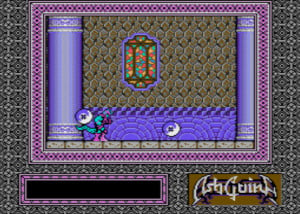
Welcome to the first area. Creatures that resemble eyes will bounce towards you. Hit them with a punch to destroy them and gain 1 point of Power for every one you slay. Stay near the beginning and fight until you unlock a tail attack that can hit short monsters. This usually happens after you defeat about 10 monsters.
Walk right for a while after unlocking the tail swipe (it becomes harder to hit the eye creatures after getting this move) and you will eventually encounter a small monster that crawls along the floor. Use the tail attack to slay them and earn 1 point of Defense per kill. Watch out for their jump attacks. The monsters constantly spawn, so keep going right before they overwhelm Ashguine.
After a short walk, you will encounter a robed figure holding a crystal ball. Talk to it to learn that our hero needs a “Holy Sword”. Ashguine will get 1 Exp point every time he talks to the robed character, so it is possible to farm experience here. Take a few minutes to talk to him a few times for some extra Exp, but do not stay long if you start taking damage from monsters.
Continue east while wading through the endless enemies and walk off the screen to get to the next area.
B. Path
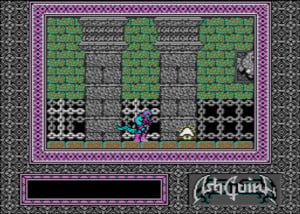
The walking mushrooms in this area heal Ashguine for 1 Life point every time he defeats one of them. Hang around the entrance to this place and fight until they change color, which means they will no longer give Ashguine Life.
Walk right for a while and hop over the worms that appear on the floor. You will meet another NPC who will tell Ashguine to go to Anode, which is to the east. Continue east to leave this area and enter the second section of the Path.
Note: If you stand just to the right of the monk in this area and press Up, you will warp to the Desert. You do not want to got to the Desert at this point, so be careful not to press Up while near the NPC.
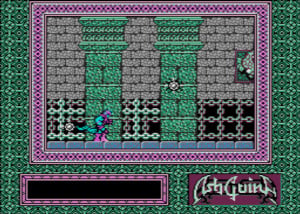
Spinning blades fly across the upper half of the screen in this dungeon-like area. You can hit the blades with jumping attacks to get 1 Defense. About halfway through the second part of the Path, you will encounter creatures with large heads that look like aliens. Killing them awards 3 Power, which makes them worth farming if you can avoid the spinning blades.
You will meet another cloaked NPC here. He will tell you to “look for the Control Ball” and explain that “The people of the desert possess a great technology.”
You can reach the next area, Anode, by walking right.
Note: Pressing up while standing to the right of the NPC in this place will warp you to Mezonte. This can serve as a very small shortcut, because you can enter Anode by walking left as soon as you enter Mezonte.
C. Anode
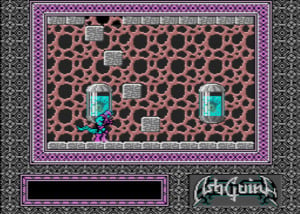
You will enter Anode from the right or from the left depending upon which path you took. Regardless, all you need to do is jump up some stone blocks until you reach the top of this bizarre tower.
Here you will find another monk who will provide you with vital information. He will tell you that the “Control Ball is near the gods”. Be sure to talk to him, because he is a trigger that will allow you to enter the Cellar, where you will find the Control Ball. You can also keep talking to him to gain Experience, which you will need for later.
After talking to the NPC, return to the bottom of this area and exit via the right side of the screen. Ashguine will be transported to the Temple where the game began. Go left to enter the Cellar, which is open now that you spoke with the monk in Anode.
Tip: Anode is probably the best place to gain Experience due to the fact that it is safe and very early in the game. Try to talk to the monk until you have about 500 Exp. You will need 2000 Exp to finish the game, so be prepared to come back here and grind after getting the Control Ball, because Exp is difficult to obtain.
D. Cellar
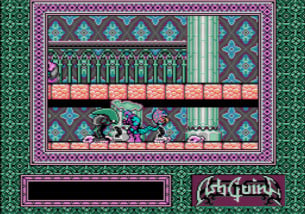
This is a great place to build up your Defense and Power. There are more of the green aliens who boost Power, plus black worms and hopping monsters that add to Defense. It is well worth your time to fight here for a while. You will need a hefty 1000 Power and 2000 Exp to get the ultimate weapon required for the final boss. Defense earned here is also helpful for the coming journey.
Try not to take damage in this area, because you need all the Life you can get for the next leg of the game.
A cloaked figure is perched on the upper level of this area, not far from the entrance. Jump up from under him, then press Up to talk to him. He will give you the Control Ball.
5. Walkthrough Part 2: The Sword
This next section is a lot easier than the first. Go east from the Cellar where you obtained the Control Ball. Keep walking right to backtrack through the Temple and Path to get to Anode.
Climb back up the stone blocks and talk to the monk at the top of Anode again. This time he will give you the Sword, simply saying “This is the Sword”.
Ashguine throws the sword, rather than slashing with it. Additionally, the sword can only be used 300 times before it becomes unavailable.
Take some time to build up Exp by talking to the monk over and over again, we will need it for the next item. I strongly recommend getting about up to 1800-1900 Exp to make getting the next few items easier.
6. Walkthrough Part 3: Obtaining the Eye of Light
Make sure you have acquired the Sword from Anode and that you have at least 500 Exp, which is required for the Eye of Light. Things will get a lot easier at this point in the game, because you can get an infinite supply of healing Herbs from the village of Tara, which is also where you will find the Eye of Light.
A. Path (Revisited)
Leave Anode via the left hand screen after obtaining the Sword. The enemies here should be familiar. Do not waste precious Sword charges (you can only use the Sword 300 times) on the monsters here. Jump over them and proceed to the second screen of the Path.
Remember the warp point next to the robed figure in the first section of the Path? If not, it is just to the right of the monk. Press Up to warp to the Desert while standing by the monk.
B. Desert
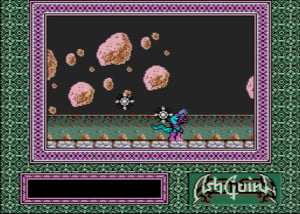
Look out for the spinning blades and walk right once you reach the Desert. Talk to the cloaked creature to learn that a “Protective shell is hidden in the boiling marsh” which is a reference to an item you will get later. For now, continue east and use the sword to slay the pterodactyl like monsters. Two hits will do the trick. You will also get some Exp.
The next screen will bring you to Oasus.
C. Oasus
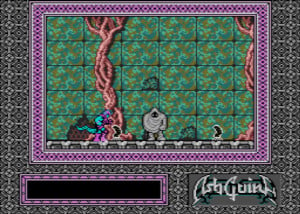
Ignore the creatures here and talk to the NPCs. The first NPC (another monk) will say “There is another town.” in reference to Tara, which you will soon visit. One of the soldiers right of the monk will comment on how Ashguine looks different from them. Talk to another monk who states “Shop closed. People are starving.” Watch out for the flying creature east of the monk, you can walk just under it if you are fast.
You can talk to two more NPCs on the way. The first says “Talk no more” while the second says “Pretarian lived with God. Now all of that has disappeared.” Continue east to enter another Desert area.
D. Desert (East of Oasus)
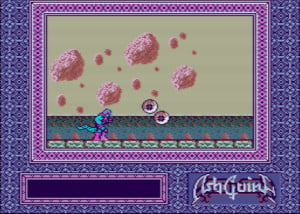
As you may have guessed, your objective is to head east while avoiding bouncing eyeball monsters. An NPC near the entrance says “Ashguine it’s nice to save people from sorrow.” You will meet sword wielding lizard men just east of the NPC. Three Sword shots will slay them. The lizard men give Ashguine 3 Exp. They have a lot of reach, so it is best to destroy them on sight rather than jump over them.
E. Tara
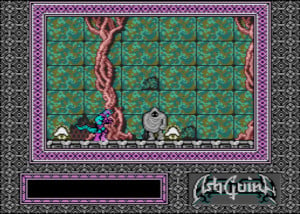
If you have made it to Tara, your chances of winning have greatly improved, because you will get the Herb here. I suggest leaving the mushroom-like creatures alone, because the 1 Life point they give Ashguine may be helpful later.
A monk to the right will say “Pretarian is a great race” if you speak to him. The soldiers next to him say “Your figure is different than ours here.”
Speak to the monk next to the tree just east of the soldiers to get the Herb. He says “Ashguine, I give you the Herb as a grace.” You can get as many Herbs as you need, so remember this spot. In fact, you can use the first one by getting hit (if you have less than 100 Life) and immediately talk to him for a second one, then take a few more hits to boost your Life to about 198. After that, talk to the monk again for a third Herb, then go east a bit more.
Look for a creature in a gray cloak near a trio of trees just east of the herb monk. Talk to him to get the Eye of Light. If he does not give it to you, check your Exp, because you need 500 Exp to obtain the Eye of Light.
You can stand around talking to NPCs to get 500 Exp if you do not have it. In fact, you should talk to NPCs in this place until you get the 2000 Exp needed for the next two items. Yes, this is extremely tedious, but the other options for gaining enough Exp are actually worse. Do not worry about taking damage since you can just grab more Herbs from the nearby monk.
Exit via the left hand side when you are ready.
7. Walkthrough Part 4: The Power Leg and The Protective Shell
Make sure you are stocked up on Life and Herbs before leaving Tara. You should also have 1000 Exp and The Eye of Light.
A. Oasus (Revisited)
This area should be familiar since you took this route to get to Tara. Head west to Oasus. Try to save ammo while crossing the Desert. Head west a bit after entering Oasus and talk to the guy in the gray cloak to get the Power Leg. Now you can jump extra high.
B. Desert, Tara, and Forest
After getting the Power Leg, walk east again to backtrack through the Desert and Tara. Keep going right to enter the Forest.
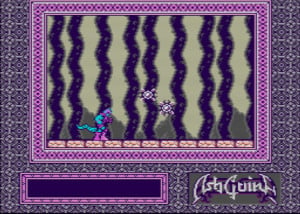
The forest is home to more spinning blade enemies, but it should be easy to jump over them with the Power Leg. Talk to the first soldier you see to learn that the Lightning is the most important of the holy weapons. Continue to the right to fight what is presumably one of Banutracus’s men. He swings a tonfa, so do not get too close. Take him down with the Sword or just jump over him. Continue east, fighting or jumping over more soldiers as you go, to reach the Marsh.
C. Marsh
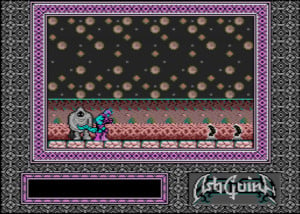
The cloaked fellow near the entrance to the Marsh says “Believe in your power. God will help you.” Walk east (once again, I recommend not using the Sword right now) and you will eventually see a giant mollusk of some sort. It seems to be immune to Ashguine’s weapons, so do not bother attacking it. Just wait a moment and the Protective Shell will fly in from the west. It looks a bit like a horseshoe crab. Let it touch Ashguine and he will automatically equip it.
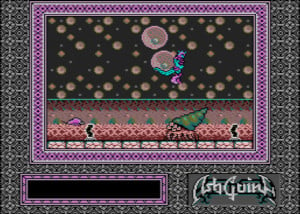
The Shell grants Ashguine another 500 Defense.
Note: You need the Control Sphere to get the Shell.
8. Walkthrough Part 5: Lightning
This next section is rather long. Your goal is to talk to an important NPC and get the most powerful weapon: The Lightning.
A. Marsh (Continued)
If you have been following this guide, you should still be at the Marsh after getting the Shell. The mollusk will back away from Ashguine when he has the Shell, so just walk east and leap over the swarming monsters. Jump over the mollusk if it decides to change directions.
Warning: Sometimes the mollusks are aggressive and spit fireballs at Ashguine, so be careful when traveling through this area.
B. Desert and Area
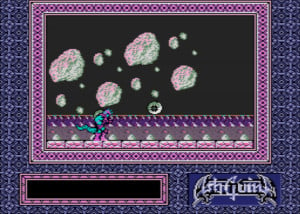
Eventually you will reach another Desert. Just jump over the enemies here. Talk to the guy standing a bit east of the entrance to learn that “Storyteller of nearby area knows something about Lightning.” which is a hint that we are getting close to the ultimate weapon. There is not much else to see here, so keep moving right.
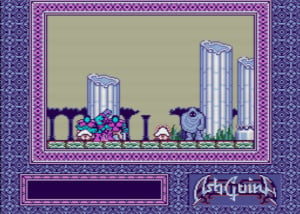
The next place is very creatively named “Area”. The soldiers here will ask “Are you a Gooligan?” and plead for mercy. Leave the mushroom creatures alone for now, because you may want to farm them for Life points later.
The monk near the center of the town says “After father was killed, you could only get a lost battle.” Be ready to fight another tonfa soldier when you see the monk. Continue east, destroying any tonfa soldiers you see and talk to the next monk who says: “To go beyond Glia, you have to request. But it may be just a legend. Go on.”
Yet another monk can be found far to the right. He says “You can’t do anything unless you are strong.” Take a few more steps to the right and you will enter Ring.
C. Ring
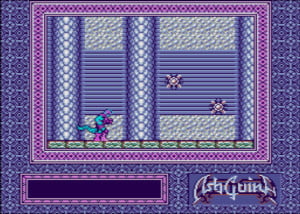
Look out for spinning blades and walk east. You will see a large reptile that spits some kind of orb at Ashguine not far into Ring. The Sword cannot harm it, so leap over it and try to get away as fast as possible. You will see a second one near the end of this area, use the same strategy and try not to get hit, because these creatures reduce Ashguine’s Power by 2 points.
Jump directly upwards when you get to the end of the Ring to enter Glia.
D. Glia
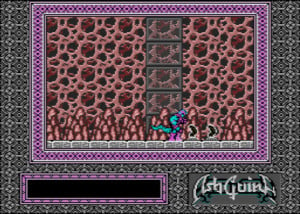
Go east and you will meet a monk who says “Hard to leave Glia.” If you did not get up to 2000 Exp earlier, I highly recommend doing so now, because you need it for the Lightning and the monks up ahead are guarded by some really nasty monsters.
Go east once you are ready and you will soon encounter a new enemy: A slow moving monster with blade arms. Leap over these things and keep going. Another monk will give you a message “There is something to see in the parent’s hometown.” Continue walking to the right as usual.
E. Glia Underground
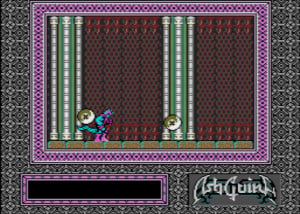
You will meet more of the bouncing ball creatures here. It is safe to use the Sword as much as you like at this point, so feel free to blast all of the monsters in this area. A monk near the beginning will ask if you met your parents. A second monk to the right of him says “Thunder can be controlled by lightning.” Continue east.
Ratmen will appear when you reach a soldier. Take them down with the sword or hop over them if you like. Another monk who says “A kind of moss with a strange power turns light into energy. It’s the food of the gods.” waits for you far to the right.
F. Marsh (East of Glia)
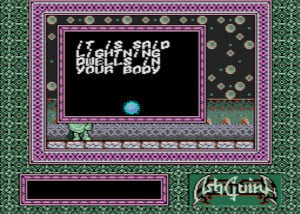
Talk to the creature at the entrance to this place. He will give you the Lightning, stating “Lightning dwells in your body.” Ashguine can now shoot balls of lightning at his foes. This powerful weapon is infinite unlike the Sword.
Go east some more to begin your next quest. Leave the mushroom creatures alone unless you have around ~200 Life, because you can come back and build up a really high life pool before the final boss.
9. Walkthrough Part 6: The Final Battle
Now that Ashguine has the Lightning, he is ready to face the last boss, Banutracus. You will need to explore and talk to a few NPCs to unlock the way to Banutracus, so this last portion of the walkthrough is fairly lengthy.
A. Glia (East of Marsh)
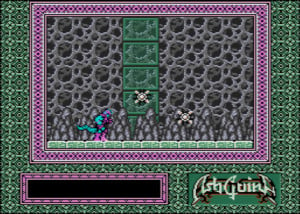
Just walk to the right as you have for most of the game. The enemies here should not pose a threat at this point. The first monk says “Descendants of scientists still transmit science.” good to know. Lizard men will start attacking from the east after the first monk, but they die in a hit from the Lightning.
The next monk says “Spirit!” Just keep going right.
B. Cathode
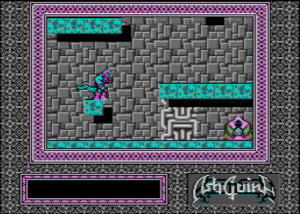
Talk to the monk on the right who will tell you “Go to Neosante. You can find something there.” then climb to the top of the tower. You will see a monk who will say “I am Rahiga.” when you speak to him. Be sure to talk to him, because he is an important event trigger. Jump to the platform on opposite side of the screen from Rahiga (slightly below him and on the far left) and exit to go to Area again.
C. Area
Ashguine will appear in Area under an archway next to a monk. Head west to another archway in Area with the monk who says “After father was killed you could only get a lost battle.” and press the Up Arrow while standing by the empty space right of the monk.
Ashguine’s mother will appear and say “In Mt. Cathode Rahiga will help you if he knows that you’re my son.” this requires the Eye of Light, which you should already have.
D. Backtracking for Life Points (Optional)
While you are near Tara, you may want to get another Herb and get your Life up to ~200. You can also start slaying all of the mushroom creatures in Tara, which can net you about 230 Life. Going to Area and the Desert near Glia to hunt mushrooms is also a good idea. I was was able to raise my LP to about 330 this way. Plus all of these places are on the way to your ultimate destination.
E. Glia and Cathode (Revisited)
Ashguine will have to make a long journey back to Glia and Cathode after talking to his mother.
From Area, head east through Ring. Beware the giant lizard-things, they are immune to the Lightning. Jump up at the end of Ring to enter Glia as you did before.
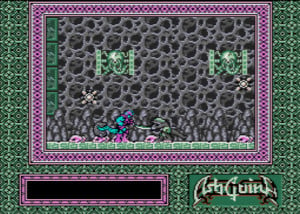
Next, you will have to pass through Glia, Glia Underground, and the Marsh to get to the eastern most part of Glia. Stand just under the object as shown in the image below and press the Up Arrow to meet with Ashguine’s father who says “My son Ryle I give you my courage if you have mother’s love you’re invincible” in a small cutscene of sorts.
Head east again to return to Cathode. Climb back up and talk to Rahiga again. He says “Let’s help Nesha’s son go forward.” Walk to the right of Rahiga to enter Neosante, which is “Satel” in Django’s translation.
F. Neosante (Satel)
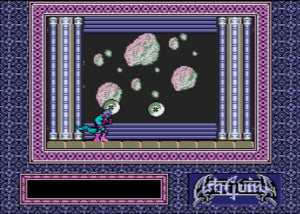
Walk right, destroying monsters as you go. A monk will tell you that you can only return with the aid of your parents. Continue east to enter the next area.
G. False Temple, Replica, and Colosseum
Do not worry, this is not the start of the game even though it looks just like the Temple. Slay the mushrooms here to stock up on more Life. Another monk will tell you “Nothing goes back, no one return from Neosante.”
Exit via the right hand side of the screen to enter Replica. Walk east and jump over the big lizard. You can jump onto the upper floor when you see it to talk to the monk on the platform who says “You must be the legendary Ashguine wearing this holy armor.” but you will have to walk back to the lower level to actually leave the area. A pair of big lizards block your way on the lower level and you will just have to walk through them to get to the Colosseum.
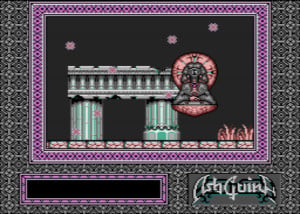
Once in the Collosseum, you will have to fight Banutracus.
Banutracus will rain fireballs on Ashguine when you approach it. Ignore the fire and focus on attacking. You must jump as high as you can, then quickly attack to hit the boss’s eye, which is its weak spot. About 5-8 hits should end the battle. Congratulations! You beat AshGuine!
Scroll down to read Django’s translation of the brief ending if you wish.
**Spoiler**
“Ryle you became the holy warrior Ashguine now restore peace to Nepenthus we will watch over you.”
**Spoiler**
There are a few things I could not figure out in AshGuine despite testing the game quite a bit. A general lack of information made it very difficult to write this guide, because the game tends to be very vague when it comes to where it wants players to go and what they need to progress. Here are the mysteries I was unable to answer.
A. What Do Power, Exp, and Defense do?
Ashguine has RPG-like stats which can be viewed using the F1 Key along with his inventory. Power and Exp are both prerequisites for getting items like the Power Leg and Lightning, but Defense seems to do nothing. On the same token, it is very possible that Power increases damage, because I was able to beat the last boss in 5 hits while the only other guide in existence states it takes 8 hits to beat the final boss. It is also possible that Defense reduces damage and I simply did not test it thoroughly enough. That said, some or all of the stats could be bugged and I have no idea what the developers actual intentions were. Feel free to contact me if you figure out what these stats do.
B. What does the “Somehow you are full of hope.” message mean?
Sometimes you will see the “Somehow you are full of hope.” message pop up in the little dialogue box in the lower left. This happens when fighting monsters. I am not sure to what it refers. At first I thought the message was tied to hitting requirements for items, but I received it several times when all of my stats were well above the basic requirements for all of the items. It may simply be flavor text or a bug, but it could also refer to something else.
C. What’s up with Mesonte?
If you press the Up Arrow while standing to the right of the first monk in Path near the beginning of the game, you will be warped to a place called Mesonte or Mezonte depending on how it was translated. It leads to the Desert from what I can tell and is connected to several other areas similar to it. It’s an out of the way spot that player may not necessarily discover and I wonder if it serves a purpose aside from being a place to grind stats and explore.
D. Can Ashguine kill the big lizards?
There are large lizard-like creatures with eyestalks who spit fireballs at Ashguine in Ring and Nesoante. None of the weapons seem to work on them, but it may be possible to slay them with high enough Power or perhaps an undiscovered item. There are also mollusk monsters in the Marsh where you get Shell that cannot be harmed, so I am curious about these monsters.
Here are the resources I used to write this walkthrough.
Original Japanese walkthrough:
http://psyzans.com/Testsite/Ashguine1/Ashguine_01.html
Ash far as I know, this is the only other guide for AshGuine in existence. It is fully in Japanese and I had to use a machine translator to read it. If anyone knows of a way to contact the creator, please let him or her know I figured out what the Herb does and that I appreciate their efforts greatly. It would not have been possible for me to write this guide without their hints.
Django’s English Patch of AshGuine Story 1:
https://download.file-hunter.com/Games/MSX2/ROM
You can download Django’s translated version of AshGuine: Densetsu no Seisenshi from the site linked above. Django also had a site, but it has been down for some time.
Thank you for using this walkthrough of AshGuine: Densetsu no Seisenshi for the MSX2!
RetroMaggedon.com ©2026